The OwlThief - A Golden Owl with Glowing Orange Eyes (Joul Thief circuit in THT version)

€9.99*

Available, delivery time: 1-3 days

Product number: blink234042
Product information "The OwlThief - A Golden Owl with Glowing Orange Eyes (Joul Thief circuit in THT version)"
The gold-black owl with bright orange eyes is a simple soldering kit with the right WOW effect!
A self-wound coil on the back ensures with a few other components that even dead batteries still give the last and two orange LEDs in the eyes of the owl to light up. The circuit is based on the so called Joul-Thief circuit and therefore our owl is named OwlThief.

The eyes of the owl and also the circuit board is a real eye-catcher. The gold plated front is not pierced at any point by a hole for the THT components. The outline of the owl and its wings and feathers are perfectly printed. Instead, the components are soldered onto the back. What is special about the Paltine is that both THT and SMD components work. This is the THT version with the slightly larger and easier to solder THT components. Of course everything is perfectly described in our instructions!

Attention: The batteries are really used to the absolute minimum. Please do not use rechargeable batteries! These will be destroyed.

The battery is inserted into a battery holder at the bottom of the board. This makes the owl stand on its own and watch over you with its Orange LED eyes. A beautiful board perfect for the desk or nightstand. A quick touch to its head and the switch will light it up.


What exactly does a joule thief do?

The name Joule thief is a pun on jewel thief and is meant to illustrate that the circuit squeezes ("steals") the last bit of electrical energy out of a battery that is already useless for other purposes, with the term joule standing for the name of the unit of energy.
The circuit was published in 1999 by Z. Kaparknik published. The circuit was so simple and so elegant that it hit like a bomb. Since then it has been used in many variations in various kits.
The circuit works in such a way that the low voltage still available in the battery is converted to a higher voltage. The self-wound coil on the OwlThief stores the necessary energy periodically magnetically. This energy is used to then induce the higher voltage and the LEDs light up. This happens so often that it looks to your eye as if the LED is permanently lit. We also added a special Z-diode and a capacitor to ensure that the LEDs do not break.


The owl in the media

Our JoulThief owl even made it into the media! The IT news website heise-online reported about our owl:: Kreatives Platinendesign: Mach's ein bisschen hübscher!


Target group

The electronics kit for soldering is designed for beginners. Adults and children alike can have fun with the owl soldering kit, although you should of course not let children solder alone. We wanted to create a little focus on resources with this kit and how much energy is still in many an empty battery. Relatively large components are used, making it easy to learn how to solder. There are 9 components to solder on. This can be done in a reasonable amount of time even by absolute beginners. We also want the kit not to disappear in the drawer after finished soldering and initial playing. That's why we chose an owl soldering kit, which looks really great as a work of art in your own room. Due to the clever arrangement of the battery, the board stands upright by itself. It's best to order a kit or two at the same time, because the owl makes a perfect gift for friends, family, and siblings. Who does not want to have his own light owl? :)

The components in the OwlThief soldering kit

In our kits are always all the components you need for soldering. Unfortunately we can't send the batteries with the kit. We have installed a AA or Mignon battery holder, these are the most common batteries in the household and there should be enough "empty" batteries. The soldering kit includes


The circuit board

The circuit board is the heart of the owl. It forms the outline and the space to solder on all the components. The board is made of fiberglass material which is coated with a gold alloy. On top of that comes a black lacquer layer. Some parts of the board are slightly transparent. This creates the great effects in the eyes of the owl. You will also find two areas on the board: THT and SMD. Only one area has to be soldered on each. Because of the two areas you have the choice if you use SMD or THT parts. To make soldering a little bit easier, we send you THT parts.

The coil

On this solderboard the coil is really the heart. A ferrite core and two about 30cm long wires are wound as described in the instructions and this results in a coil that is exactly suitable for this circuit. At the end the coil has to be soldered to the board with four solder pads. Do not be afraid of this step. We have described everything with high resolution pictures and in the text in the instructions.

Some "chicken" or "owl" food

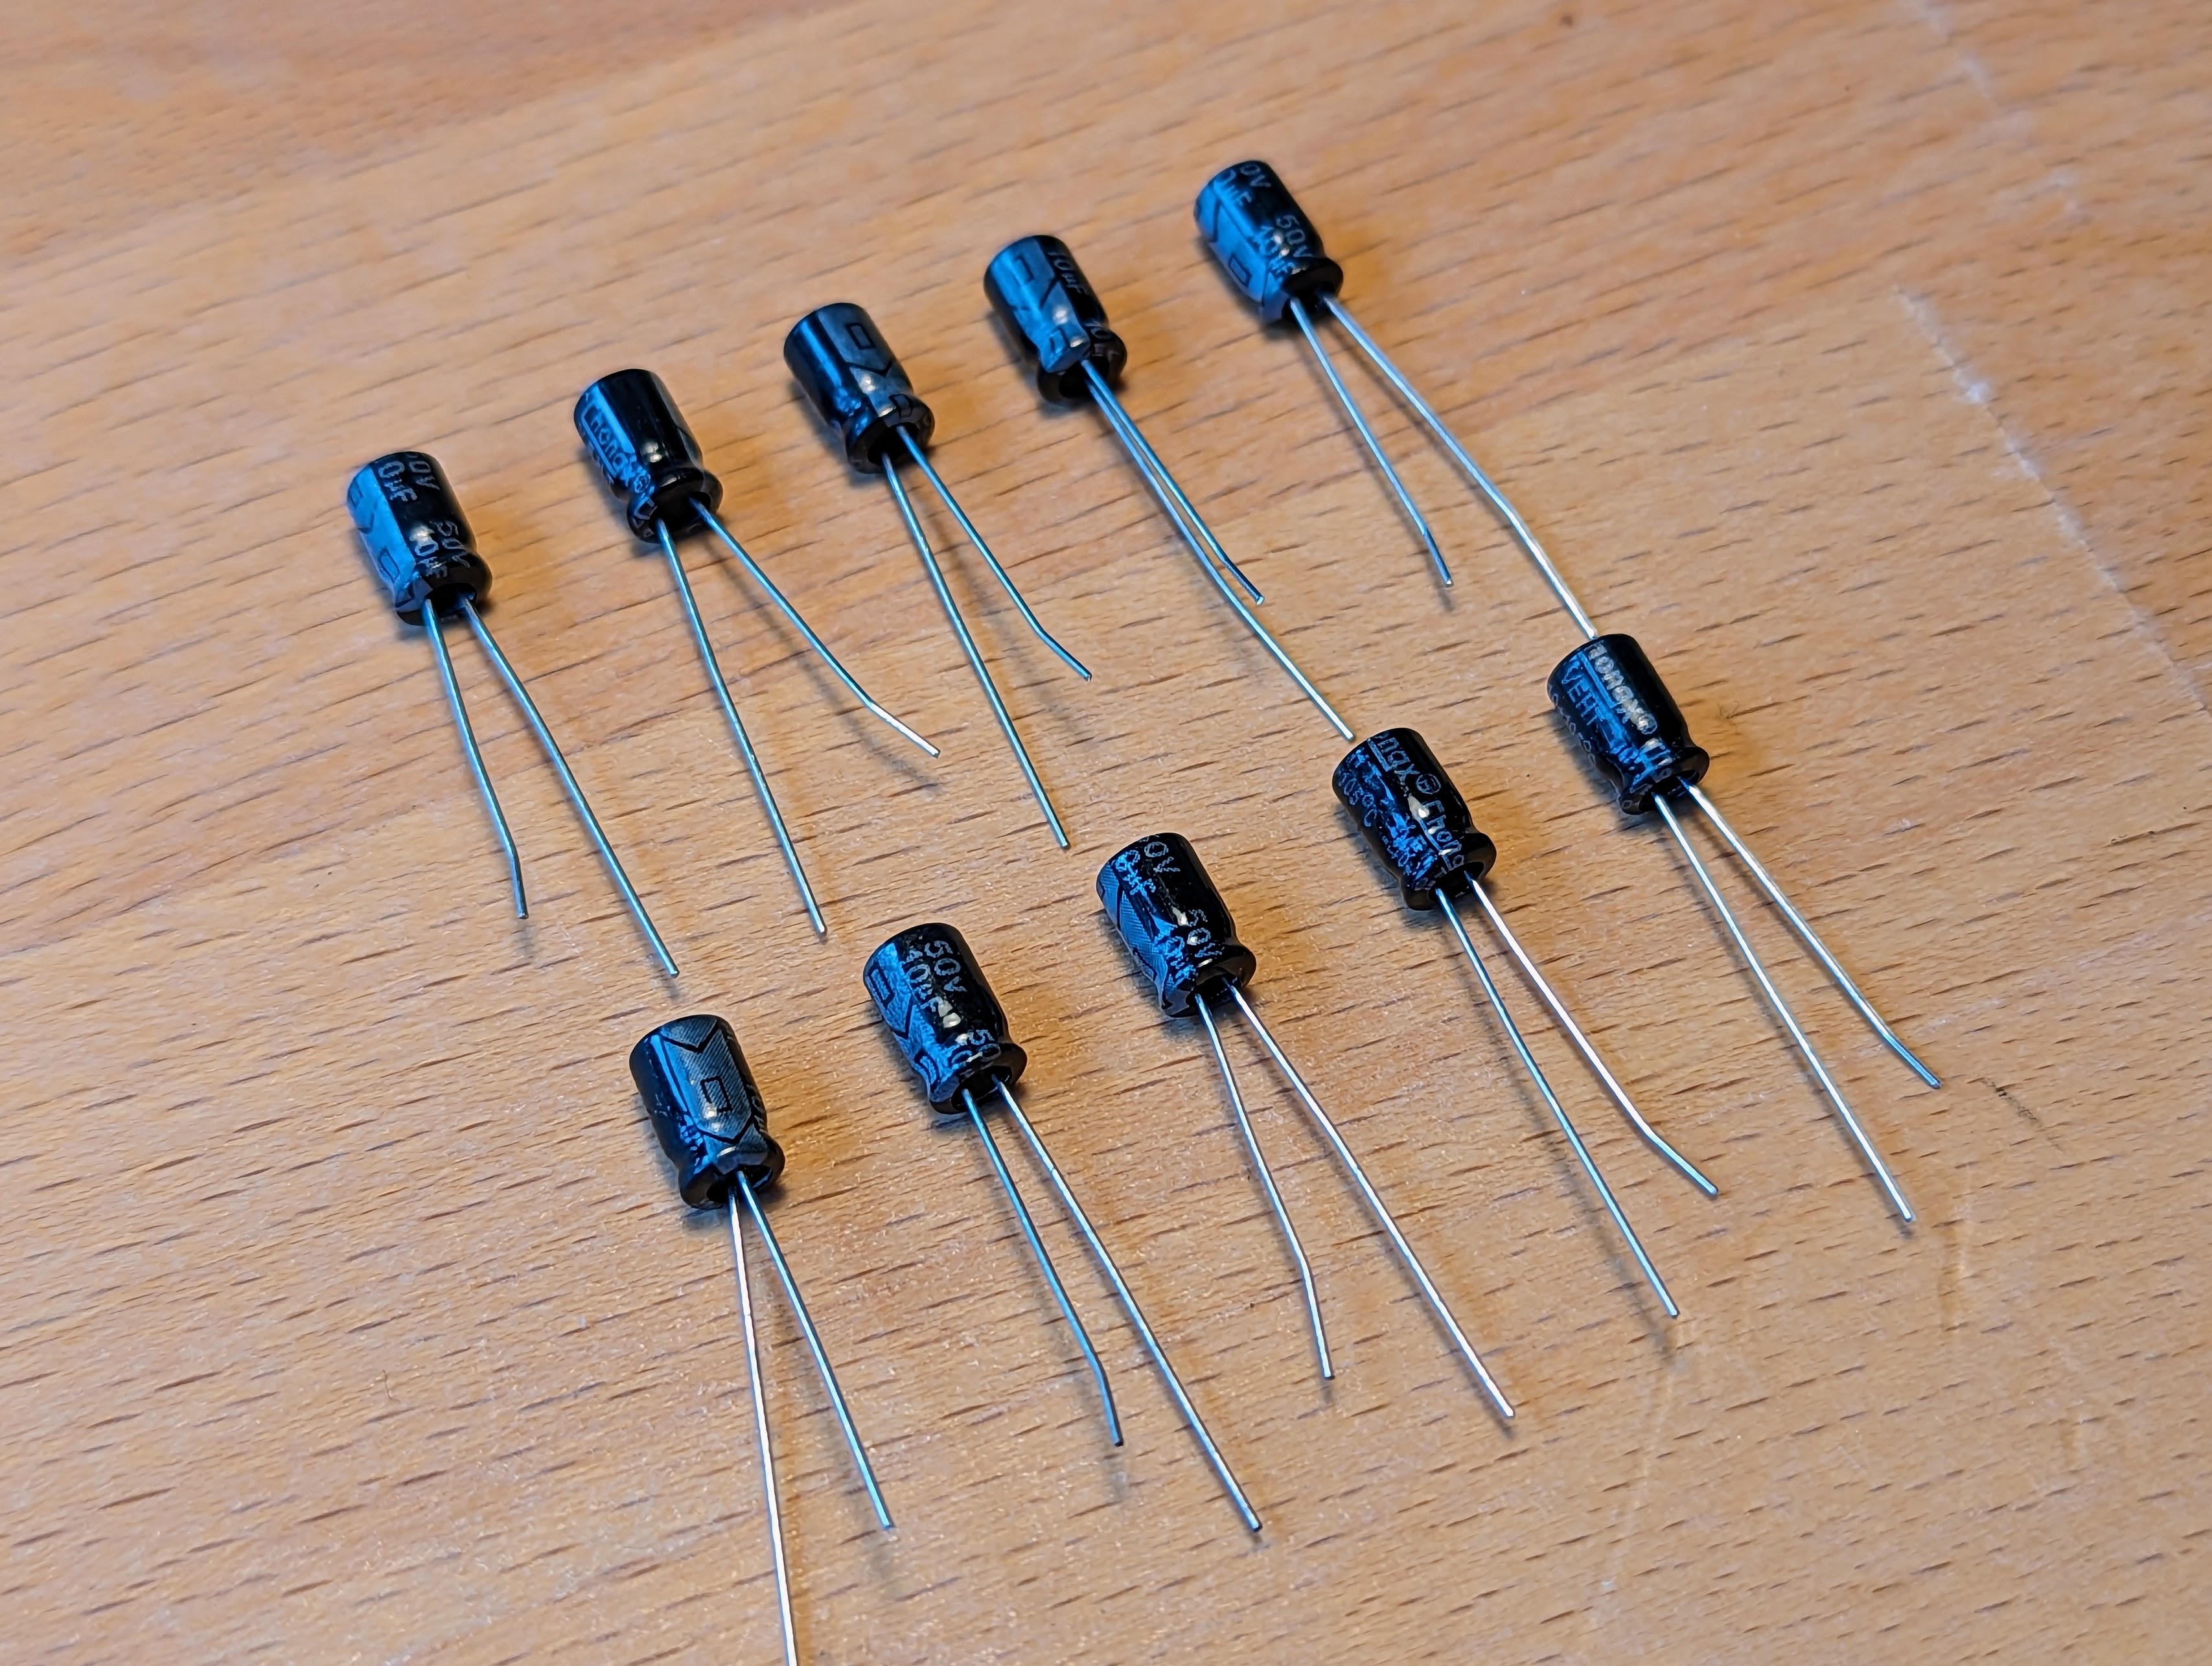
This time we won't send you any chicken food. Chicken food jokingly refers to all the smaller components. In this kit we have a resistor, a capacitor, a Z-diode and a BC547 transistor. If you want to know more about the components, you can read a bit on Wikipedia. We have linked you to the respective Wikipedia entry. If you have further questions, don't hesitate to send us an email. We are happy to help!

Orange LEDs

Two orange LEDs on the back provide the magic eyes of the owl. The circuit sucks the last energy from the batteries and pushes the electrons towards the LEDs. Through the slightly transparent circuit board, the LEDs shine through to the front and make the owl's eyes glow.

The AA battery holder

The battery holder for AA or Mignon batteries is included in the kit and is placed on the bottom edge of the board so that the center of gravity is at the feet of the owl. This way the owl stands on its own and does not need an extra stand or to lean against. By the way, there are also adapters from AAA or micro batteries to the battery holder used here.

A switch

Of course, there is also a switch included! The switch is easy to use and therefore ideal for children (and adult hands). The switch locks in place and stays in the position (on or off) you want the switch to be in. A great noticeable "click" provides tactile and audible comfort.

Required tools

How the minimal soldering workstation looks like we describe you here: Der Lötarbeitsplatz
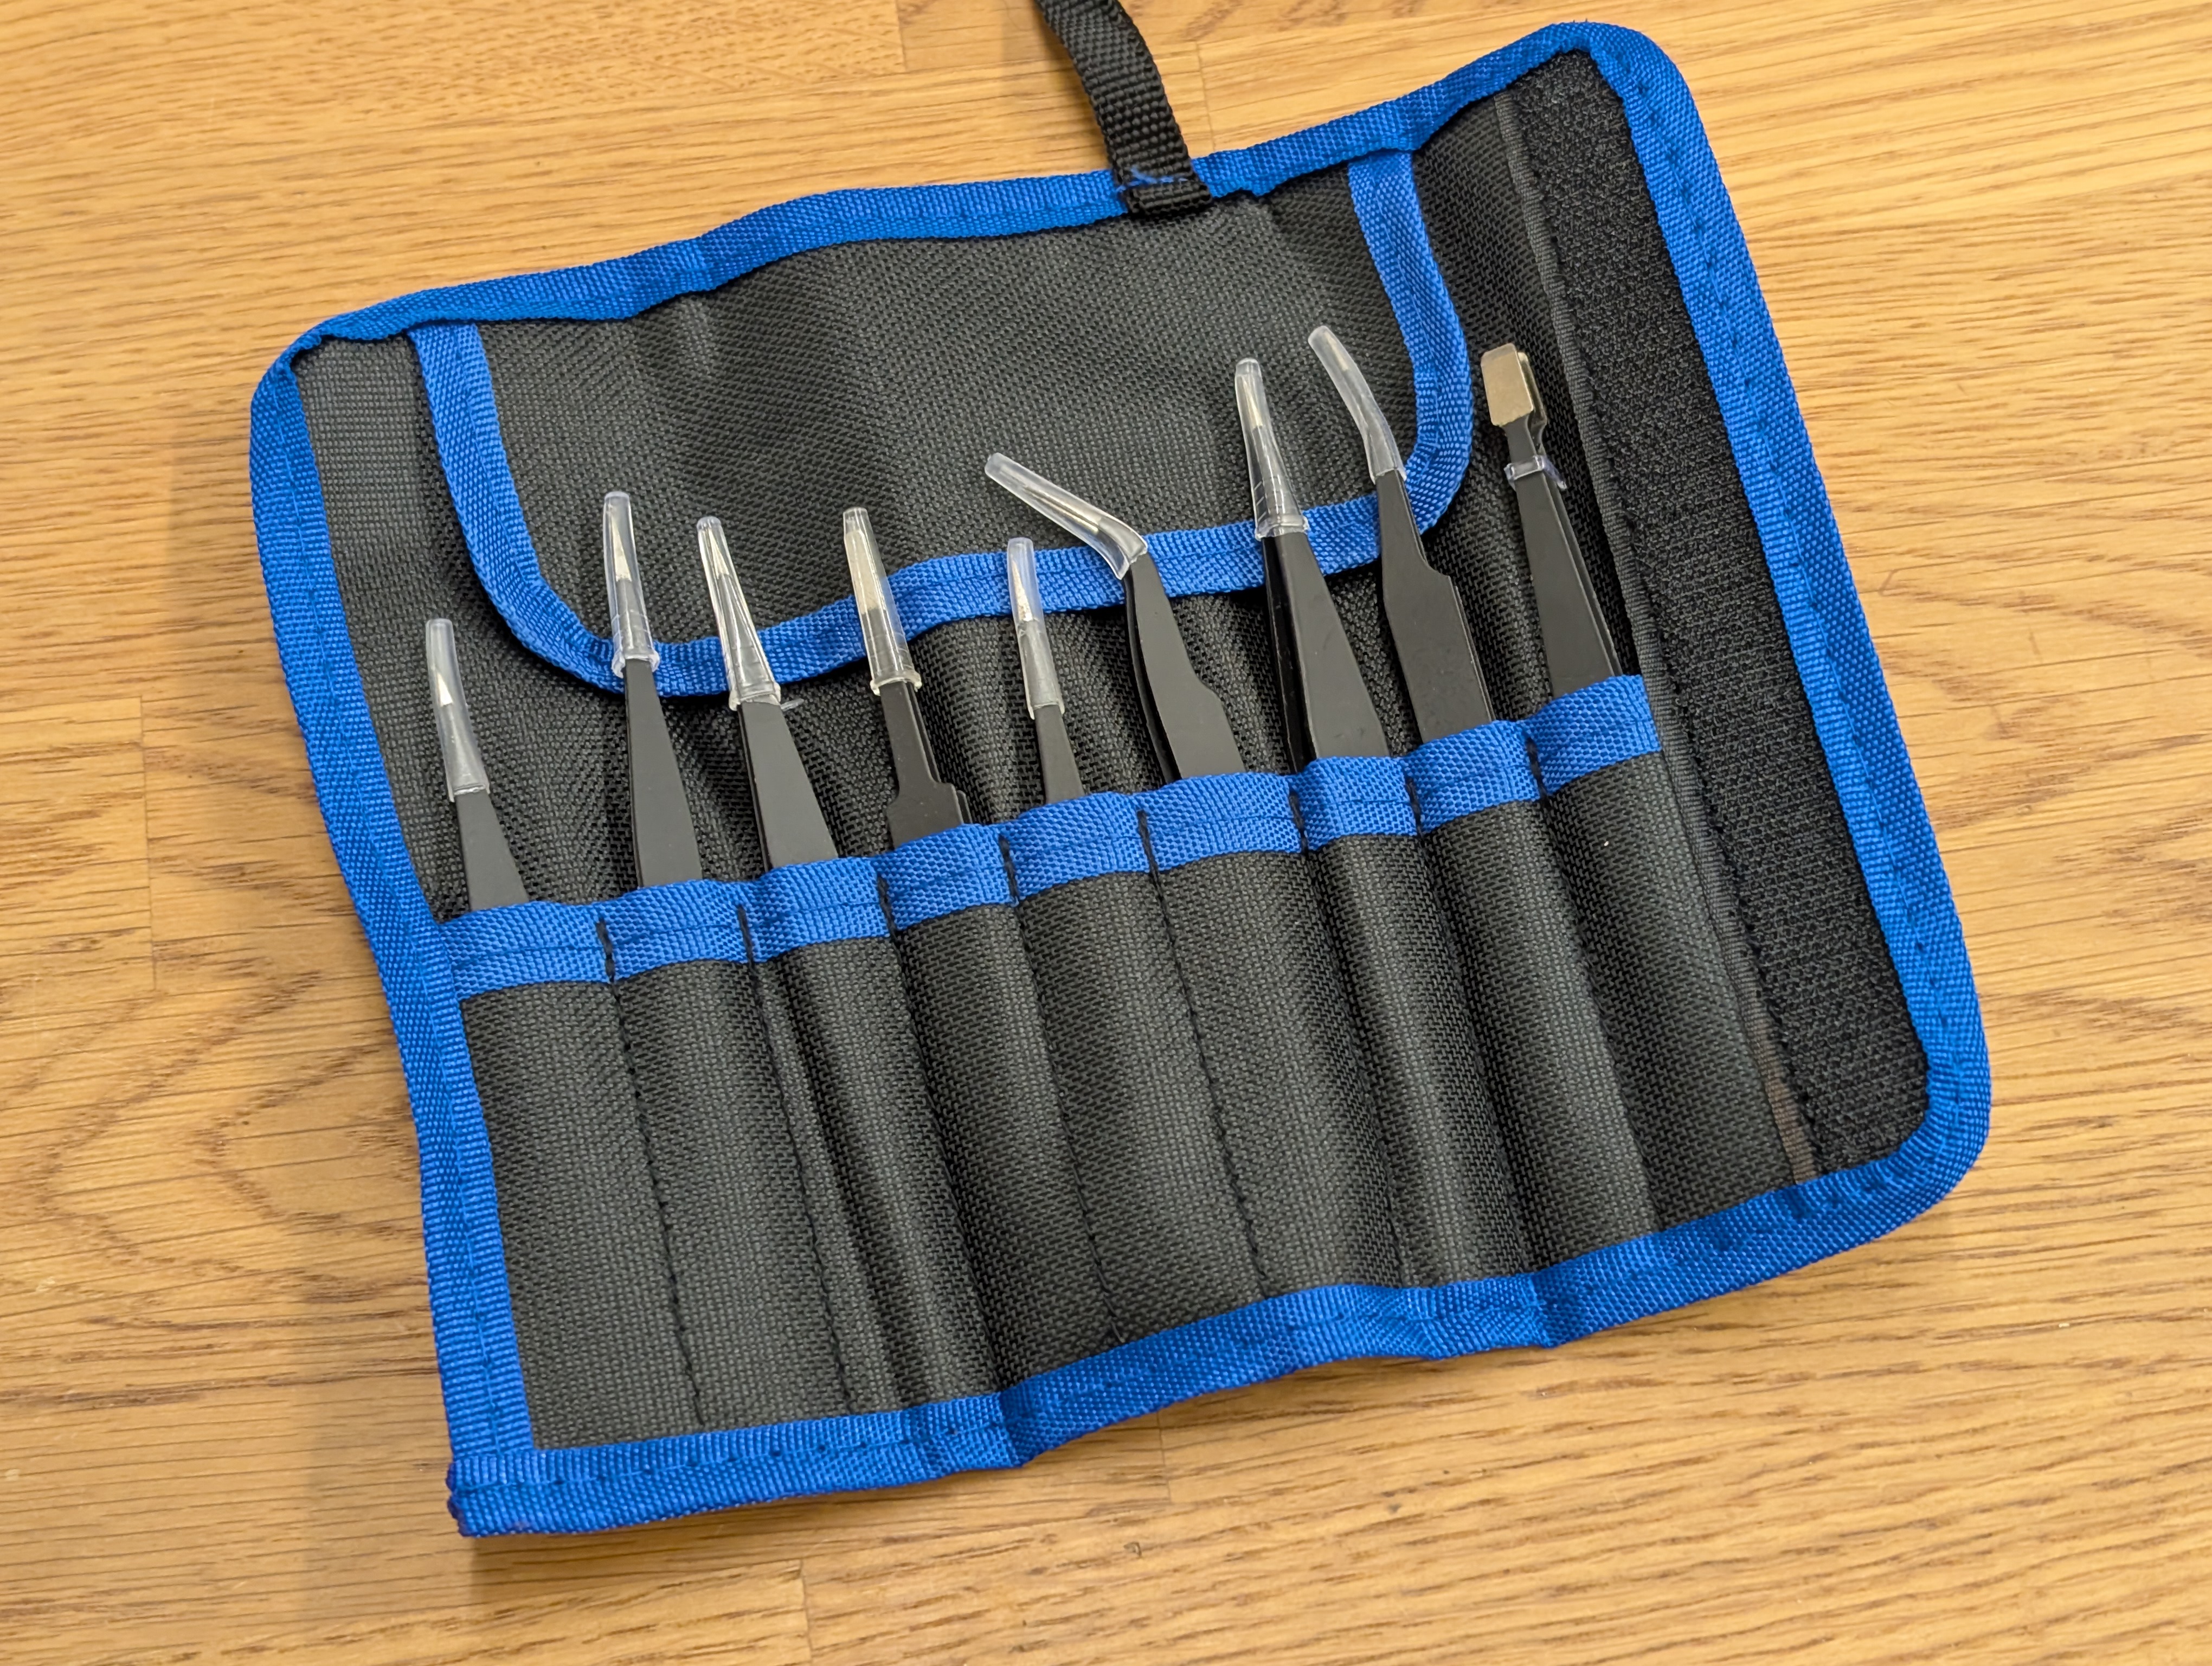
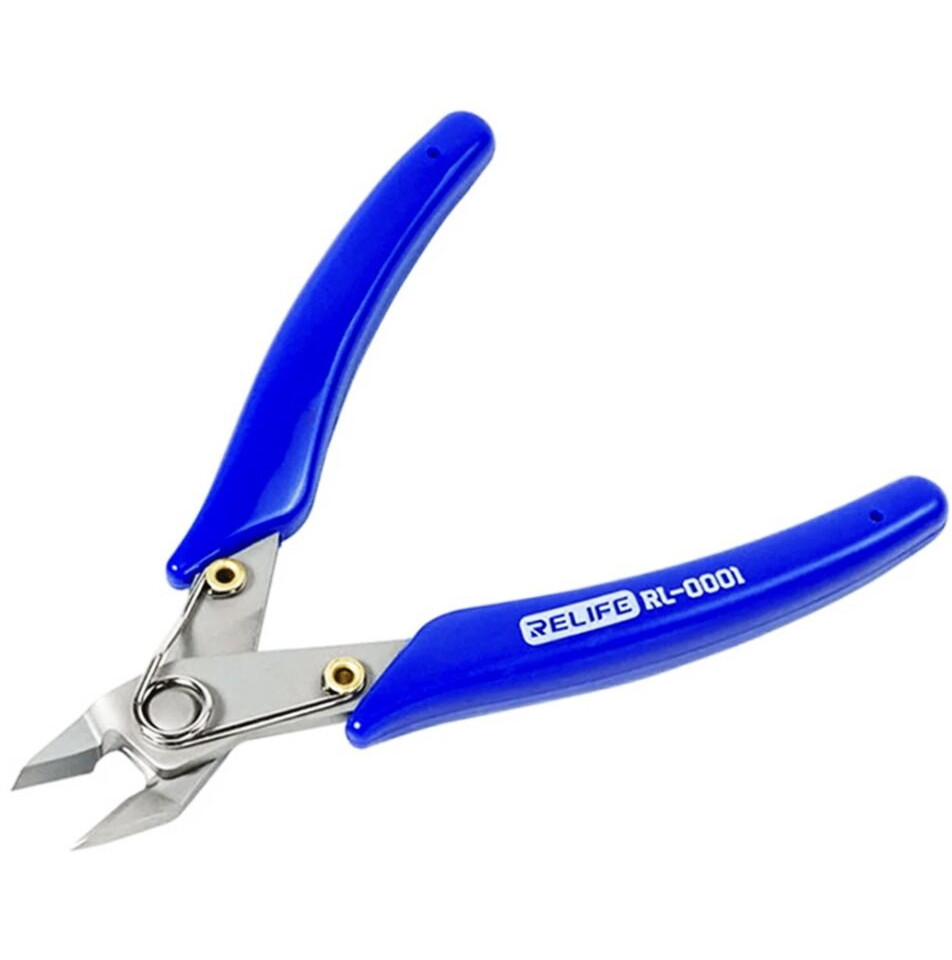
In addition, a pair of tweezers is especially helpful for this kit :)
 

Instructions and help

To make it easy for you to solder the kit, we have built a detailed instruction with many pictures and single steps for each of our kits. There you will be guided step by step through the assembly and there are many tips and tricks on how to solder correctly. For most of our soldering kits there are also interactive circuits with names of the components and the traces. All instructions are available in German and English.

For environmental reasons we do not print our instructions. In fact, it is better to view them on screen, as you can then zoom into the high-resolution photos to see details. On each kit you will find a QR code or link to the instructions.

All instructions can be found as PDF at the following link: https://binary-kitchen.github.io/SolderingTutorial
Just click on "DE" or "EN" at the right kit and you can download a PDF.

Lovingly packed for you by hand

All soldering kits are lovingly packed for you by hand in Germany. Unfortunately it happens from time to time that a component is packed too much or too little. If something is too much: No problem! Keep the parts and use them for your creations! If something is missing: No problem! Just send us an email and we will send you the missing parts.


Show us your JoulThief owl

We at blinkyparts are super excited to know what happened to your owl soldering kit. Did you add a sticker to your owl? Did you do some creative soldering? Did you paint your kit? Share your photo with us at

  • Twitter/Mastodon: #SolderConnects
  • Instagram: #SolderConnectsoder or follow us at @blinkyparts_com

Help others with your feedback

Often it is hard to judge if the soldering kit is something for you. Help others by giving us a rating, feedback. How did it work? What equipment did you have? What did you like most about it? What makes your owl soldering kit special? Just leave a review here on the product page under "Reviews".
Build Time: 1-2 Hours
Difficulty: Easy
Manual and iteractive board: https://binary-kitchen.github.io/SolderingTutorial/
Needed batteries (not inclueded): Mignon bzw. AA Batterien
Target group: Children, Grownup, Nerd

3 of 3 reviews

5 out of 5 stars

100%

0%

0%

0%

0%


Leave a review!

Share your experiences with other customers.


6 February 2024 19:45

Ein besonderer Dieb

Nach dem Prinzip eines Joule Thief aufgebaute Platine in Form einer Eule. Sie kann bereits aufgebrauchte AA Batterien noch verwenden und verbraucht fast die gesamte Restenergie, daher der Name. Die Eule ist etwa 9 cm hoch und etwa 6cm breit. Die Eule wird übersandt in einer braunen Papiertasche. Aber jetzt aufgepasst. Bitte die Einzelteile entsprechend der Liste überprüfen. Es gibt da nämlich ein kleines braunes Teilchen, so groß wie eine Linse, mit zwei Füßchen, das sich evtl. so wie bei mir in einer braunen Papierfalte versteckt. Das Zusammenlöten macht echt Spass und gelang sehr gut, wenn man sich an die Anweisungen hält. Das vorgeschlagene Lötzinn funktioniert ganz gut. Beim Wickeln der Spule darf man das Markieren der beiden Drähte einer Seite nicht vergessen. Etwas verzwickt ist das Biegen der Füße der LED aber mit einer Spitzzange und etwas Ruhe gelang das sehr gut. Der im Shop gekaufte Lötkolben ist eine tolles Gerät und zu empfehlen, wenn man einen neuen sucht. Etwas hochpreisig, kann aber mit noch teureren Lötkolbenstationen locker mithalten. Und tata die Eule leuchtet. Guter Bausatz für Anfänger mit Lerneffekt.

21 December 2023 09:12

Und wieder was gelernt!

* Top: Alte Batterien werden einfach "zu Ende" benutzt. Ich habe es mit einer "leeren" Batterie ausprobiert - mega! * Anders als bei anderen Bausätzen wird hier ausschließlich auf Lötpads aufgelötet, kein THT. * Ich hatte vorher noch nie eine Spule gewickelt. Klasse! * Die Eule sieht super aus mit den glühenden Augen. * Tolle Anleitung - sehr verständlich.

17 May 2023 05:09

größer als erwartet

Die Eule ist beim Auspacken größer als erwartet. Die Positionierung der Bauteile geht fix, am längsten dauert das Wickeln der Spule. Mir gefällt der Ansatz gebrauchte Batterien hiermit komplett zu entladen, hier wäre es schön noch 1-2 andere Bausätze zur Auswahl zu haben.

Weitere Blinke-Bausätze

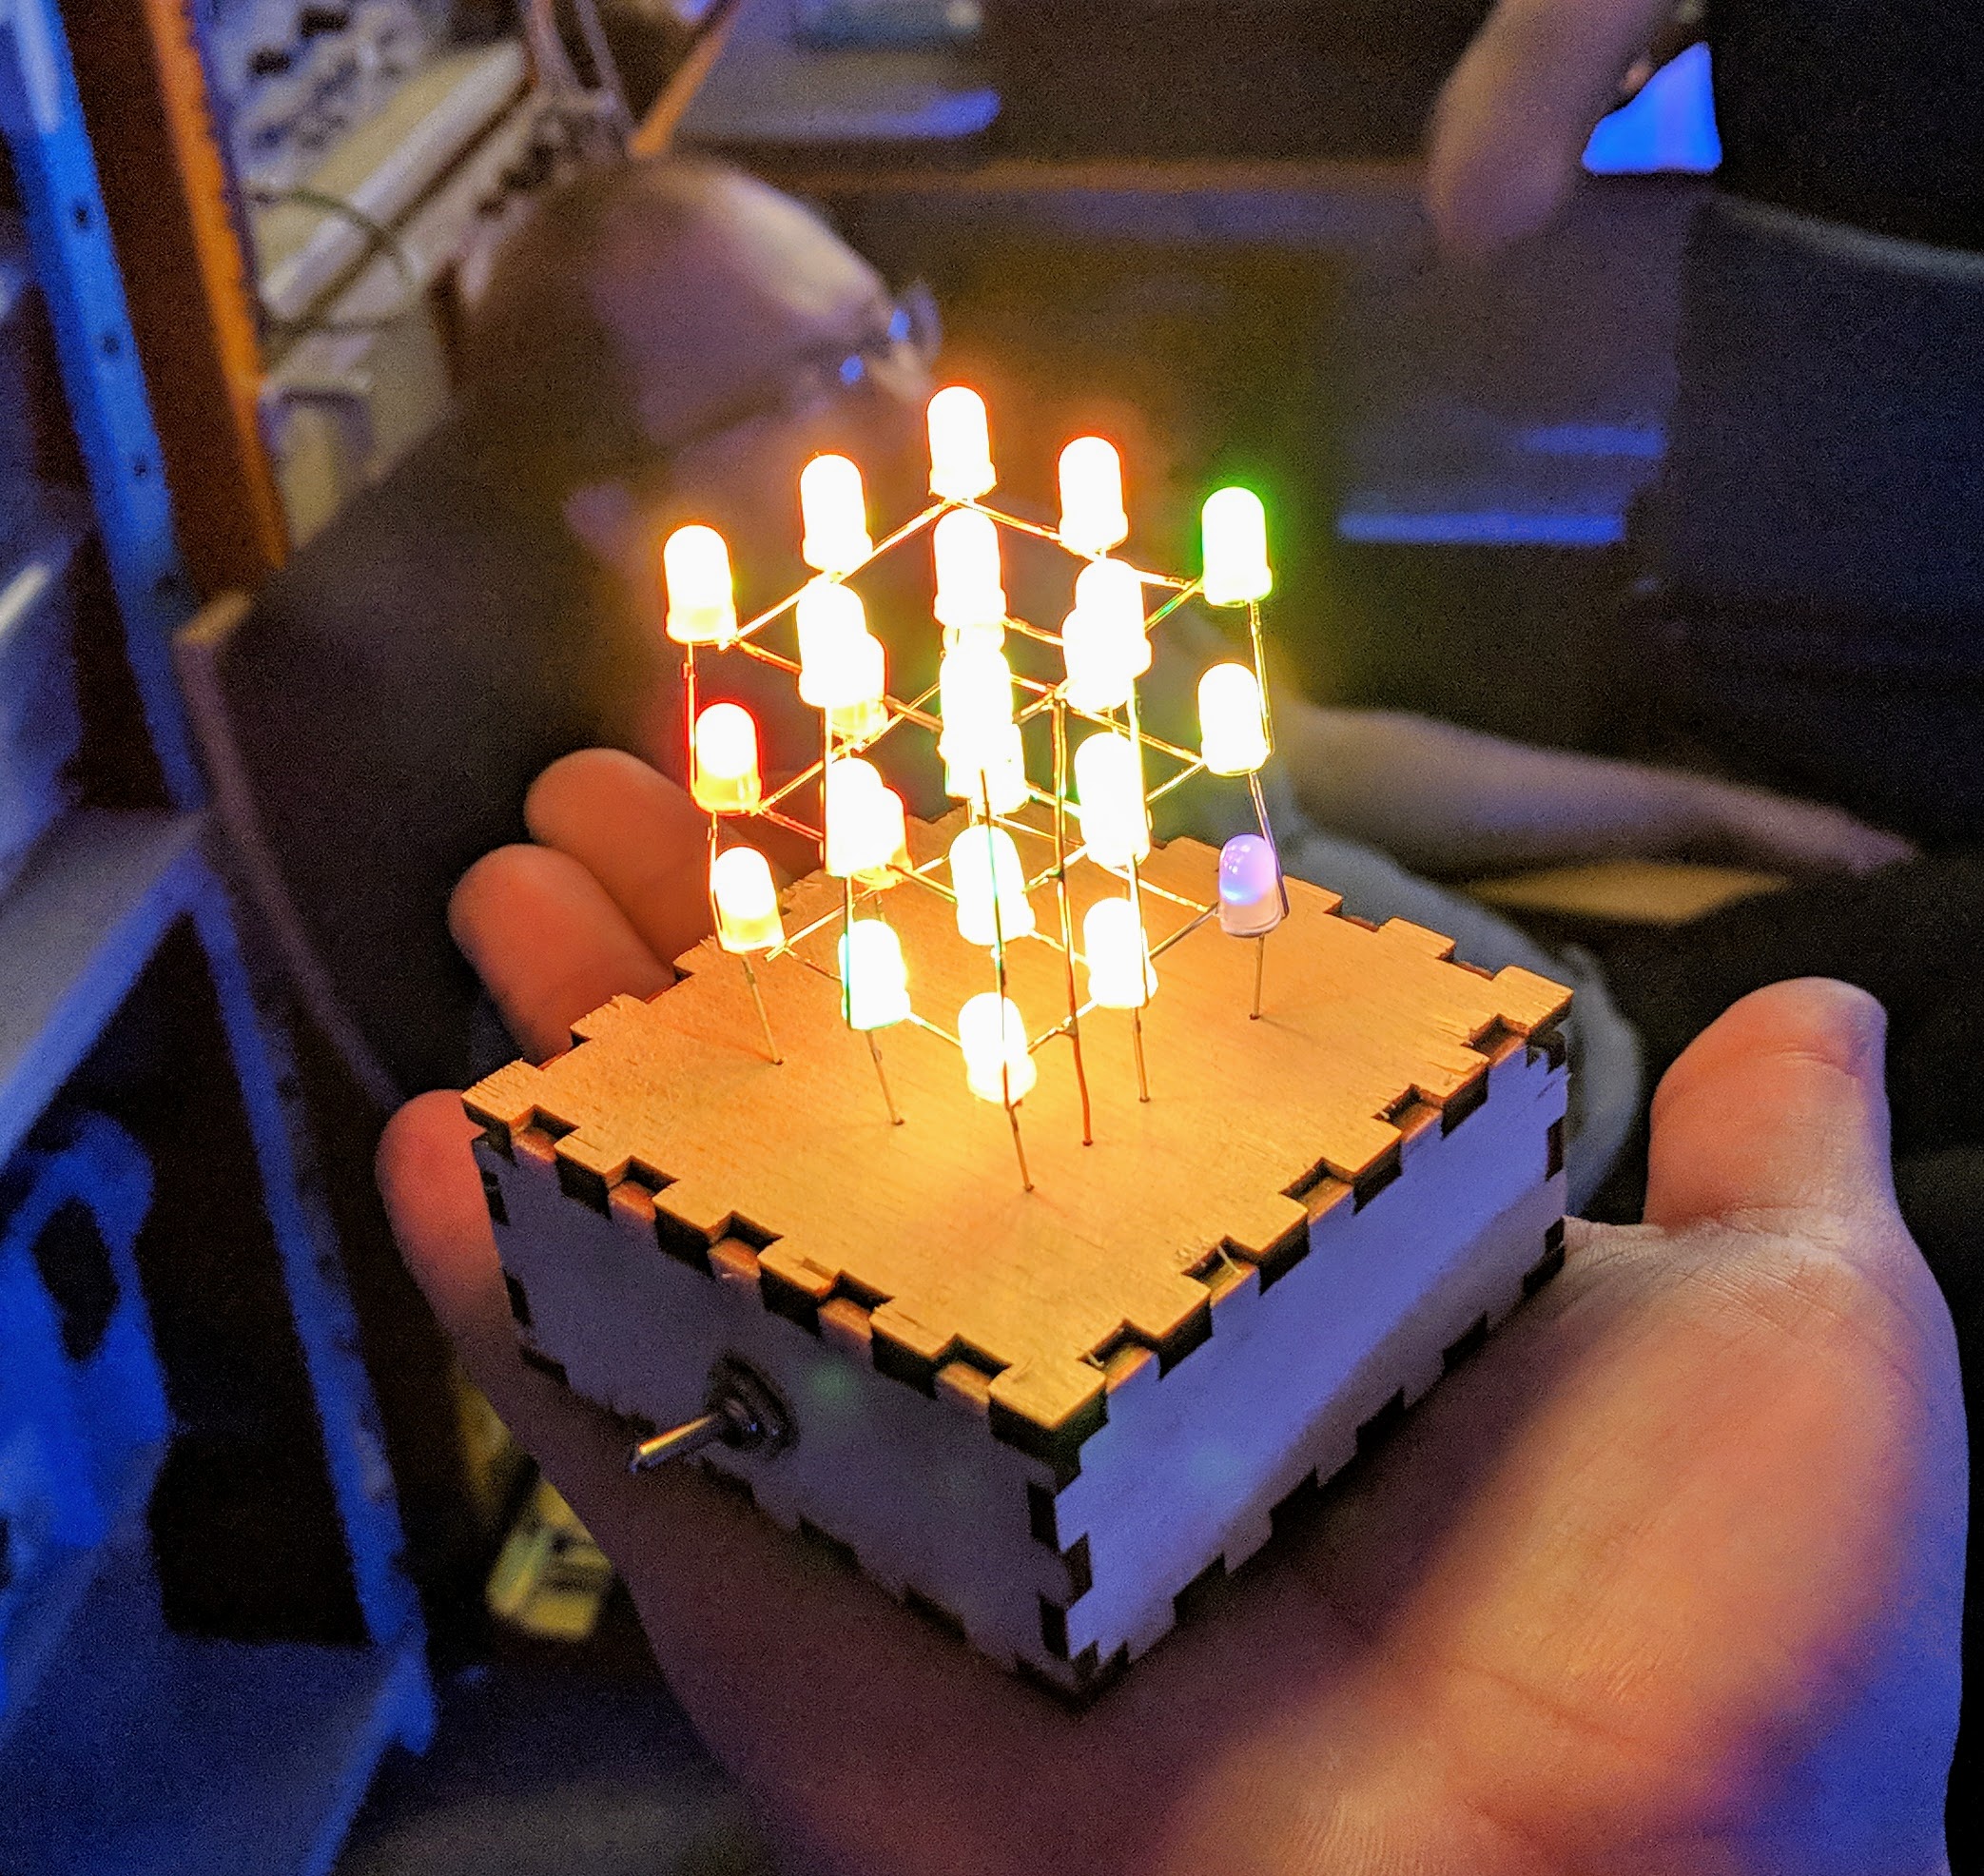
LED Cube - A colorful LED 3D cube with 27 colorful glowing LEDs
This kit consists of 27 LEDs a simple circuit and a nice wooden box to hide the battery. First you solder a simple LED 3D cube with 3x3x3 LEDs. The total of 27 LEDs shine in bright colors. The box with a power switch and a battery holder for AA looks very good on the desk.No programming knowledge is needed, just a little soldering skill. After that, the LEDs shine independently in all colors of the rainbow.

€11.49*
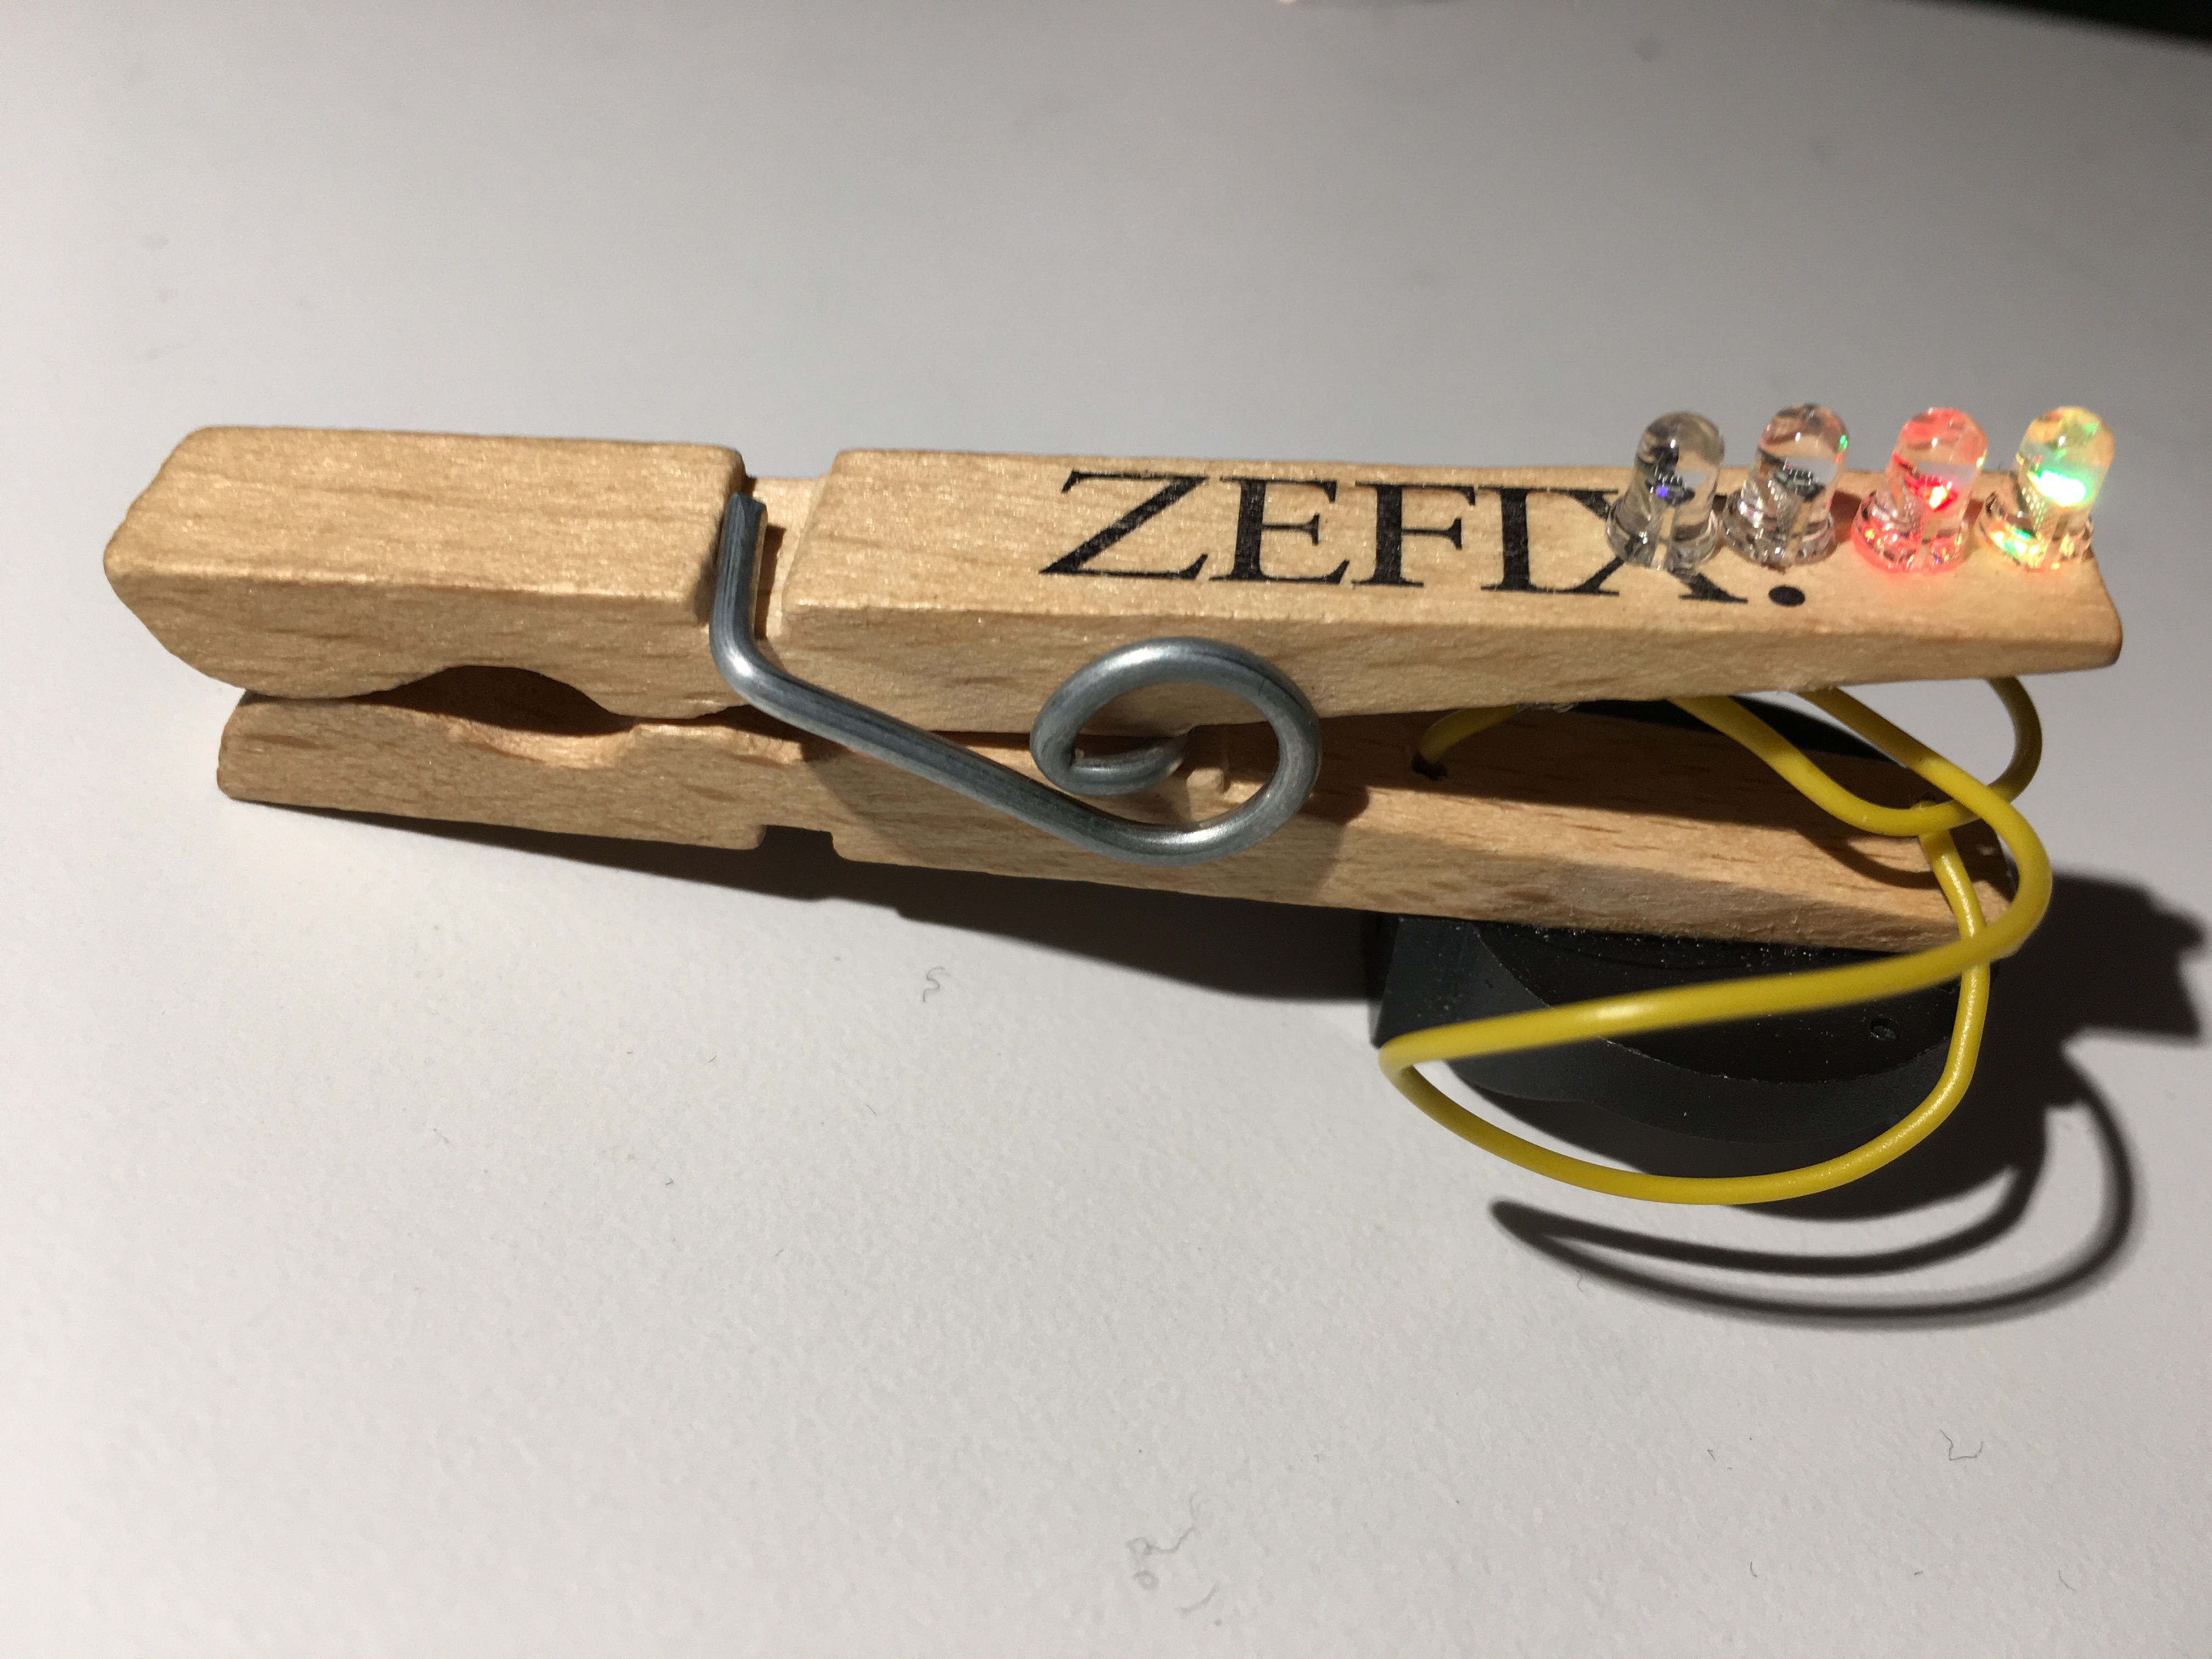
Nibble Peg - Very simple kit with 4 LEDs
A very simple soldering kit with four LEDs. The four LEDs are connected with a few wires to a battery holder. As soon as a battery is inserted, the LEDs light up in all colors of the rainbow. Thanks to the clothespin, you can easily attach the artwork afterwards. No big soldering skills are needed for this kit. It is really ideal even for children and teenagers.The name comes from the unit "Nibble". A nibble is a unit for four bits (half a byte).

€2.99*
Kitchenkopf with SMD - A medium hard kit with SMD to hang around your neck
The Kitchenhead kit is ideal for learning SMD soldering. The Kitchenkopf kit has 21 SMD LEDs on the board that light up in different animations and display the logo of the Hackspace Binary Kitchen e.V..The animation is made possible with a microcontroller, which is already pre-programmed with the kit.With this SMD kit, first steps with SMD soldering can be made. SMD components of the size 0805 are used. In the SMD world this is relatively large. Because of the size and the components used you will have longer fun with the kit and can thus learn new skills of SMD soldering.

€6.99*
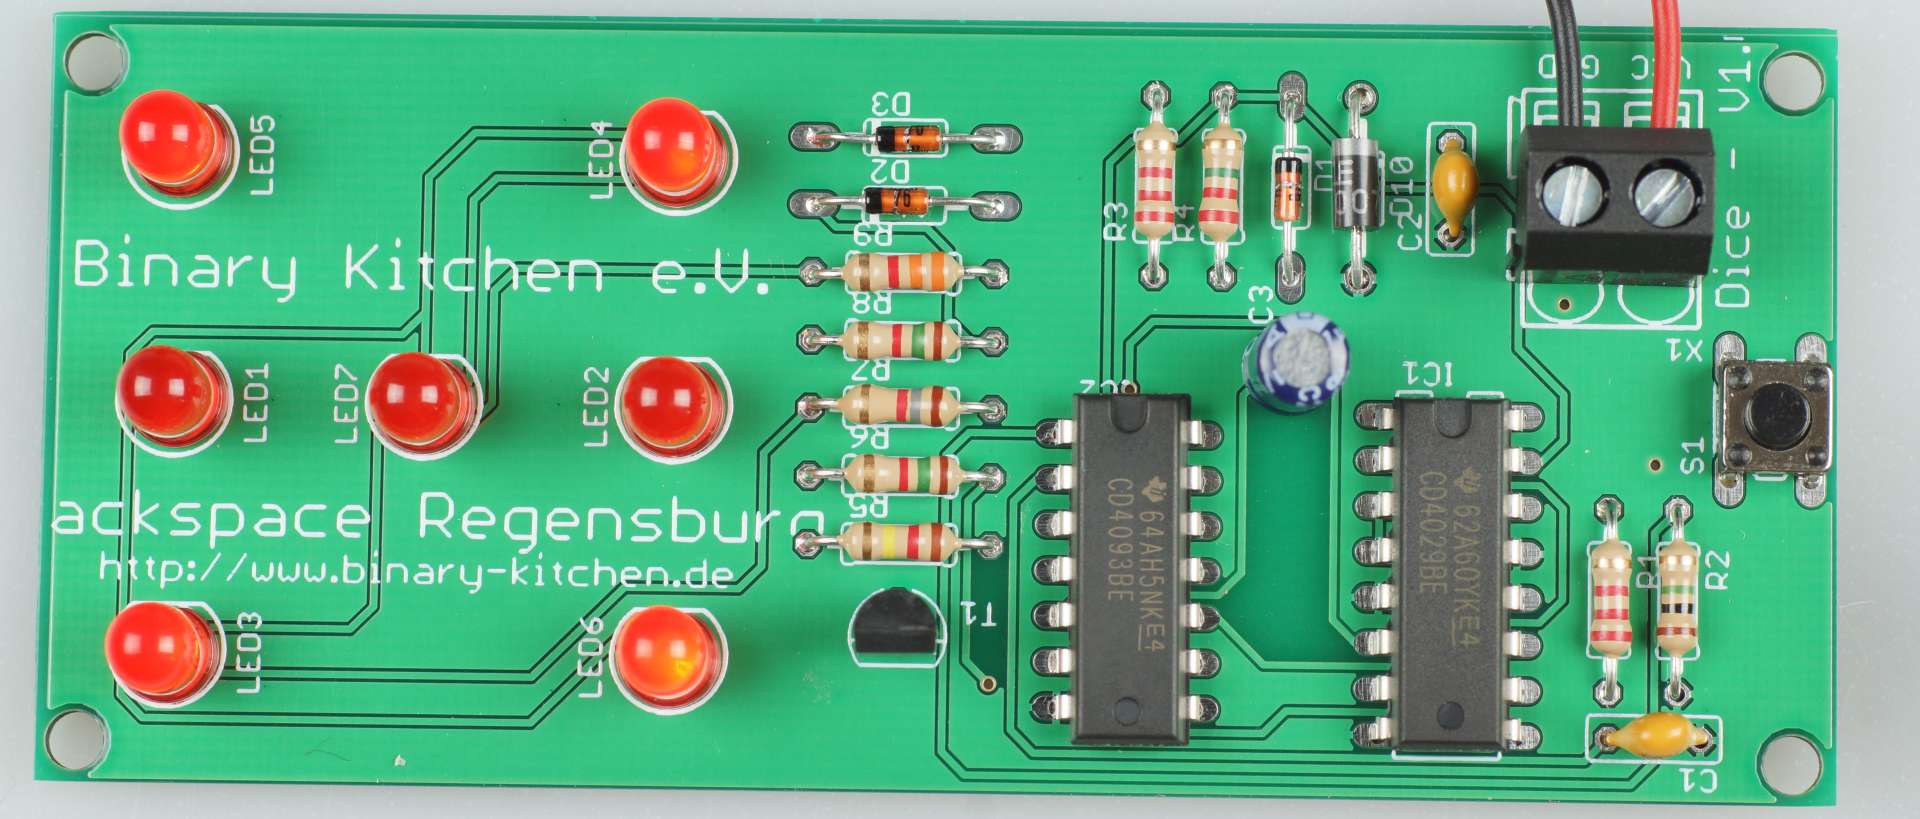
Dice with logic circuits - A medium dice kit ideal for beginners and experienced students
This kit is a simple dice to play with.The 7 LEDs a randomized number between 1 and 6 after pressing the button. The randomness is made possible by a great analog circuit.The kit is ideal for beginners and advanced players, because no programming is necessary and many different components must be installed. Through a more extensive kit, many soldering skills can be learned playfully.

€9.99*
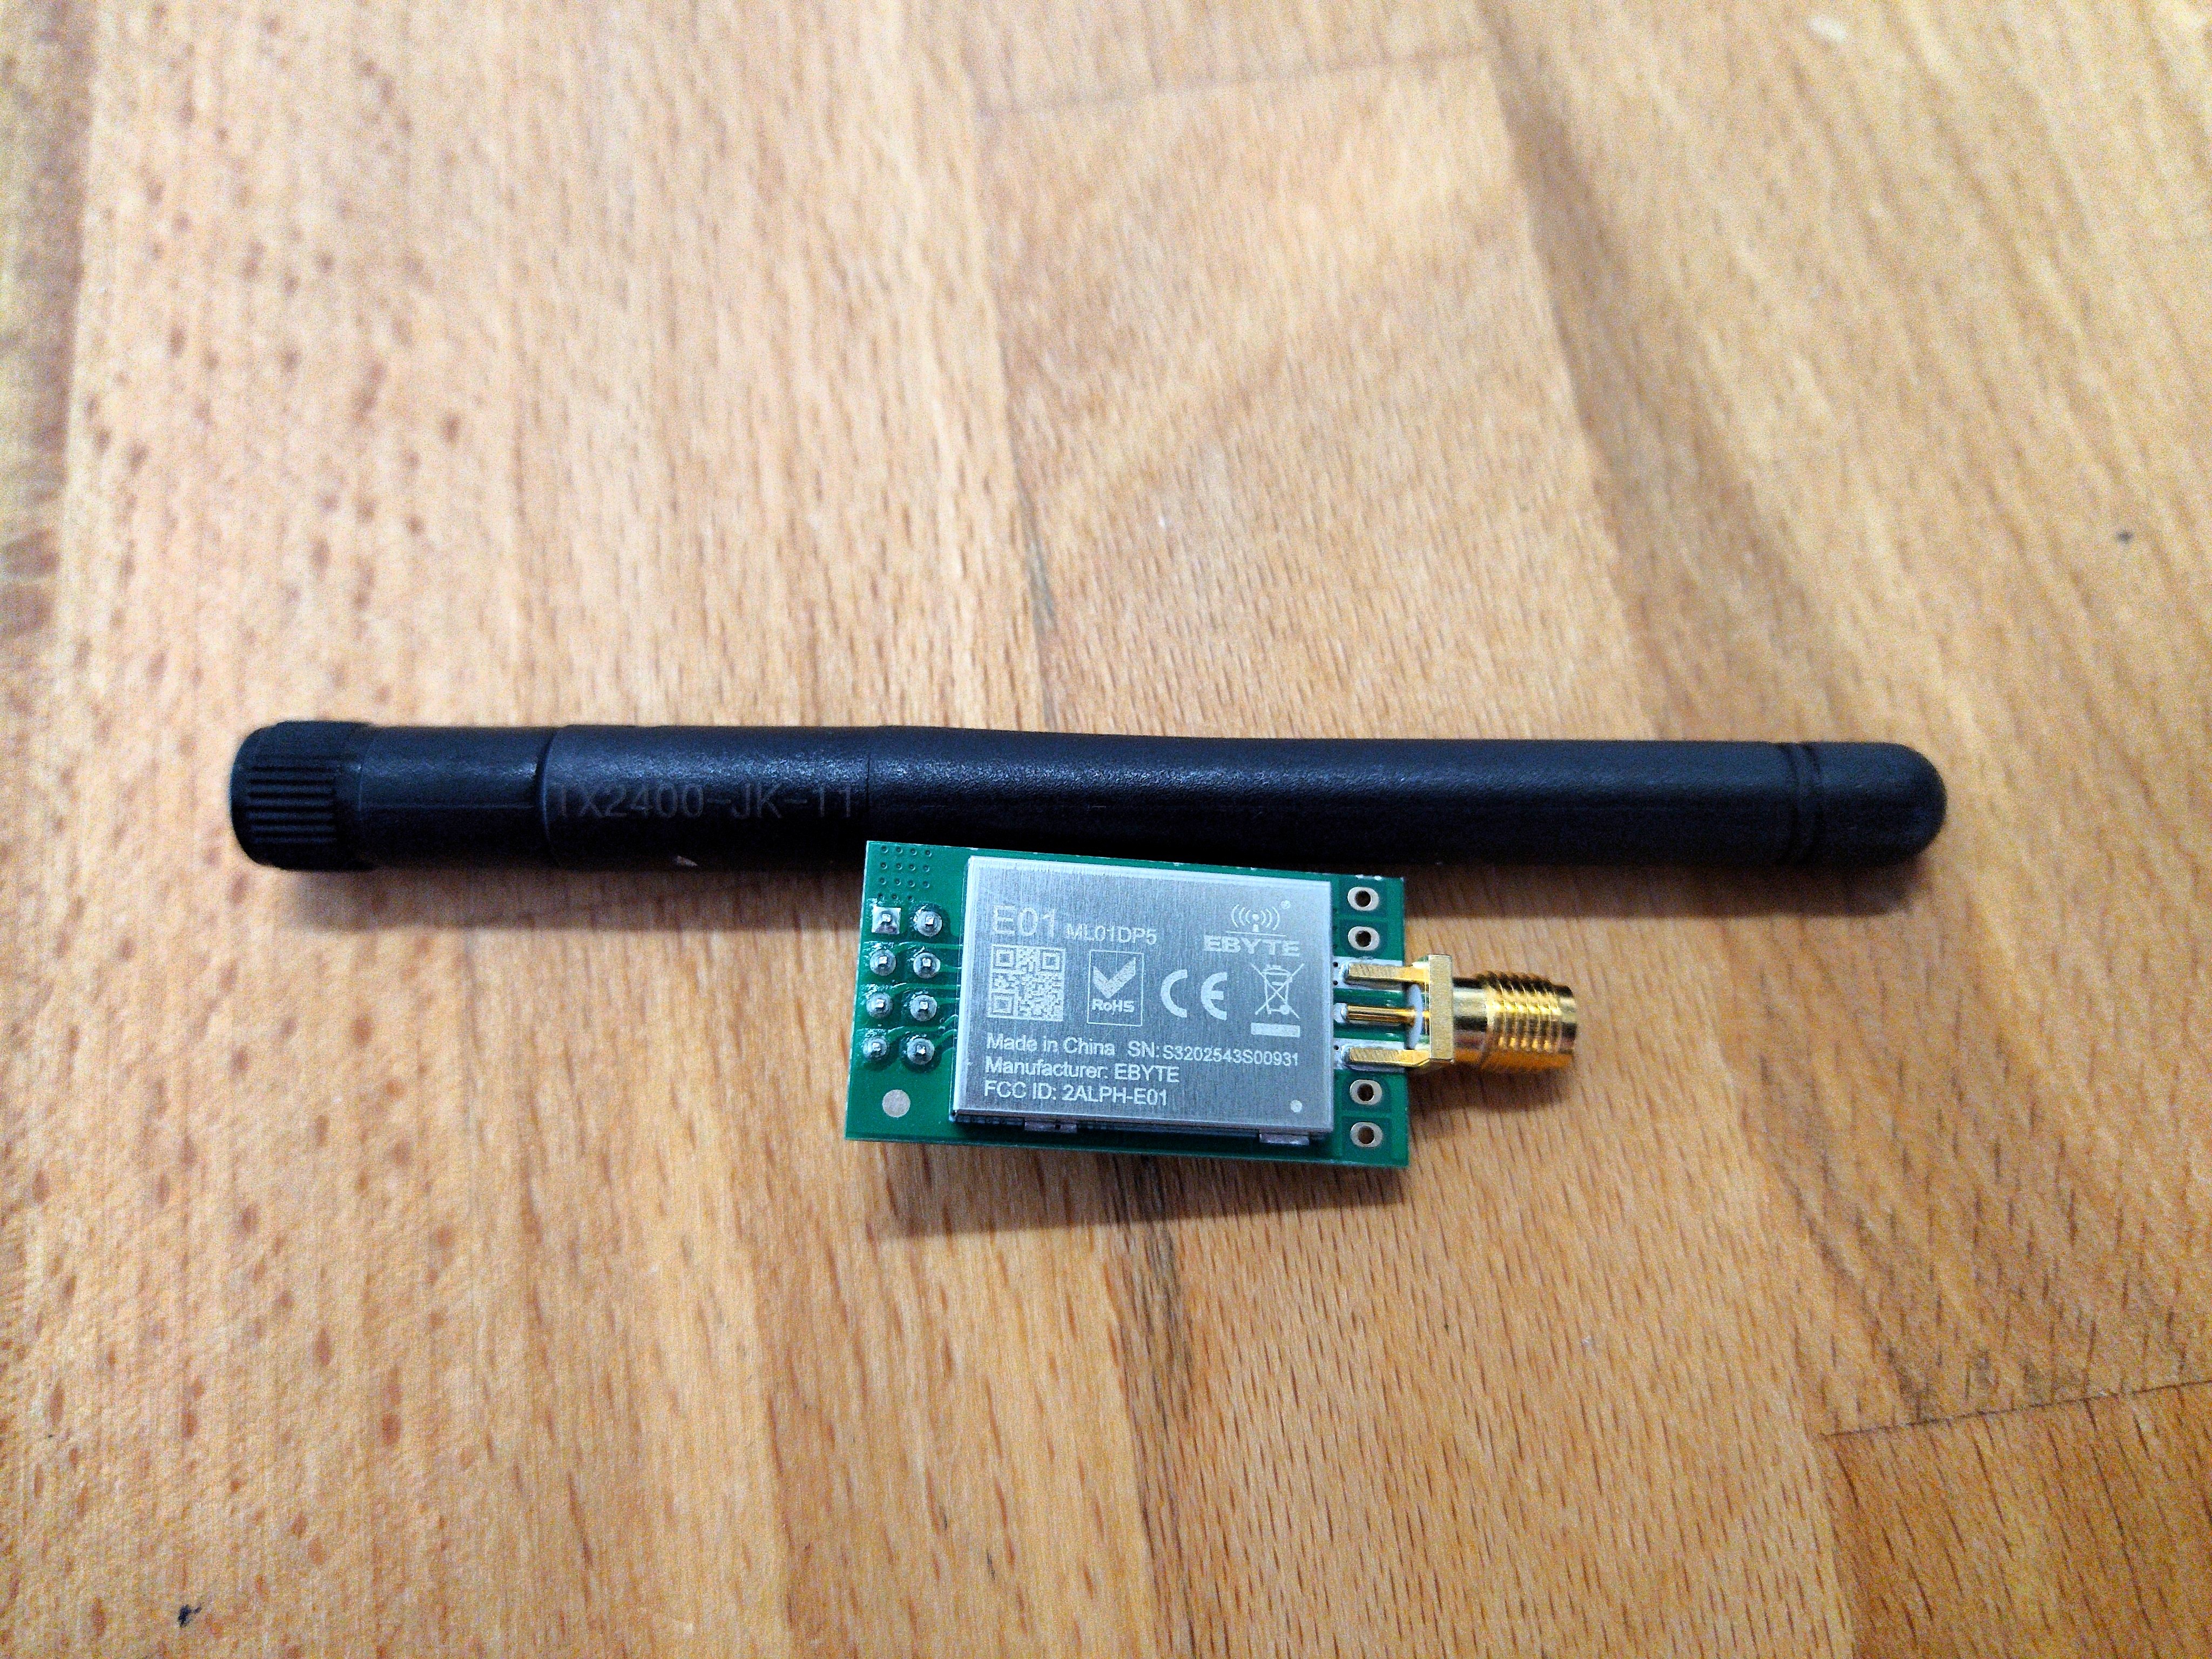
Ebyte radio module NRF24L01 E01-ML01DP5 2.4 GHz incl. matching 3dBi antenna
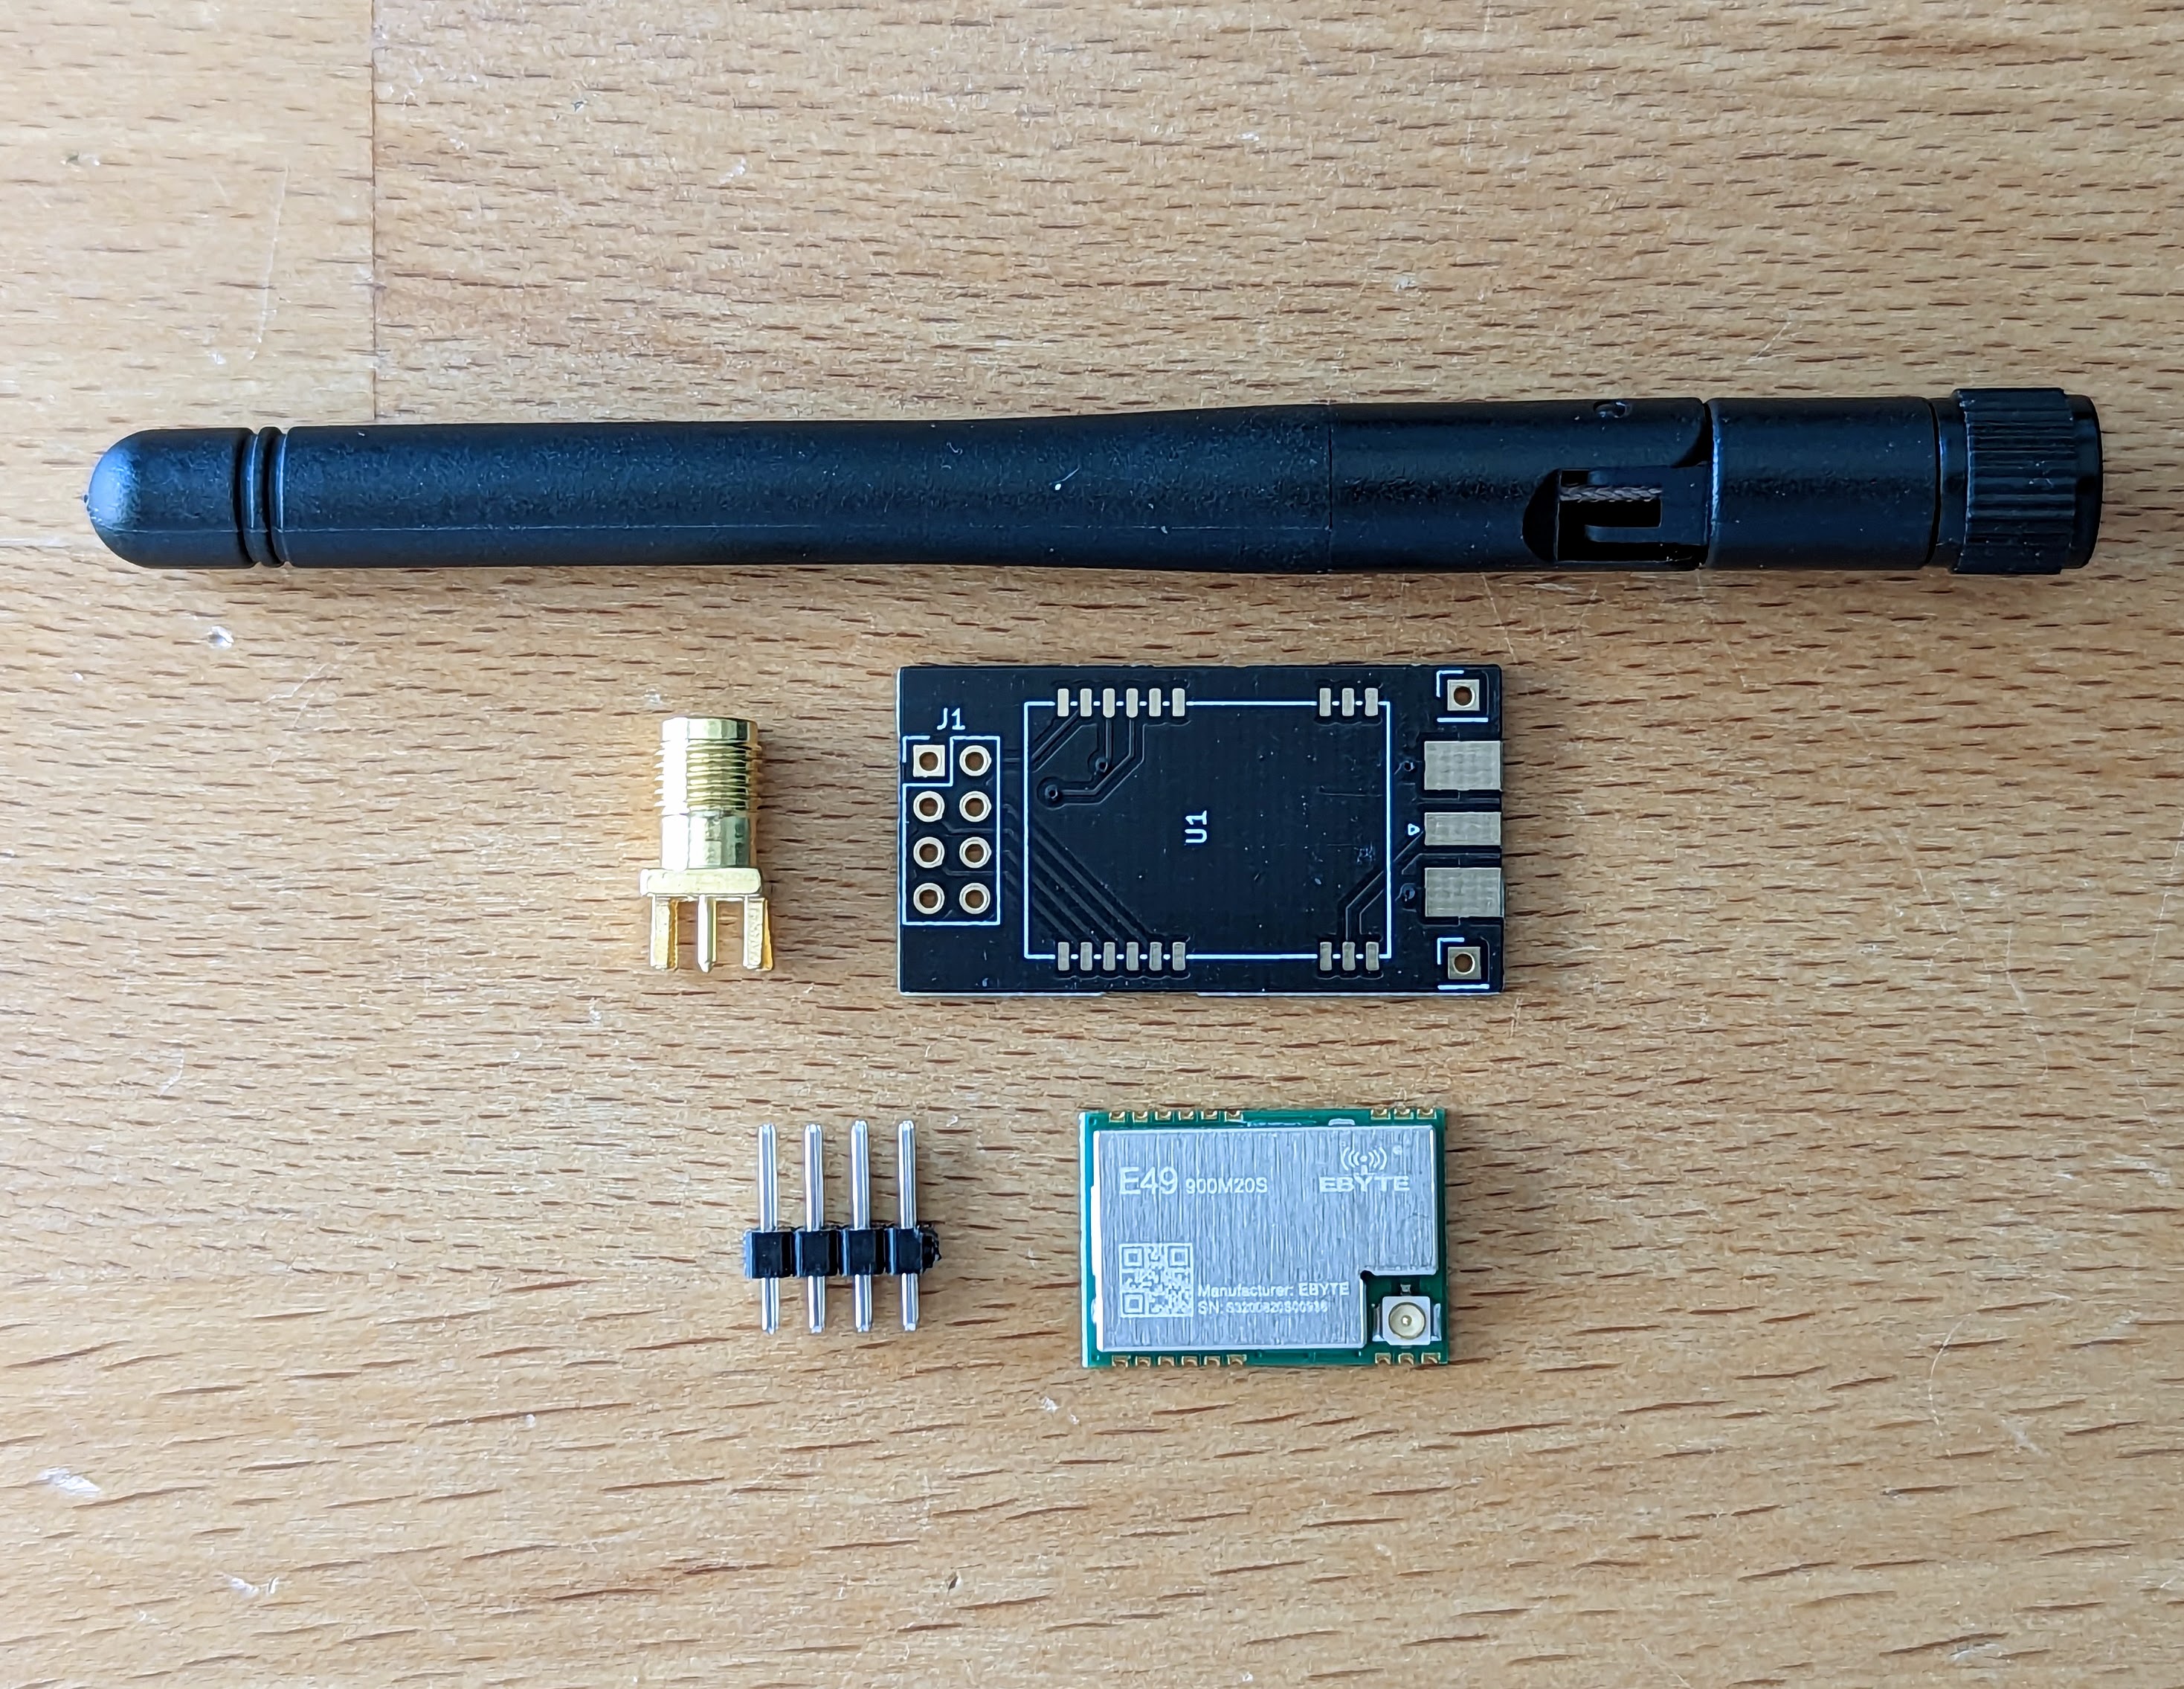
E01-ML01DP5 is a DIP module based on the original imported nRF24L01P from Nordic in Norway, operating at 2.4Ghz with 100mW transmit power. The E01-ML01DP5's RF performance and component selection during research and development meet industry standards. A high-precision 16MHz industrial-grade crystal oscillator is used and has received FCC, CE and RoHS certification. A power amplifier (PA) and low noise amplifier (LNA) are built in so that the maximum transmit power reaches 100mW and the receive sensitivity is further improved. The products have been significantly improved when there is no PA and LNA in the design.We supply the module with matching 2.4GHz 3dBi omnidirectional antenna.Attention: This is only the radio module and intended for hobbyists. The radio module is suitable for openDTU and ahoyDTU (please pay attention to the matching inverters!). The radio module is not sufficient to build an openDTU! You need the complete kit or additional components.Technical dataThe tested communication distance is up to 2.5KM Maximum transmit power of 100mW, multi-level adjustable via software Supports data transmission rates of 2Mbps, 1Mbps, 250kbps 125 communication channels to meet the requirements of multipoint communication, grouping, frequency hopping, etc. Connects to the MCU via the SPI interface at a rate of 0 to 10Mbps. Support 2.0V~3.6V power supply, power supply above 3.3V can guarantee the best performance. Industrial standard design, support -40~85°C for long time operation. SMA interface for easy connection of coaxial cables or external antennas Improved ShockBurst, fully compatible with all NORDIC nRF24L, nRF24E, nRF24U serieScope of deliveryEbyte NRF24L01 E01-ML01DP5 MoudlOmnidirectional Antenna ** When selecting the tax rate for products for photovoltaic systems, §8 of our Terms & Conditions must be taken into account.

€10.59*
OpenDTU NRF - Your evaluation for your balcony solar system compatible with Hoymiles HM series (NRF module)
The energy turnaround is in full swing and great balcony power plants are sprouting up on every balcony. It's beautiful!With this OpenDTU Board kit you can read out your balcony solar power plant, display the data and even control it. The prerequisite is an inverter from Hoymiles. A small display always shows the current power production.The project was started by Thomas and Jan and can of course be found under open source licence here:https://github.com/tbnobody/OpenDTU (there you will also find a list of compatible inverters).This breakout board is 100% compatible and was created together with the developers of the software. On the board there is a special radio module that speaks the radio standard of the inverters. This is read out by an ESP32 module, processed and can be further processed via WLAN, e.g. with MQTT.The board also has connections for a display and an RGB LED strip, which may be supported in a future version. NEW - Fully assembled OpenDTU (optional) Due to the frequent requests, we have now also decided to offer you a fully pre-soldered and assembled DTU. It will be ready to go when it arrives. All you have to do is log in to your OpenDTU, connect it to the Wi-Fi and then add your inverter. Please follow the instructions from step 20 onwards. Scope of Delivery In the scope of delivery, you will receive all the necessary components: a display, an ESP32, and an antenna module. You just need to solder them together and enter your Hoymiles serial number, and you're ready to go! The ESP32 is already pre-flashed. ** When selecting the tax rate for products for photovoltaic systems, §8 of our Terms & Conditions must be taken into account. CompatibilityThis kit uses the NRF24L01+ module and is compatible with the following Hoymiles models: Hoymiles HM-300-1THoymiles HM-350-1T Hoymiles HM-400-1T Hoymiles HM-600-2T Hoymiles HM-700-2T Hoymiles HM-800-2T Hoymiles HM-1000-4T Hoymiles HM-1200-4T Hoymiles HM-1500-4T Solenso SOL-H350 Solenso SOL-H400 Solenso SOL-H800 TSUN TSOL-M350 TSUN TSOL-M800 TSUN TSOL-M1600If you are looking for a module with CMT2300A for the HMS and HMT series from Hoymiles you need this: https://shop.blinkyparts.com/en/OpenDTU-CMT-Your-evaluation-for-your-balcony-solar-system-compatible-to-Hoymiles-HMS-and-HMT-series-CMT-module/blink238342FeaturesRead out live data from the inverter Display the inverter's internal event log Display inverter information such as firmware version, firmware build date, hardware revision and hardware version View and set the current inverter threshold Power off/on function of the inverter Uses ESP32 microcontroller and NRF24L01+ multi-inverter support MQTT support (with TLS) Home Assistant MQTT Auto Discovery support Beautiful and fancy WebApp with visualisation of current data Firmware upgrade via the Web UI Standard source supports up to 10 inverters Time zone support Prometheus API endpoint (/api/prometheus/metrics) English, German and French web interface Direct connection of displays (SSD1306, SH1106, PCD8544) Dark theme in the web interfaceThe HousingThe kit comes with a high-quality 3D printed housing. You can also print it yourself. We have published the files here:https://www.printables.com/de/model/441037-opendtu-breakoutboard-caseTarget GroupThis kit is designed for all those who have a solar power plant at home and a suitable Hoymiles inverter. Without the inverter and the solar panels the kit is just a nice paperweight with display ;). The electronics kit for soldering is designed for beginners. Relatively large components are used, which make it easy to learn how to solder. This is also possible for absolute beginners in a reasonable time.Required toolsWhat the minimum soldering workstation looks like is described here: Der LötarbeitsplatzYou will also need a micro USB cable or a USB-C cable and a suitable USB power supply. Two toothpicks are very practical. An electric side cutter is also very useful for this kit :) Instructions and helpTo make it easy for you to solder the kit, we have put together detailed instructions with lots of pictures and individual steps for each of our kits. There you will be guided step by step through the assembly and there are many tips and tricks on how to solder correctly. For the majority of our soldering kits there are also interactive circuits with the names of the components and the tracks. All instructions are available in German and English.The instructions also describe the software part as far as the software is installed, connected to your WLAN and you have set up your inverter. Everything else is self-explanatory in the web interface. For environmental reasons, we do not print our instructions. It is even better to view them on screen, as you can then zoom into the high-resolution photos to see the details. On each kit you will find a QR code or link to the instructions. You can find all the instructions as PDF files at the following link: https://binary-kitchen.github.io/SolderingTutorialJust click on "DE" or "EN" for the right kit and you can download a PDF.Lovingly packed for you by handAll soldering kits are lovingly packed for you by hand in Germany. Unfortunately, it happens from time to time that a component is packed too much or too little. If something is too much: No problem! Keep the components and use them for your creations! If something is missing: No problem! Just send us an email and we will send you the missing parts.Show us your solar system and your OpenDTU evaluationWe at blinkyparts are super excited to hear what your solar system looks like and how/what you did with your OpenDTU kit. Share your photo with us atTwitter/Mastodon: #SolderingConnectsInstagram: #SolderingConnects or follow us on @blinkyparts_comHelp others with your feedbackIt is often difficult to judge whether a soldering kit is something for you. Help others by giving us a rating, a feedback. How did it work? What equipment did you have? What did you like most about it? What does your solar system do? Just leave a review here on the product page under "Reviews".

€42.83*
%
All-in-one: Pinecil v2 - complete package with everything needed for soldering
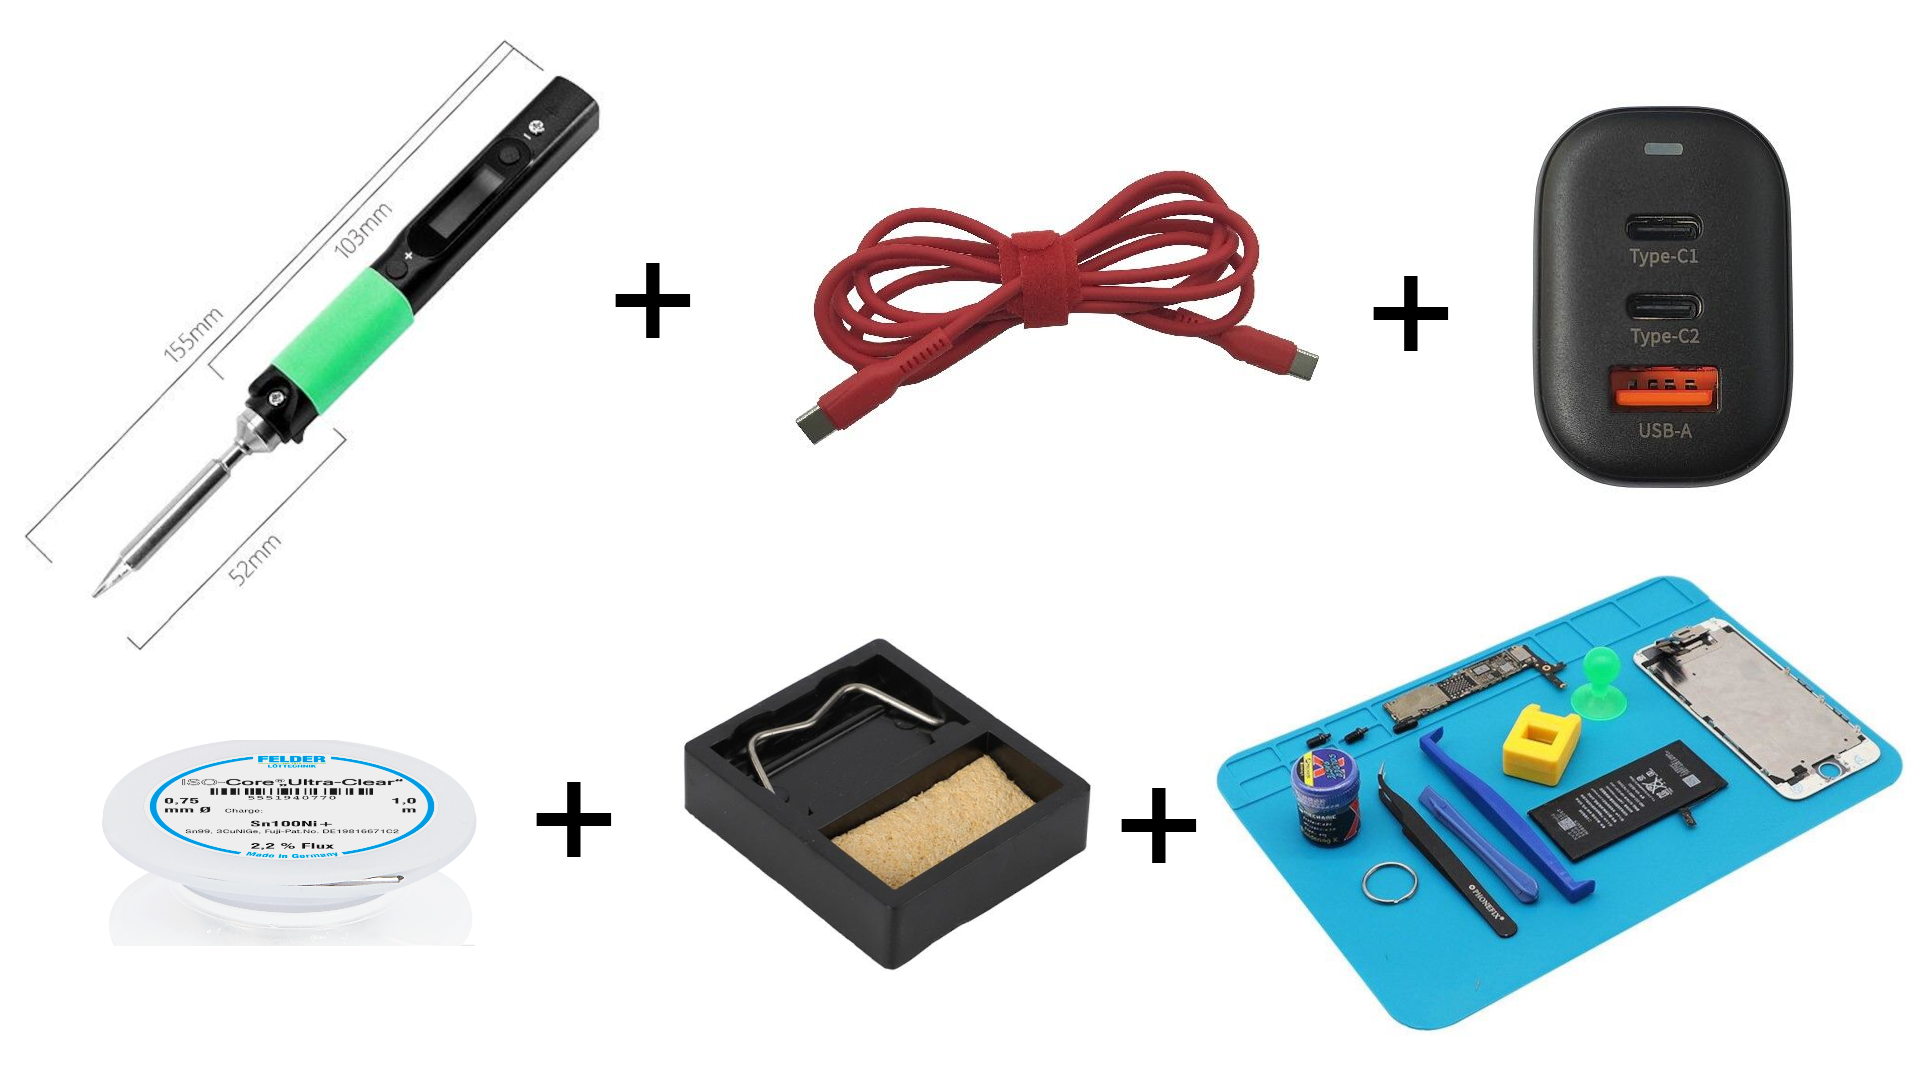
With this all-in-one package you have everything you need for soldering in your hands: The Pinecil soldering iron: The heart of the package, of course. A fine piece of hardware and an absolutely great soldering iron. The silicone USB-C cable: A normal USB-C cable will also work, of course, but this cable is particularly heat-resistant and flexible. The 65W Pine Power charger: The perfect power from the original manufacturer. Real 65W that arrives 100% in the soldering iron. A mini soldering iron holder: Perfect for taking along and placing the soldering iron. Of course also from the original manufacturer. A heat-resistant soldering pad: The silicone pad protects the table and ensures a clean work surface. In addition, there are various small compartments for storing components and accessories. Soldering tin strips: Of course, the soldering tin must not be missing. 0.75mm best Sn100Ni+ on a 1m spool. Every soldering joint is a success!All that's missing now are the right soldering kits. You can find them in the kits menu!As a note: The photo shows a few tools on the silicone pad. These are not included in the delivery. The discount refers to the normal price of the products if you were to buy them individually.Target group This set is perfect for beginners, but you are certainly not buying cheap goods. The quality is really very good and it is wonderful to solder with the soldering iron and the accessories. The easy-to-change tips also make the mini soldering iron flexible to use. However, the price definitely makes it the first soldering iron for a beginner. The Pinecil will definitely be a companion for life.Show us your soldering setupWe at blinkyparts are super curious to know what your soldering setup looks like? Have you printed any other 3D printed parts for the Pinecil? Share your photo with us at Twitter/Mastodon: #SolderConnects Instagram: #SolderConnects or follow us on @blinkyparts_com. Help others with your feedback It's often hard to know which soldering iron is for you. Help others by giving us a rating, a feedback. How did it work? What other equipment did you have? What did you like most about it? What makes the Pinecil special? Just leave a review here on the product page under "Reviews".

€134.00* €142.94* (6.25% saved)
Katie the Cat - A simple cat soldering kit with special eyes!
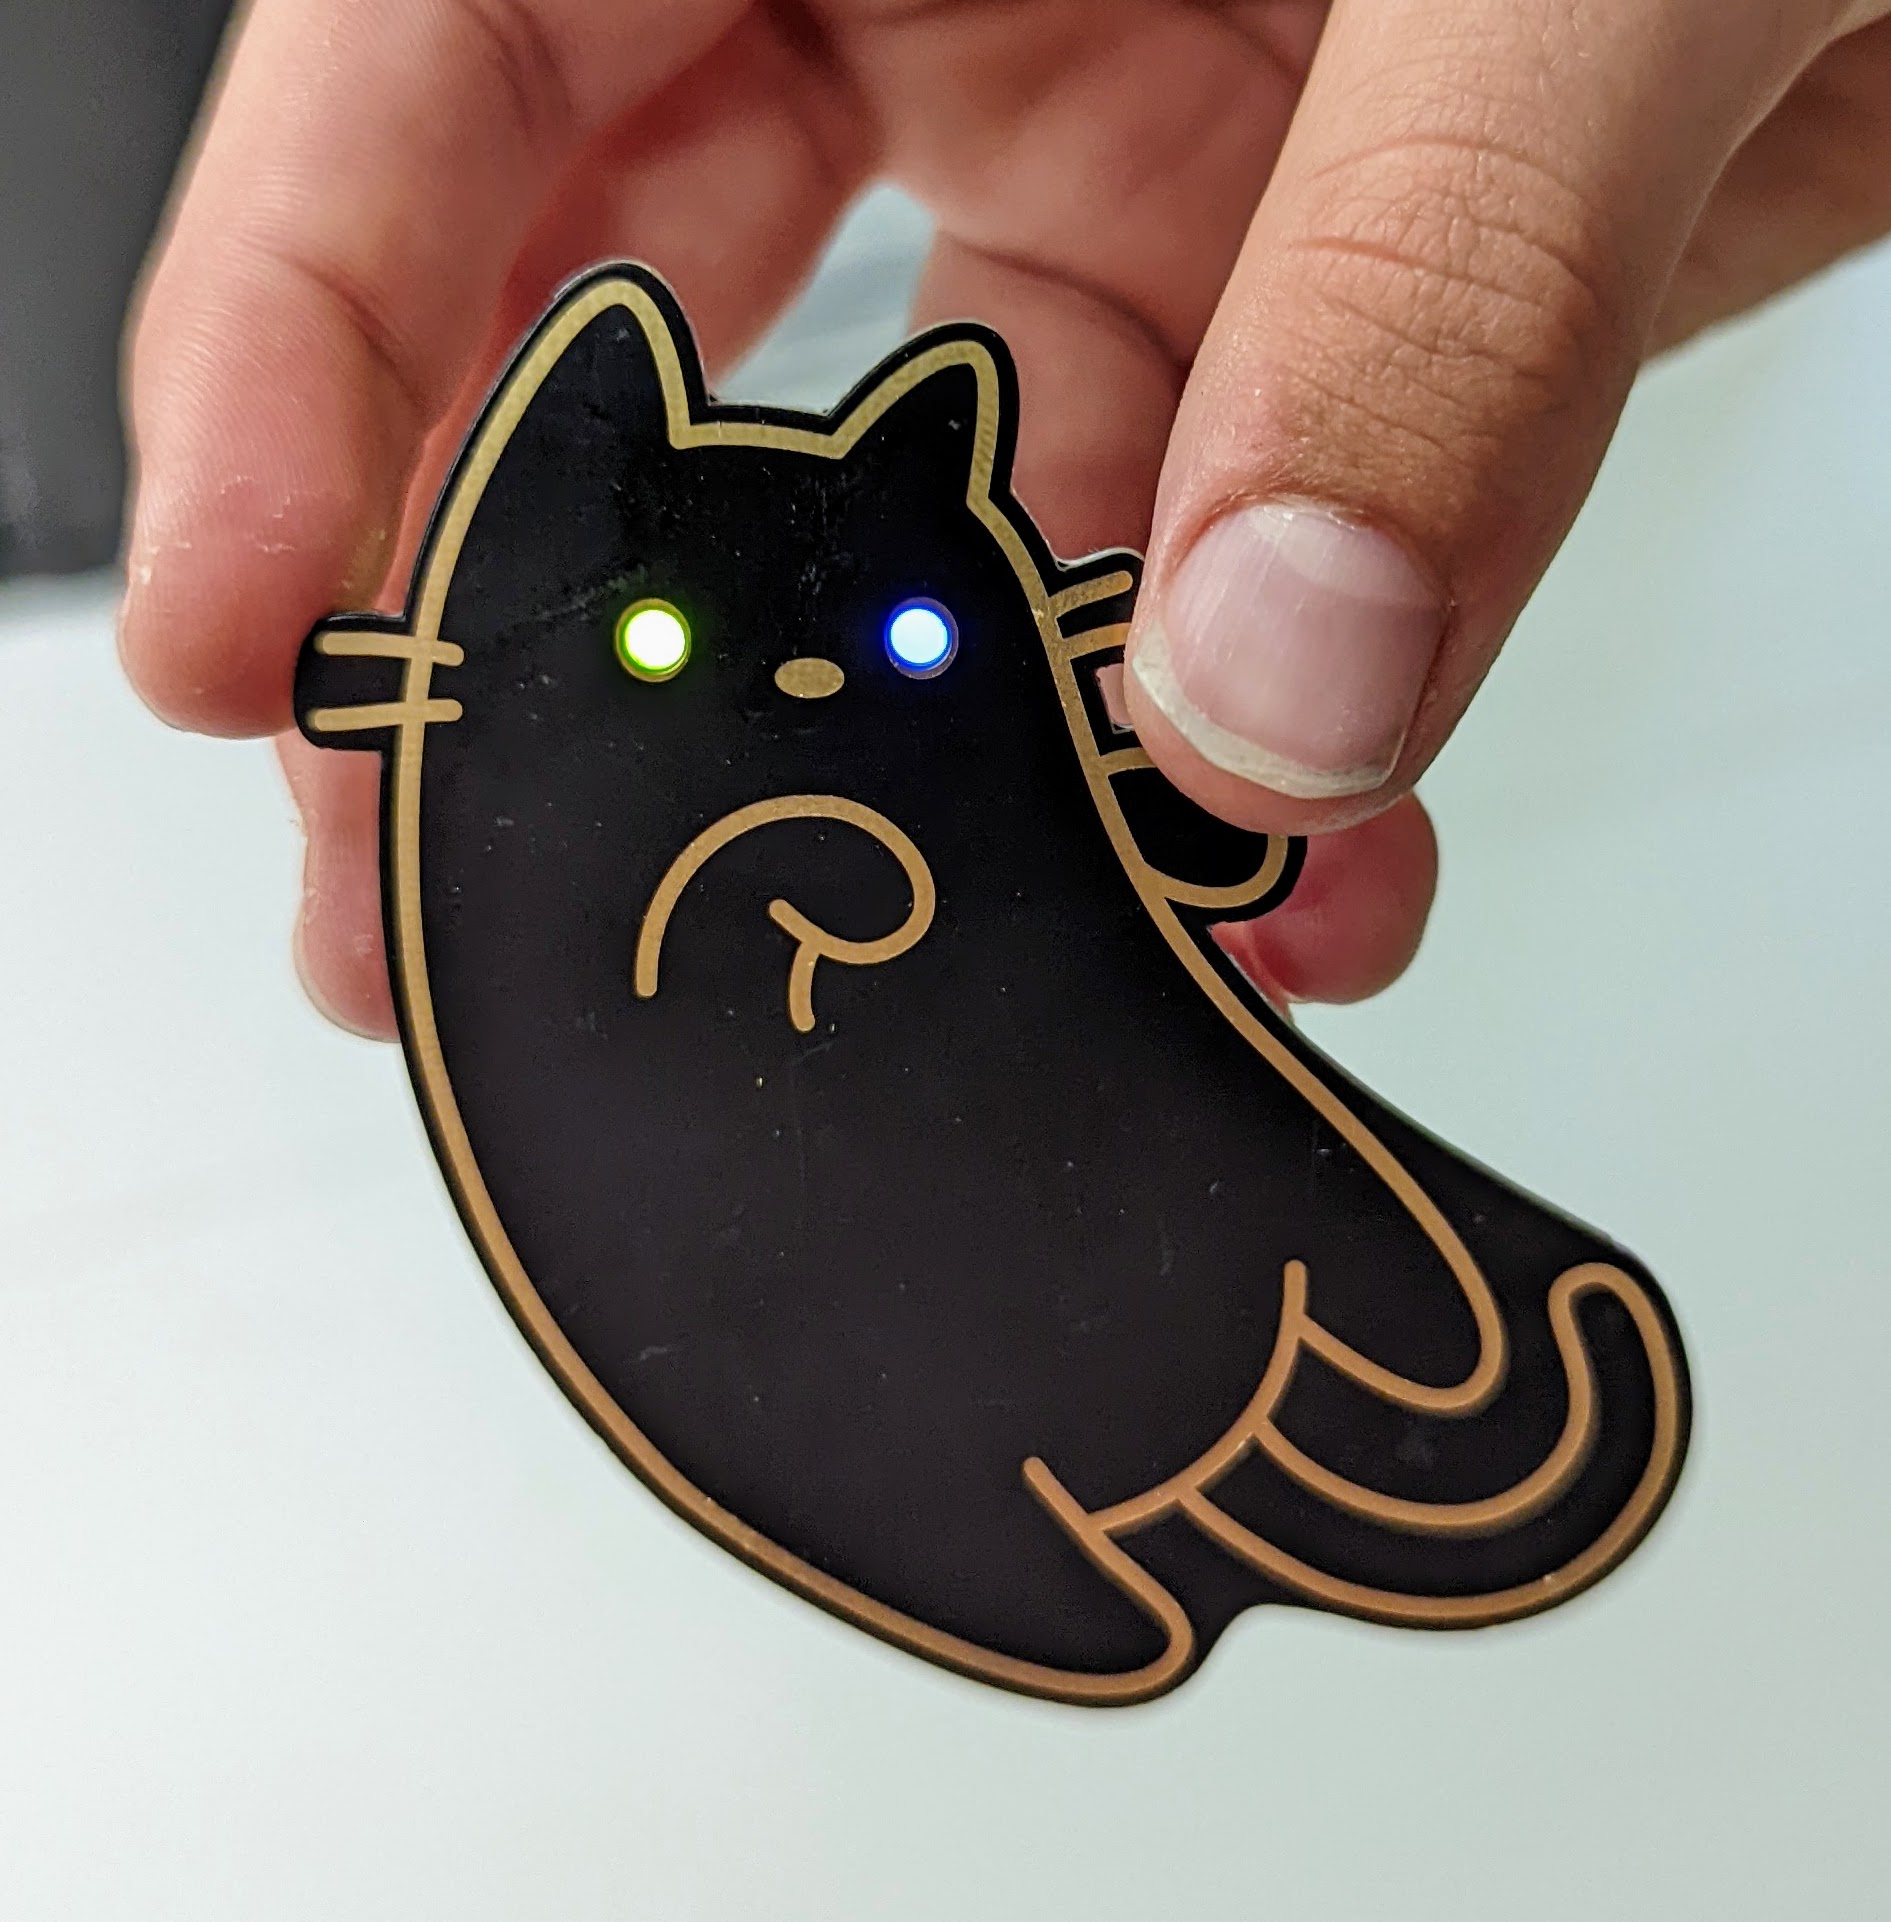
This is Katie - The cat! Katie is a cat with two eye colours! Look deep into her eyes and you will see her beautiful two-coloured eyes. Heterochromatic eyes! Katie is a black cat who likes to live in boxes. Katie is a wonderful and easy soldering kit for anyone who wants to learn to solder or wants a great cat for company. What's special about Katie the Cat. Katie was designed by Franziska Breunig herself when she was 11 years old. From the circuit design to the board! How cool is that?The best thing is: with this soldering kit you can easily make a great pin, pendant or necklace even as a beginner. You only have to solder 6 components on the back. For those who already know a bit about soldering: The LEDs are THT, i.e. through-hole components. They are soldered to the surface on the back. We used this trick to get the special effect of the eyes.For those who are not yet ready: never mind! Detailed and well-tested instructions will guide you through this little soldering adventure.Target groupThe electronic soldering kit is designed for beginners. Franziska has also written the instructions and we have taken special care to use simple language. Adults and children alike can have fun with the cat soldering kit, although of course you should not let children solder alone. Relatively large components are used, making it easy to learn how to solder. Only 6 components need to be soldered. This can be done in a reasonable amount of time even by absolute beginners. The shape shows the cat Katie with her two different eyes looking at you playfully. It's best to order one or two other kits at the same time, because as you can imagine, Katie loves company and the other soldering kits make a great gift for friends and family.The components in the Katie the Cat kitOur kits always include all the components you need for soldering. Unfortunately, we cannot send you the batteries. However, you can get them from hardware stores and larger supermarkets (more on this below under "Tools and accessories"). The soldering kit includes:The Board (PCB)The circuit board is the heart and gives Katie her beautiful shape. It forms the outline and the space to solder all the components. The board is made of fibreglass material which is coated with a gold alloy. A layer of black lacquer is applied on top. There are two holes in the board, which allow the LEDs to shine from the back.The LEDsThis is where the magic happens! And they do it twice. Once in green and once in blue they make the eyes shine, both the eyes that solder the kit and the eyes of the cat. The colour was chosen especially for you by Franziska. The brightness is also perfectly matched!The SMD battery holderThe battery holder for CR2032 batteries is included in the kit in an SMD design. It is soldered onto the surface like the other components. How to do this is described in the soldering instructions. We made sure that the SMD battery holder is very easy to solder on. The battery itself is then simply plugged in. The battery lasts for many hours of continuous operation. If you don't want Katie to be there for you with shining eyes, you can switch her off with a switch. You can buy more batteries in any well-stocked supermarket, in hardware stores and Swedish furniture stores. It's best to buy 1-2 more batteries ;).A Push ButtonOf course, a switch is also included! The button is easy to operate and therefore ideal for children (and adult hands). The switch locks and remains in the position (on or off) in which you want the switch to be. A great perceptible "click" ensures haptic and acoustic well-being.Required ToolsHere we describe what the minimum soldering workstation looks like: The soldering workplaceTo make Katie's eyes light up, you'll need to get another CR2032 battery per soldering kit at the hardware store or a large supermarket/Swedish home furnishing store.Also, tweezers are particularly helpful for this kit :) Instructions and HelpTo make it easy for you to solder the kit, we have set up detailed instructions with lots of pictures and individual steps for each of our kits. There you will be guided step by step through the assembly and there are many tips and tricks on how to solder correctly. For the majority of our soldering kits there are also interactive circuits with the names of the components and the tracks. All instructions are available in German and English.For environmental reasons, we do not print our instructions. It is even better to view them on screen, as you can then zoom into the high-resolution photos to see the details. On each kit you will find a QR code or link to the instructions.You can find all the instructions in PDF format under the following link: https://binary-kitchen.github.io/SolderingTutorialJust click on "DE" or "EN" for the right model kit and you can download a PDF.Lovingly packed for you by handAll soldering kits are lovingly packed for you by hand in Germany. Unfortunately, it happens from time to time that a component is packed too much or too little. If something is too much: No problem! Keep the components and use them for your creations! If something is missing: No problem! Just send us an email and we will send you the missing parts.Show us what you did with your KatieWe at blinkyparts are super excited to find out what happened to your Katie the Cat soldering kit. A pin? A hair clip? A pendant? Did you engrave or paint Katie? A pin for your backpack or something completely different? Share your photo with us atTwitter/Mastodon: #SolderingConnectsInstagram: #SolderingConnects or follow uns at @blinkyparts_comHelp others with your feedbackIt is often difficult to judge whether the soldering kit is something for you. Help others by giving us a rating, a feedback. How did it work? What equipment did you have? What did you like most about it? What makes your cat special? Just leave a review here on the product page under "Reviews".
€6.99*
Felder ISO-Core Ultra-Clear Solder - Sn100Ni+ 1m Coil 0,75mm
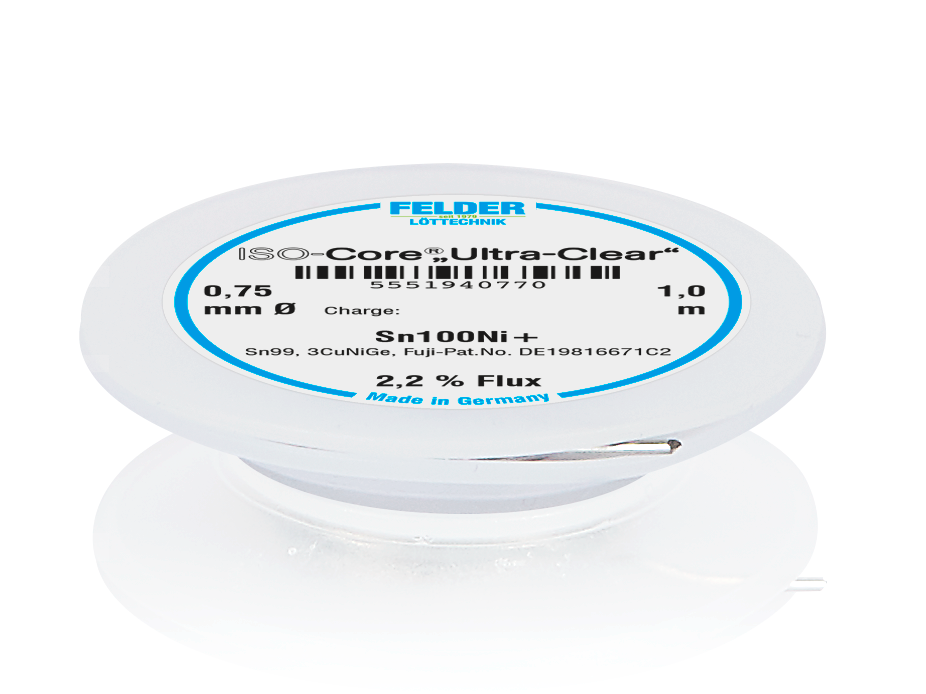
We've been looking around the incredibly large solder market and have decided on a good solder for lots of soldering fun: Felder ISO-Core Solder. All lead-free and everything, of course! We have limited ourselves to a small selection, but all the solders here have been tested and found to be good. The diameter is 0.75mm. In our experience, you don't have to add too much and still don't apply too much solder to your spots. Perfect for fine and coarse solder joints. Properties 2.2% flux Sn100Ni (Sn99,3CUNiGe)0.75mm diameter1m spool, perfect for testing and first soldering experiences Made in Germany Felder and Eco Tin Felder is a solder manufacturer from Germany and pays special attention to fair resources with Eco Tin. EcoTin pays attention to environmental protection, prevents child labour and increases work safety. You can read more about the company and EcoTin here: https://www.felder.de/unternehmen/ecotin.html

€5.49*
Transparent case for the Pinecil v2
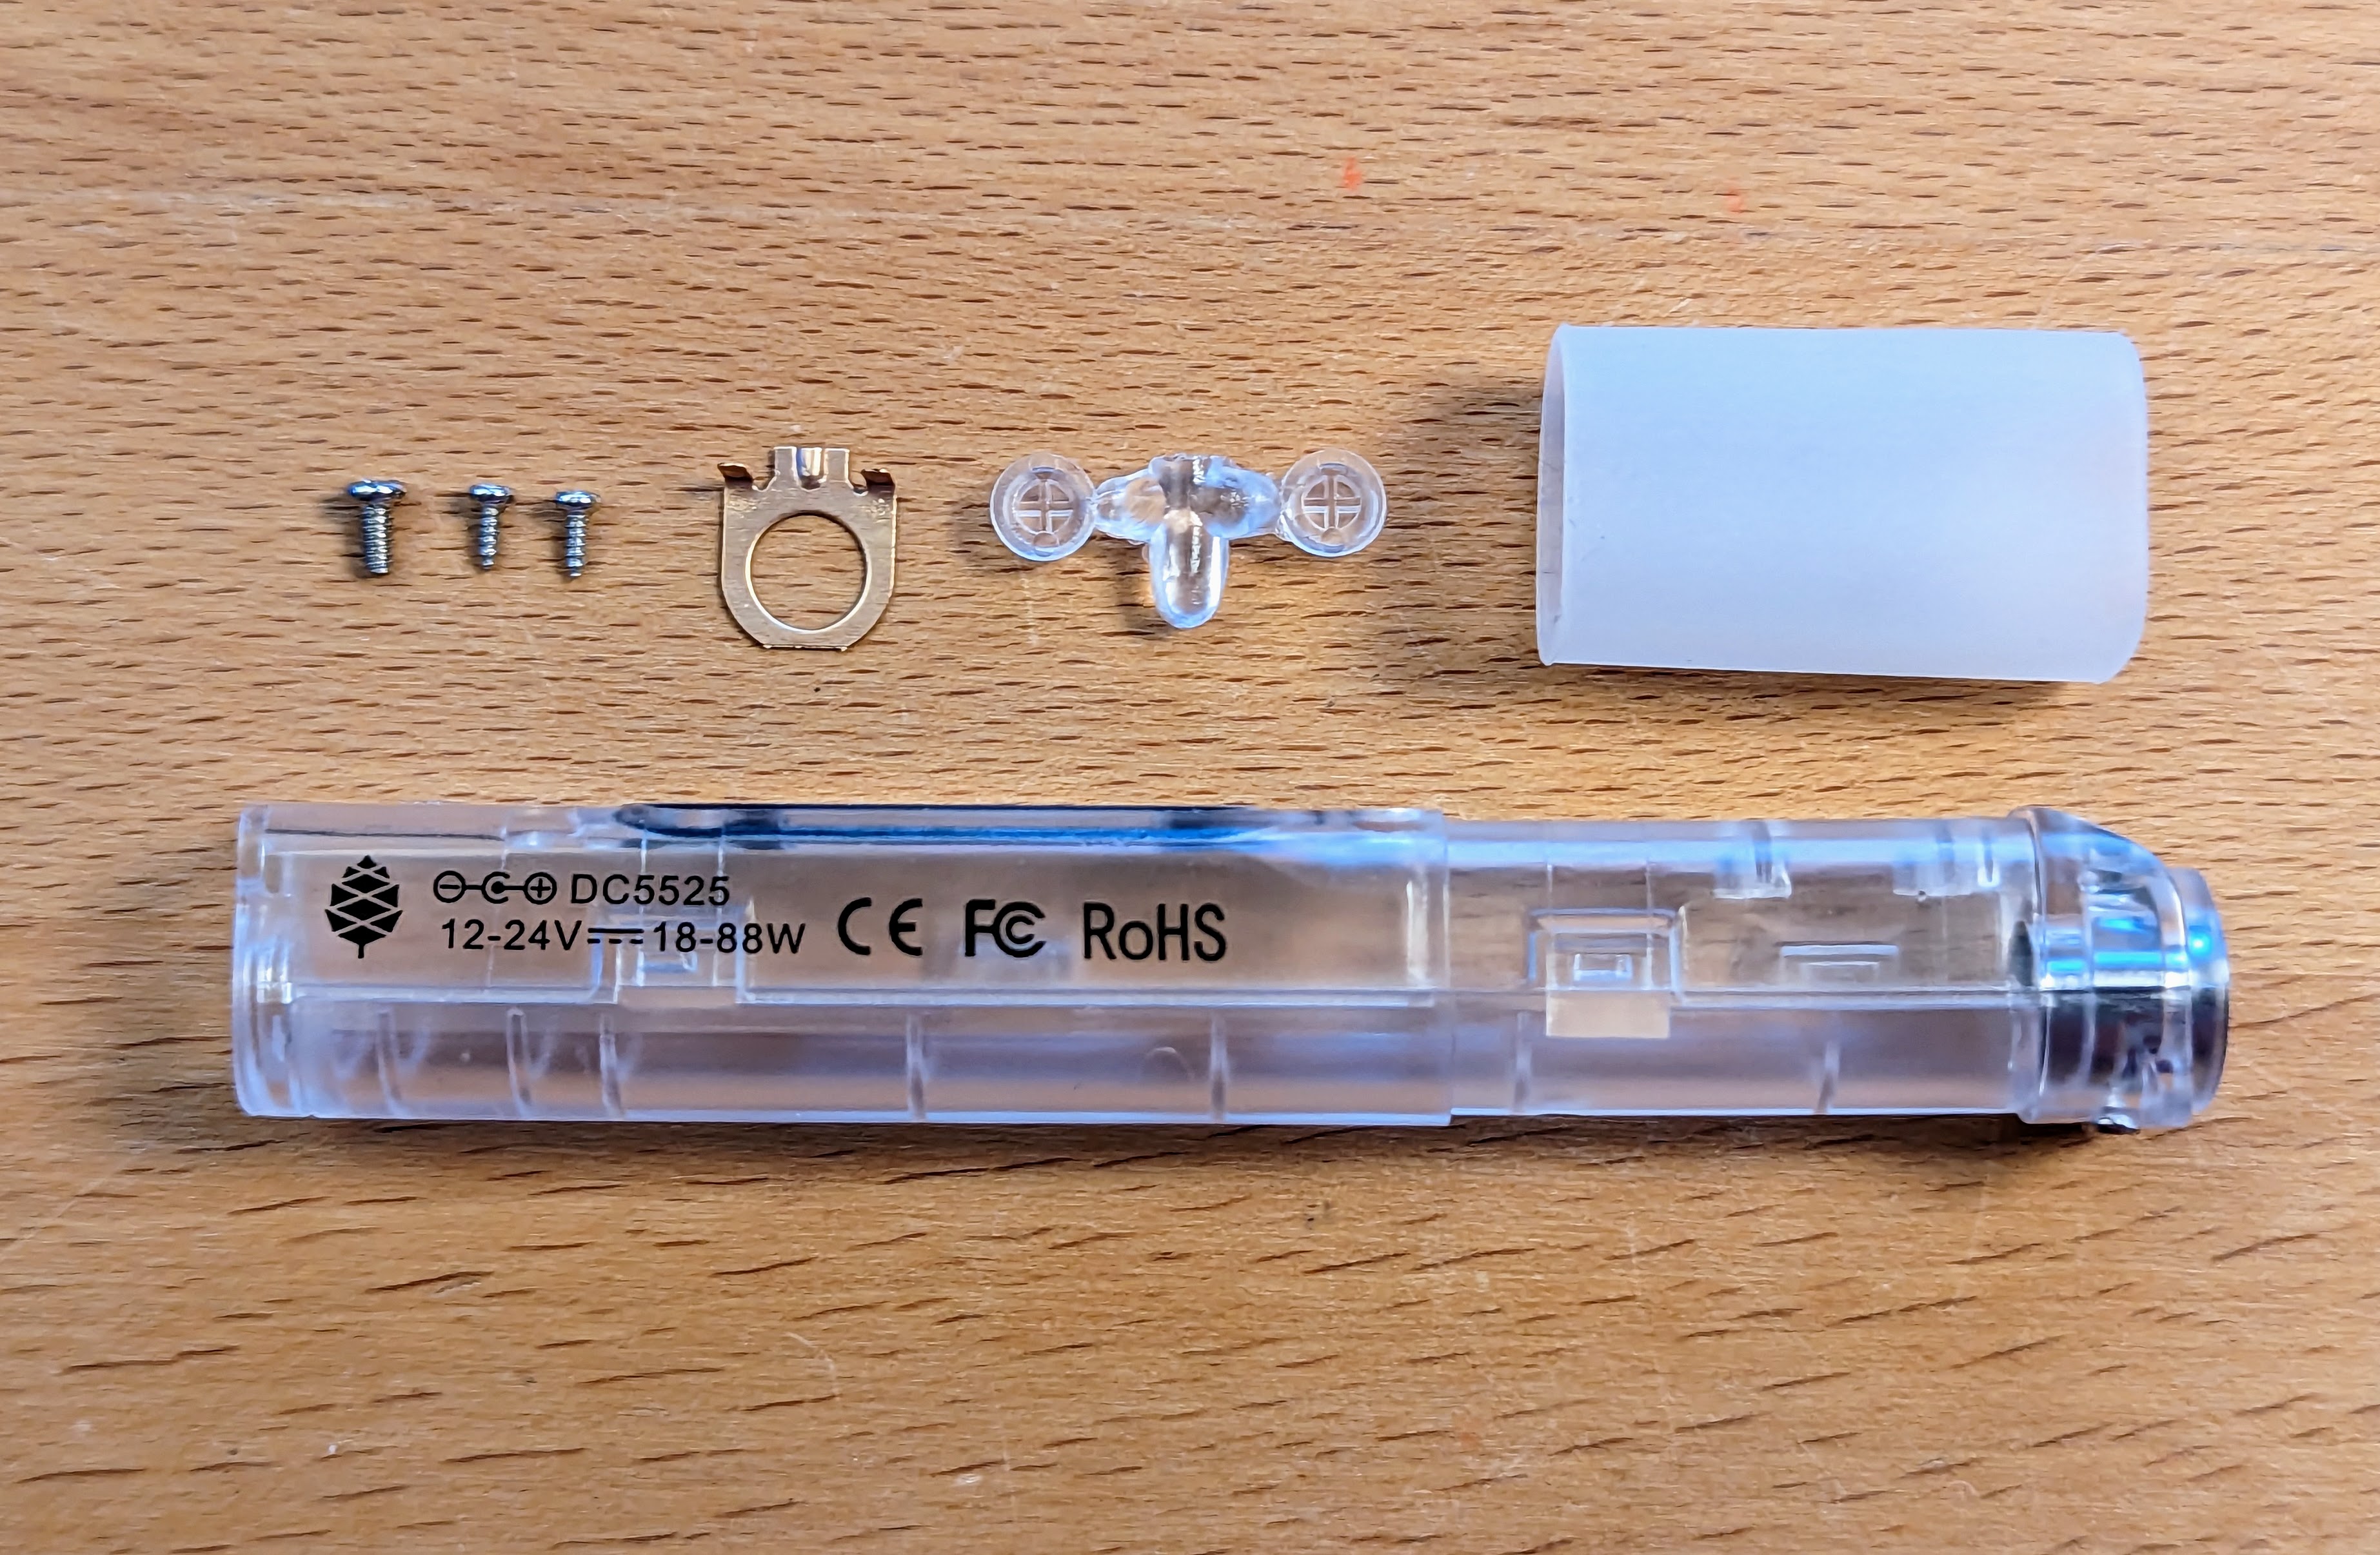
The perfect accessory for you and your Pinecil soldering iron: A transparent case for your Pinecil. Show what the Pinecil made of! (phun intended). The case fits the Pinecil v2 and requires two screwdrivers. The case and the matching buttons are supplied. Of course, the necessary screws and a spare contact are also included. You want a different colour? Why not simply paint the case from the inside or outside?

€13.99*
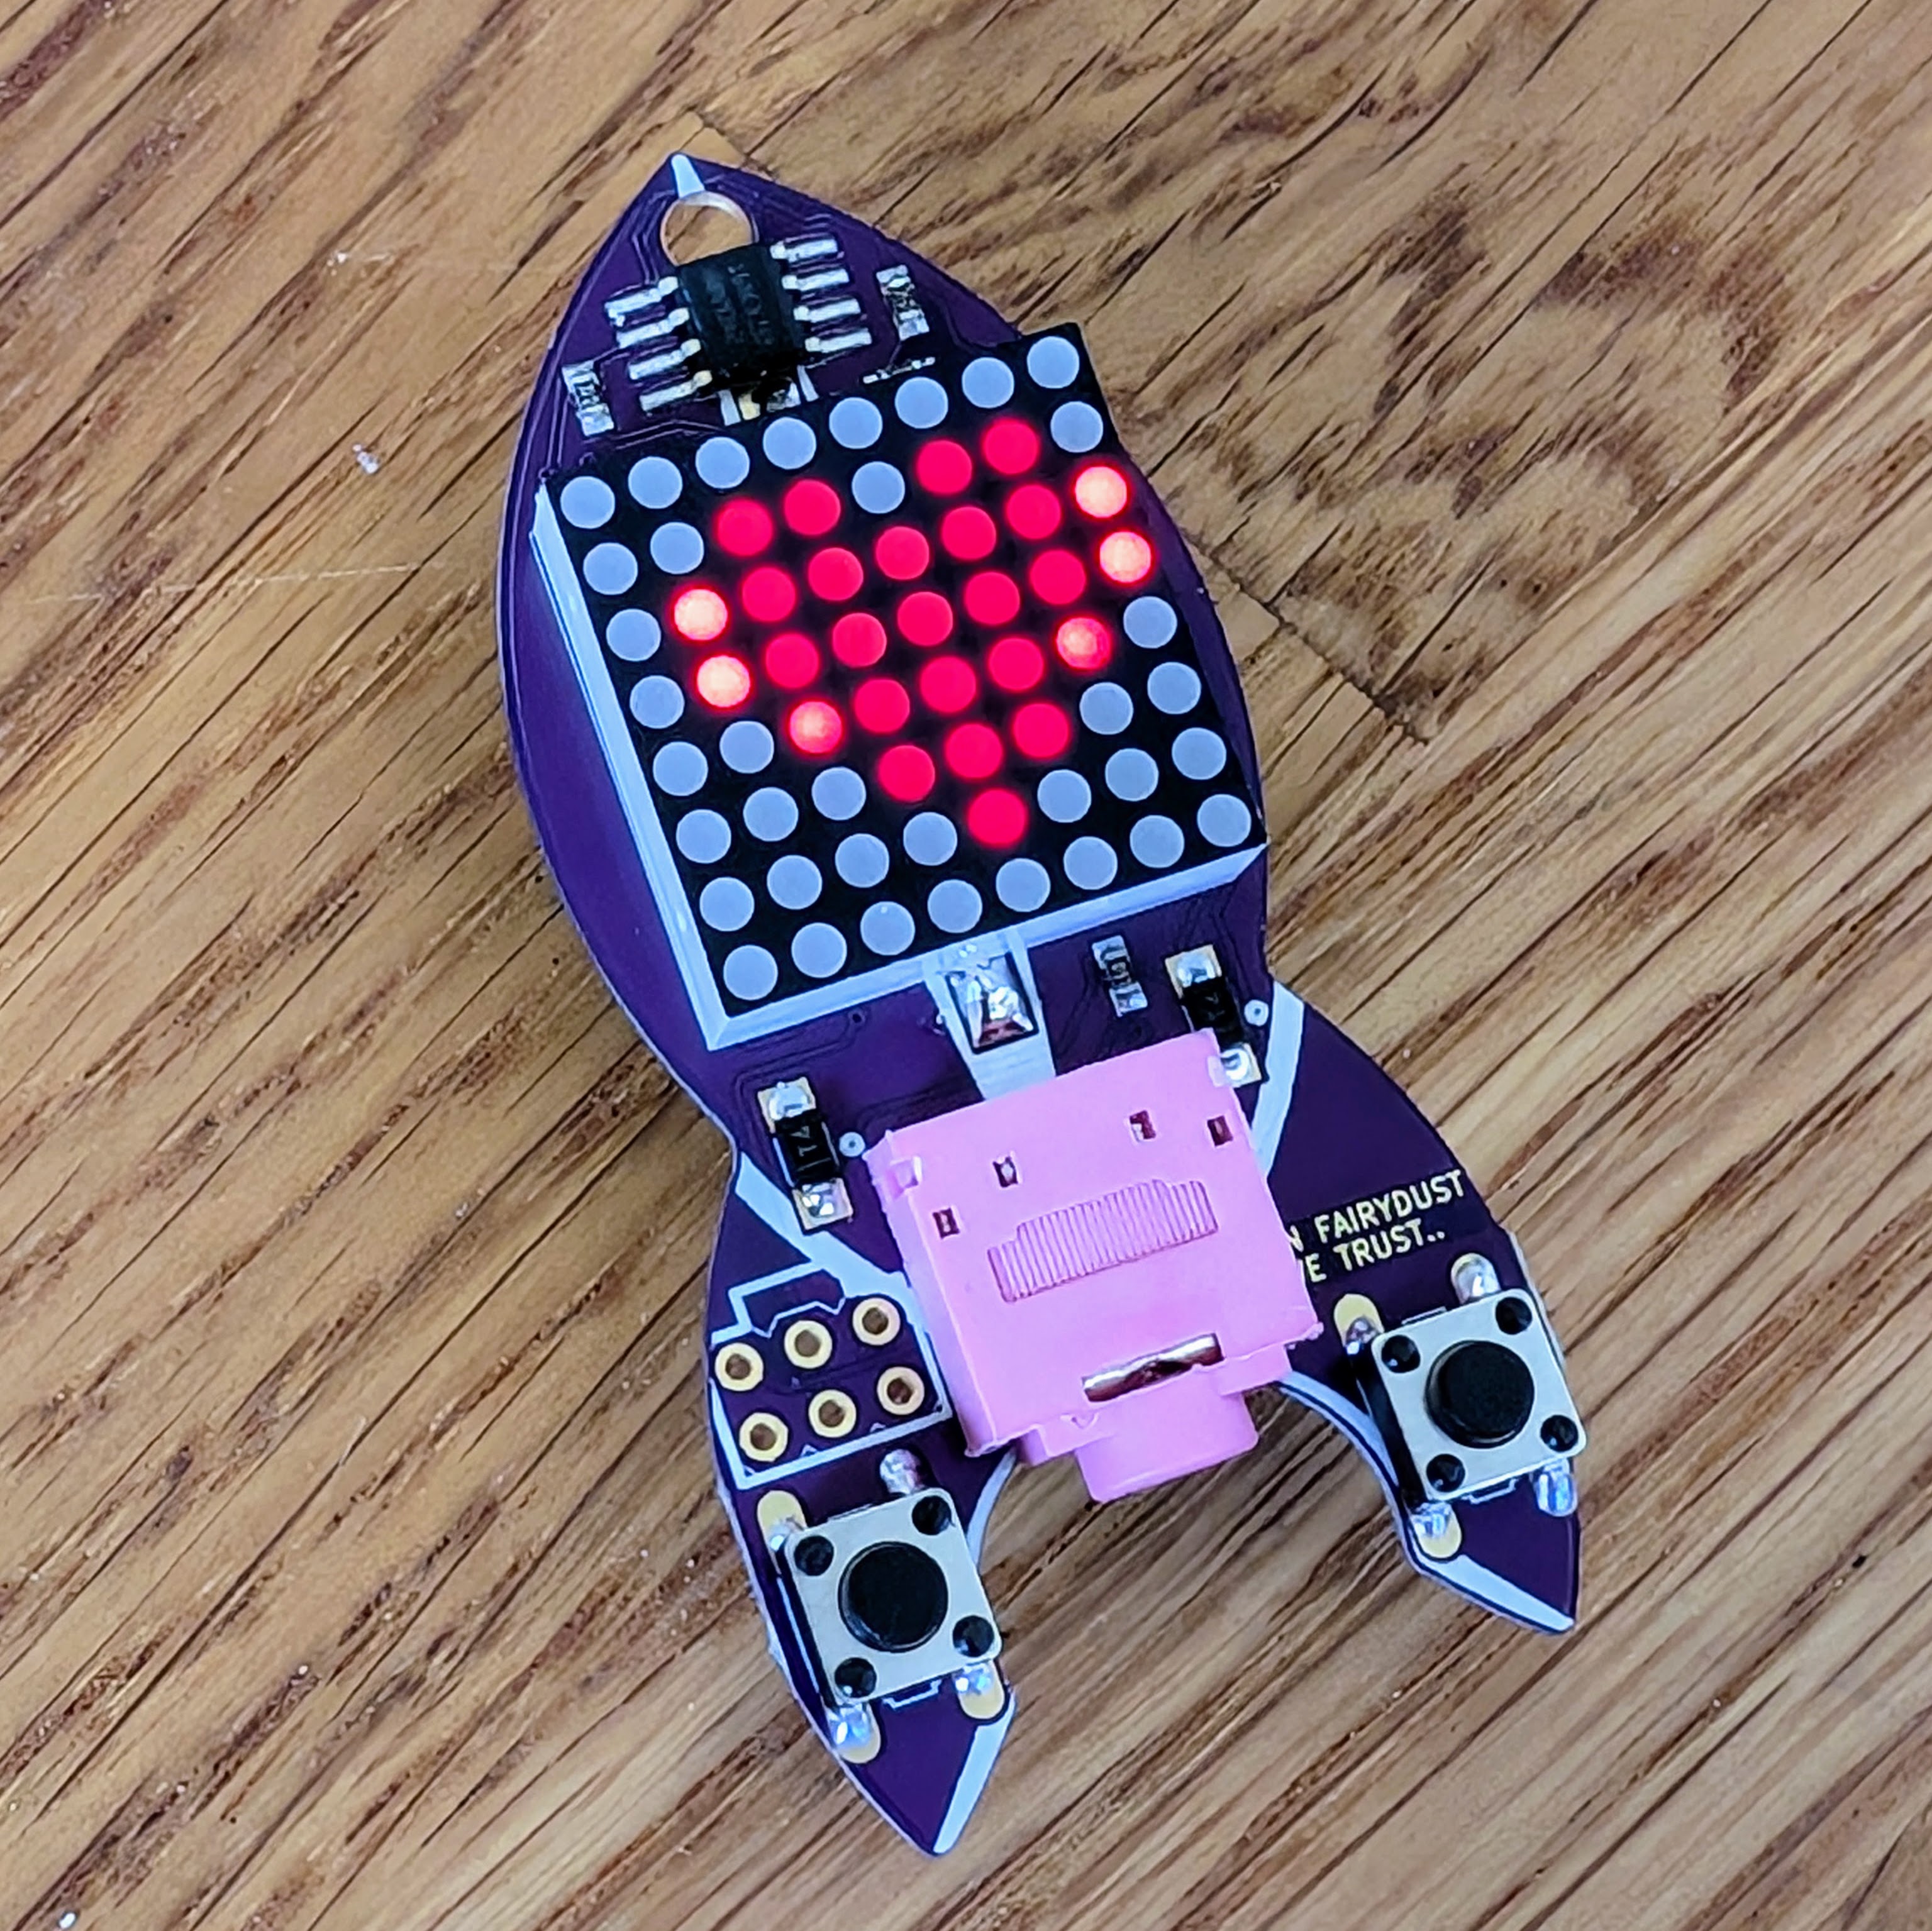
Rainbow Rocket - A soldering kit out of this world
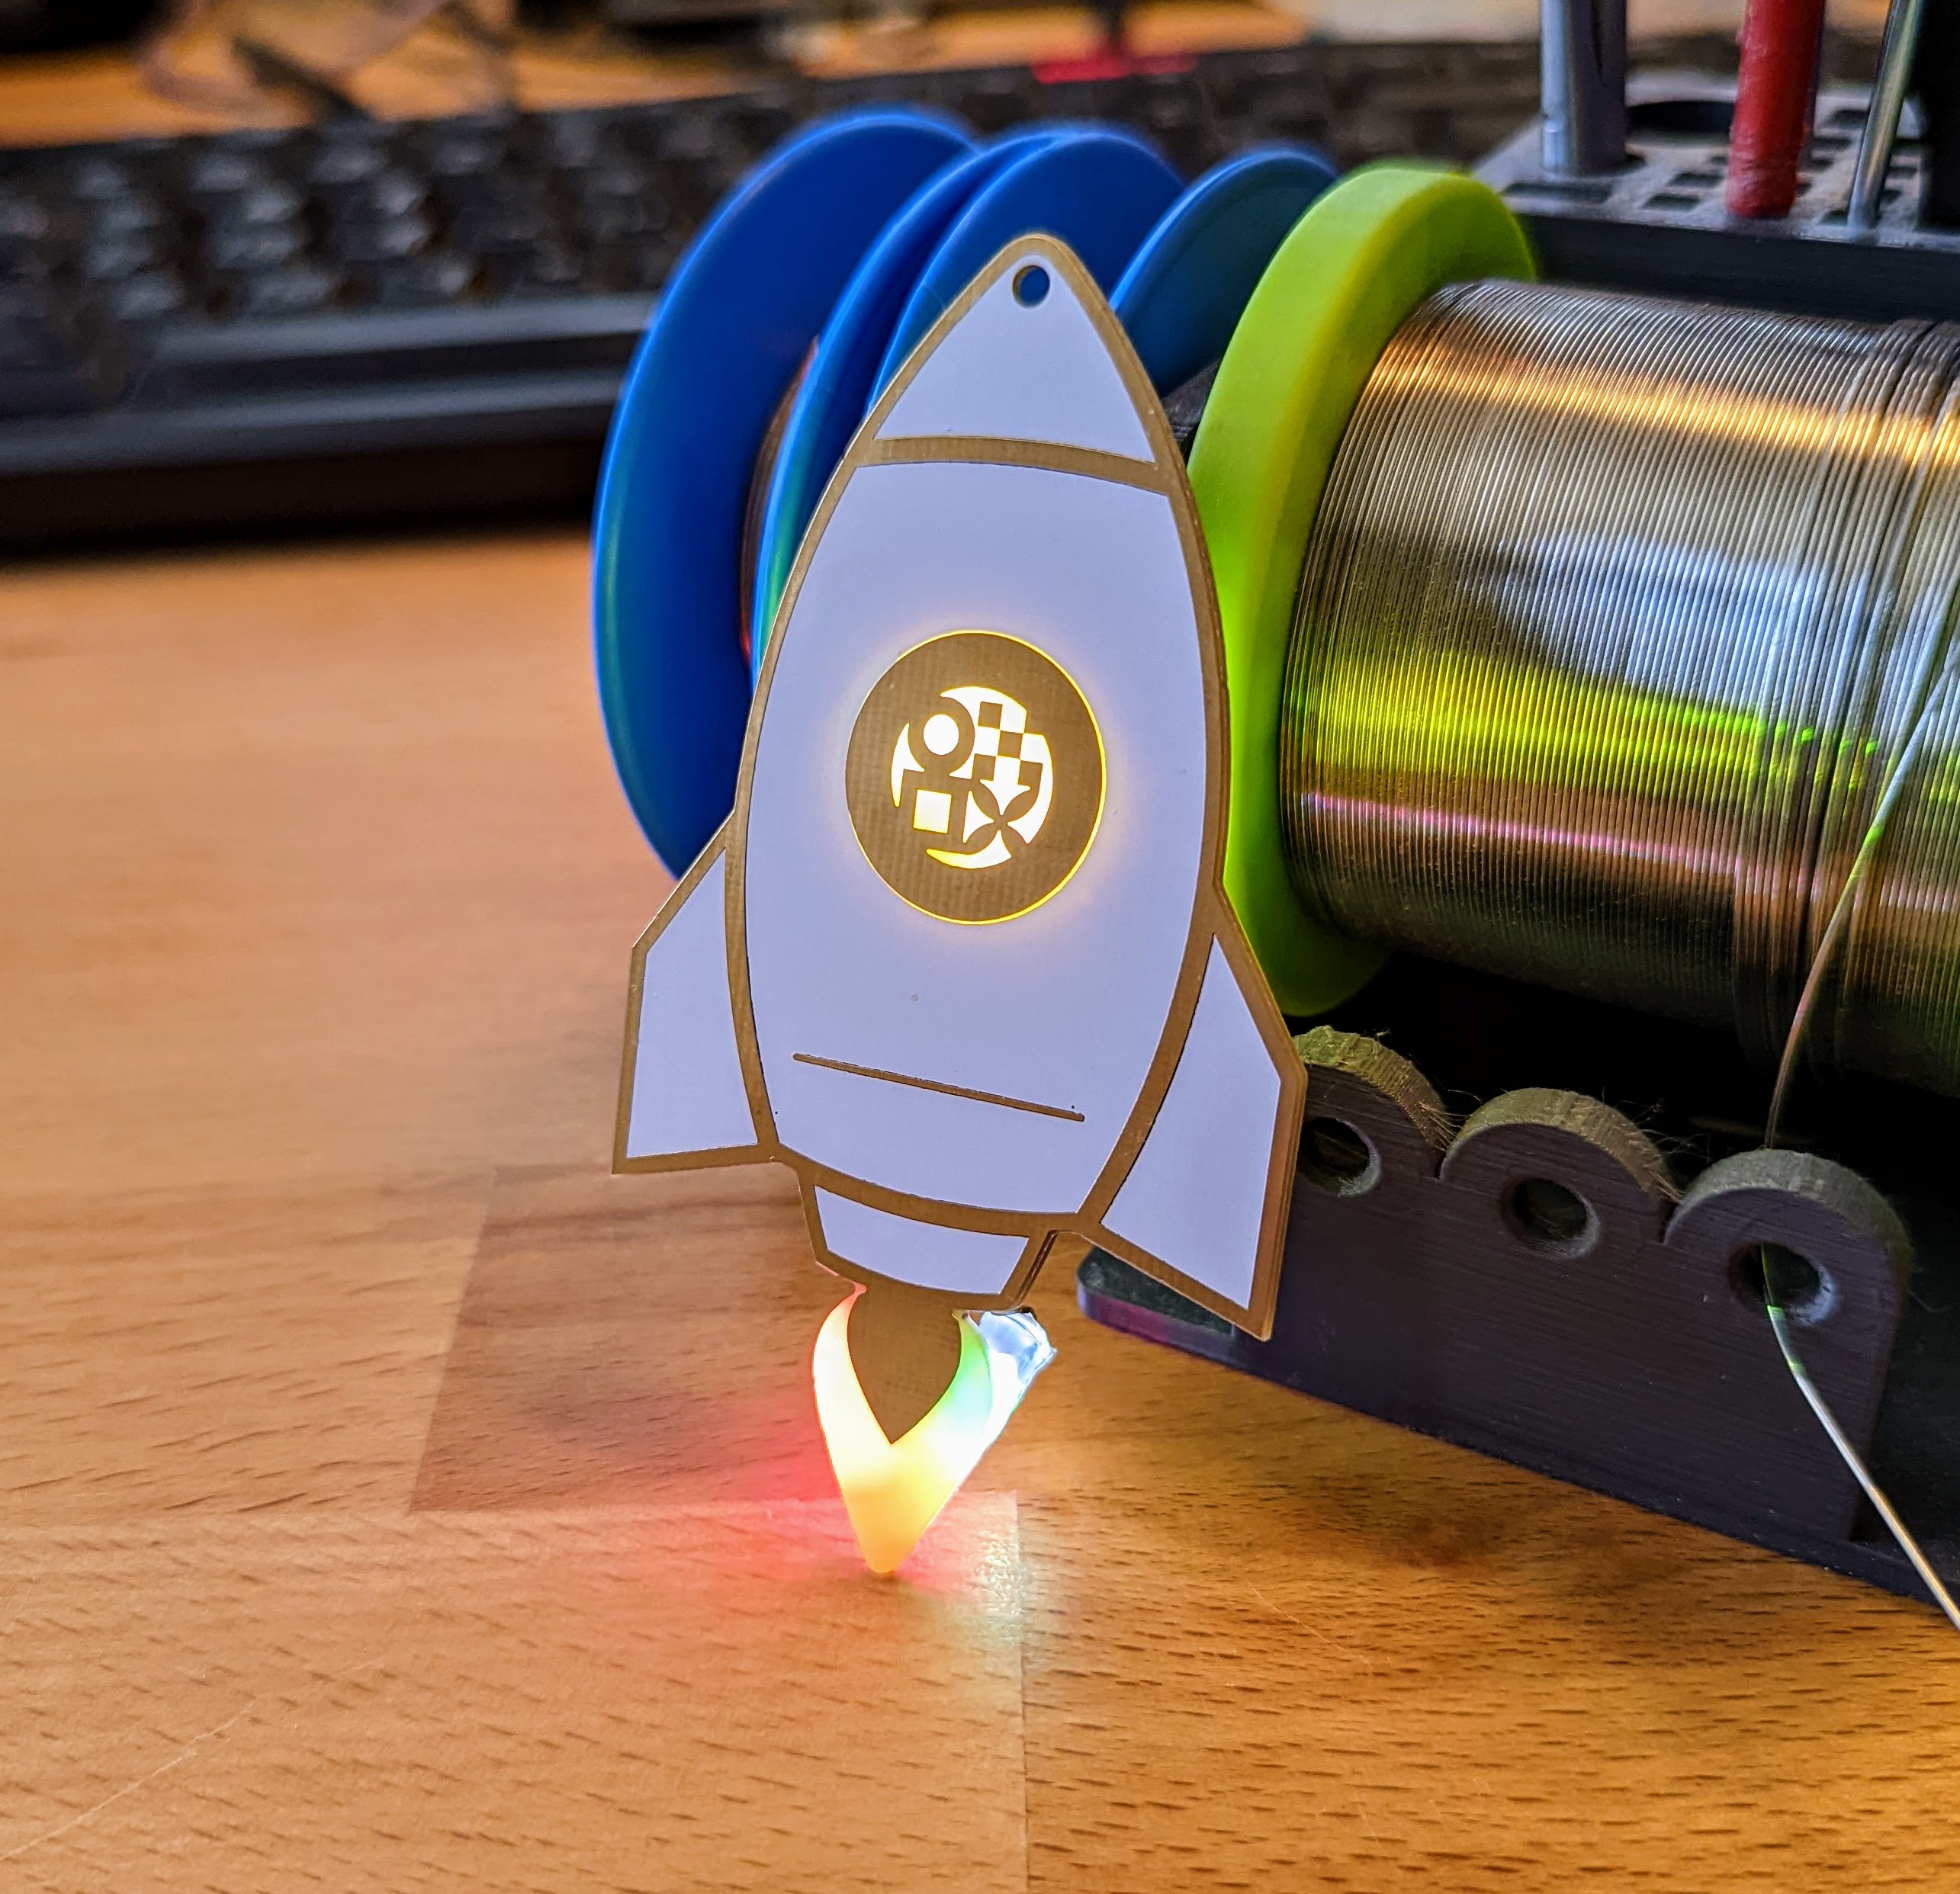
Launch your own rocket! With the MINT-Labs rocket soldering kit you can make a beautiful glowing necklace. Once soldered, the porthole and the exhaust jet, the tail of the rocket will glow in all the colours of the rainbow. The best thing is: with this soldering kit you can easily make a great pin, pendant or necklace even as a beginner. You only have to solder 6 components on the back. For those who already know a bit about soldering: The LEDs are THT, i.e. through-hole components. They are soldered to the surface on the back. We used this trick to avoid having holes on the front. Well, we left one hole to hang the rocket on a keychain or somewhere else. This way, the rocket can shine in all its glory and shine without any flaws.For all those who are not yet that far: don't worry! Detailed and well-tested instructions will guide you through this little soldering adventure.A video of the rainbow colours can be found here: https://www.youtube.com/watch?v=b8JFJ-eYq9o Of course, it looks much better in real life :). The animation here in the pictures is a time-lapse recording.Target groupThe electronic soldering kit is designed for beginners. Adults and children alike can have fun with the unicorn soldering kit, although of course you should not let children solder alone. Relatively large components are used, which make it easy to learn how to solder. Only 6 components need to be soldered. This is also possible for absolute beginners in a reasonable amount of time. And the shape? This is rocket-scienece! It's best to order a kit or two at the same time, because as you can imagine, the rocket or unicorn soldering kit is a popular gift for friends, partners or children.The components in the rocket soldering kitOur kits always contain all the components you need for soldering. Unfortunately, we cannot send you the batteries. However, you can get them from hardware stores and larger supermarkets (more on this below under "Tools and accessories"). The soldering kit includes:The circuit boardThe circuit board is the heart or hull of the rocket. It forms the outline and the place to solder all the components. The board is made of fiberglass material which is coated with a gold alloy. A white coating of varnish is applied on top of it. Some parts of the board are slightly transparent. This creates the great effects on the exhaust jet and the porthole.RGB LEDsThis is where the magic happens! RGB stands for red-green-blue and describes the different colours of the LED. It looks like one LED, but there are 3 tiny little LEDs that slowly change through an integrated circuit. This gives you all the colours of the rainbow. Look closely, the black dot you find in the LED is the entire circuit! Yes really, so tiny! Just connect 3V and the LED lights up in all colours. There are four RGB LEDs in the Rocket soldering kit.The SMD battery holderThe battery holder for CR2032 batteries is included in the kit in an SMD version. It is soldered onto the surface like the other components. How to do this is described in the soldering instructions. We made sure that the SMD battery holder is very easy to solder on. The battery itself is then simply plugged in. The battery lasts for 4-8 hours of continuous operation. So you should switch off your rocket to save some power. You can get more in any well-stocked supermarket, in hardware stores and Swedish furniture stores.A switchOf course, a switch is also included! The switch is easy to operate and therefore ideal for children (and adult hands). The switch locks and stays in the position (on or off) you want the switch to be in. A great perceptible "click" provides haptic and acoustic comfort.Needed toolsHow the minimal soldering workplace looks like is described here: The soldering workplace To make the MINT-Labs rocket glow, you need to get one CR2032 battery per rocket at the hardware store or a big supermarket/shop. Also, a pair of tweezers is very helpful for this kit :) Instructions and helpTo make it easy for you to solder the kit, we have put together detailed instructions with lots of pictures and individual steps for each of our kits. There you will be guided step by step through the assembly and there are many tips and tricks on how to solder correctly. For the majority of our soldering kits there are also interactive circuits with the names of the components and the tracks. All instructions are available in German and English. For environmental reasons we do not print our instructions. In fact, it is better to view them on screen, as you can then zoom into the high-resolution photos to see details. On each kit you will find a QR code or link to the instructions.You can find all the instructions as PDF files at the following link: https://binary-kitchen.github.io/SolderingTutorialJust click on "DE" or "EN" for the relevant kit and you can download a PDF.Who are the MINT-Labs?The MINT-Labs Regensburg e.V. is an association for the promotion of STEM education among children and adults. The rocket is the further development of a rocket of the MINT-Labs. The new version was developed together with them and therefore proudly bears the name of the MINT-Labs. If you're ever in Regensburg, stop by! If you are a hackspace or a MINT organisation: network :)Lovingly packed for you by handAll soldering kits are lovingly packed for you by hand in Germany. Unfortunately, it happens from time to time that a component is packed too much or too little. If something is too much: No problem! Keep the components and use them for your creations! If something is missing: No problem! Just send us an email and we will send you the missing parts.Show us your rocketWe at blinkyparts are super excited to hear what your rocket soldering kit turned out to be. A pin? A hairclip? A pendant? Did you paint the MINT-Labs rocket? A pin for your backpack or something completely different? Share your photo with us atTwitter/Mastodon: #SolderingConnectsInstagram: #LötenVerbindet or follow us under @blinkyparts_comHelp others with your feedbackIt is often difficult to judge whether a soldering kit is something for you. Help others by giving us a rating, a feedback. How did it work? What equipment did you have? What did you like most about it? What makes your rocket special? Just leave a review here on the product page under "Reviews".

€6.99*
Heart THT - A special heart with a very special chip
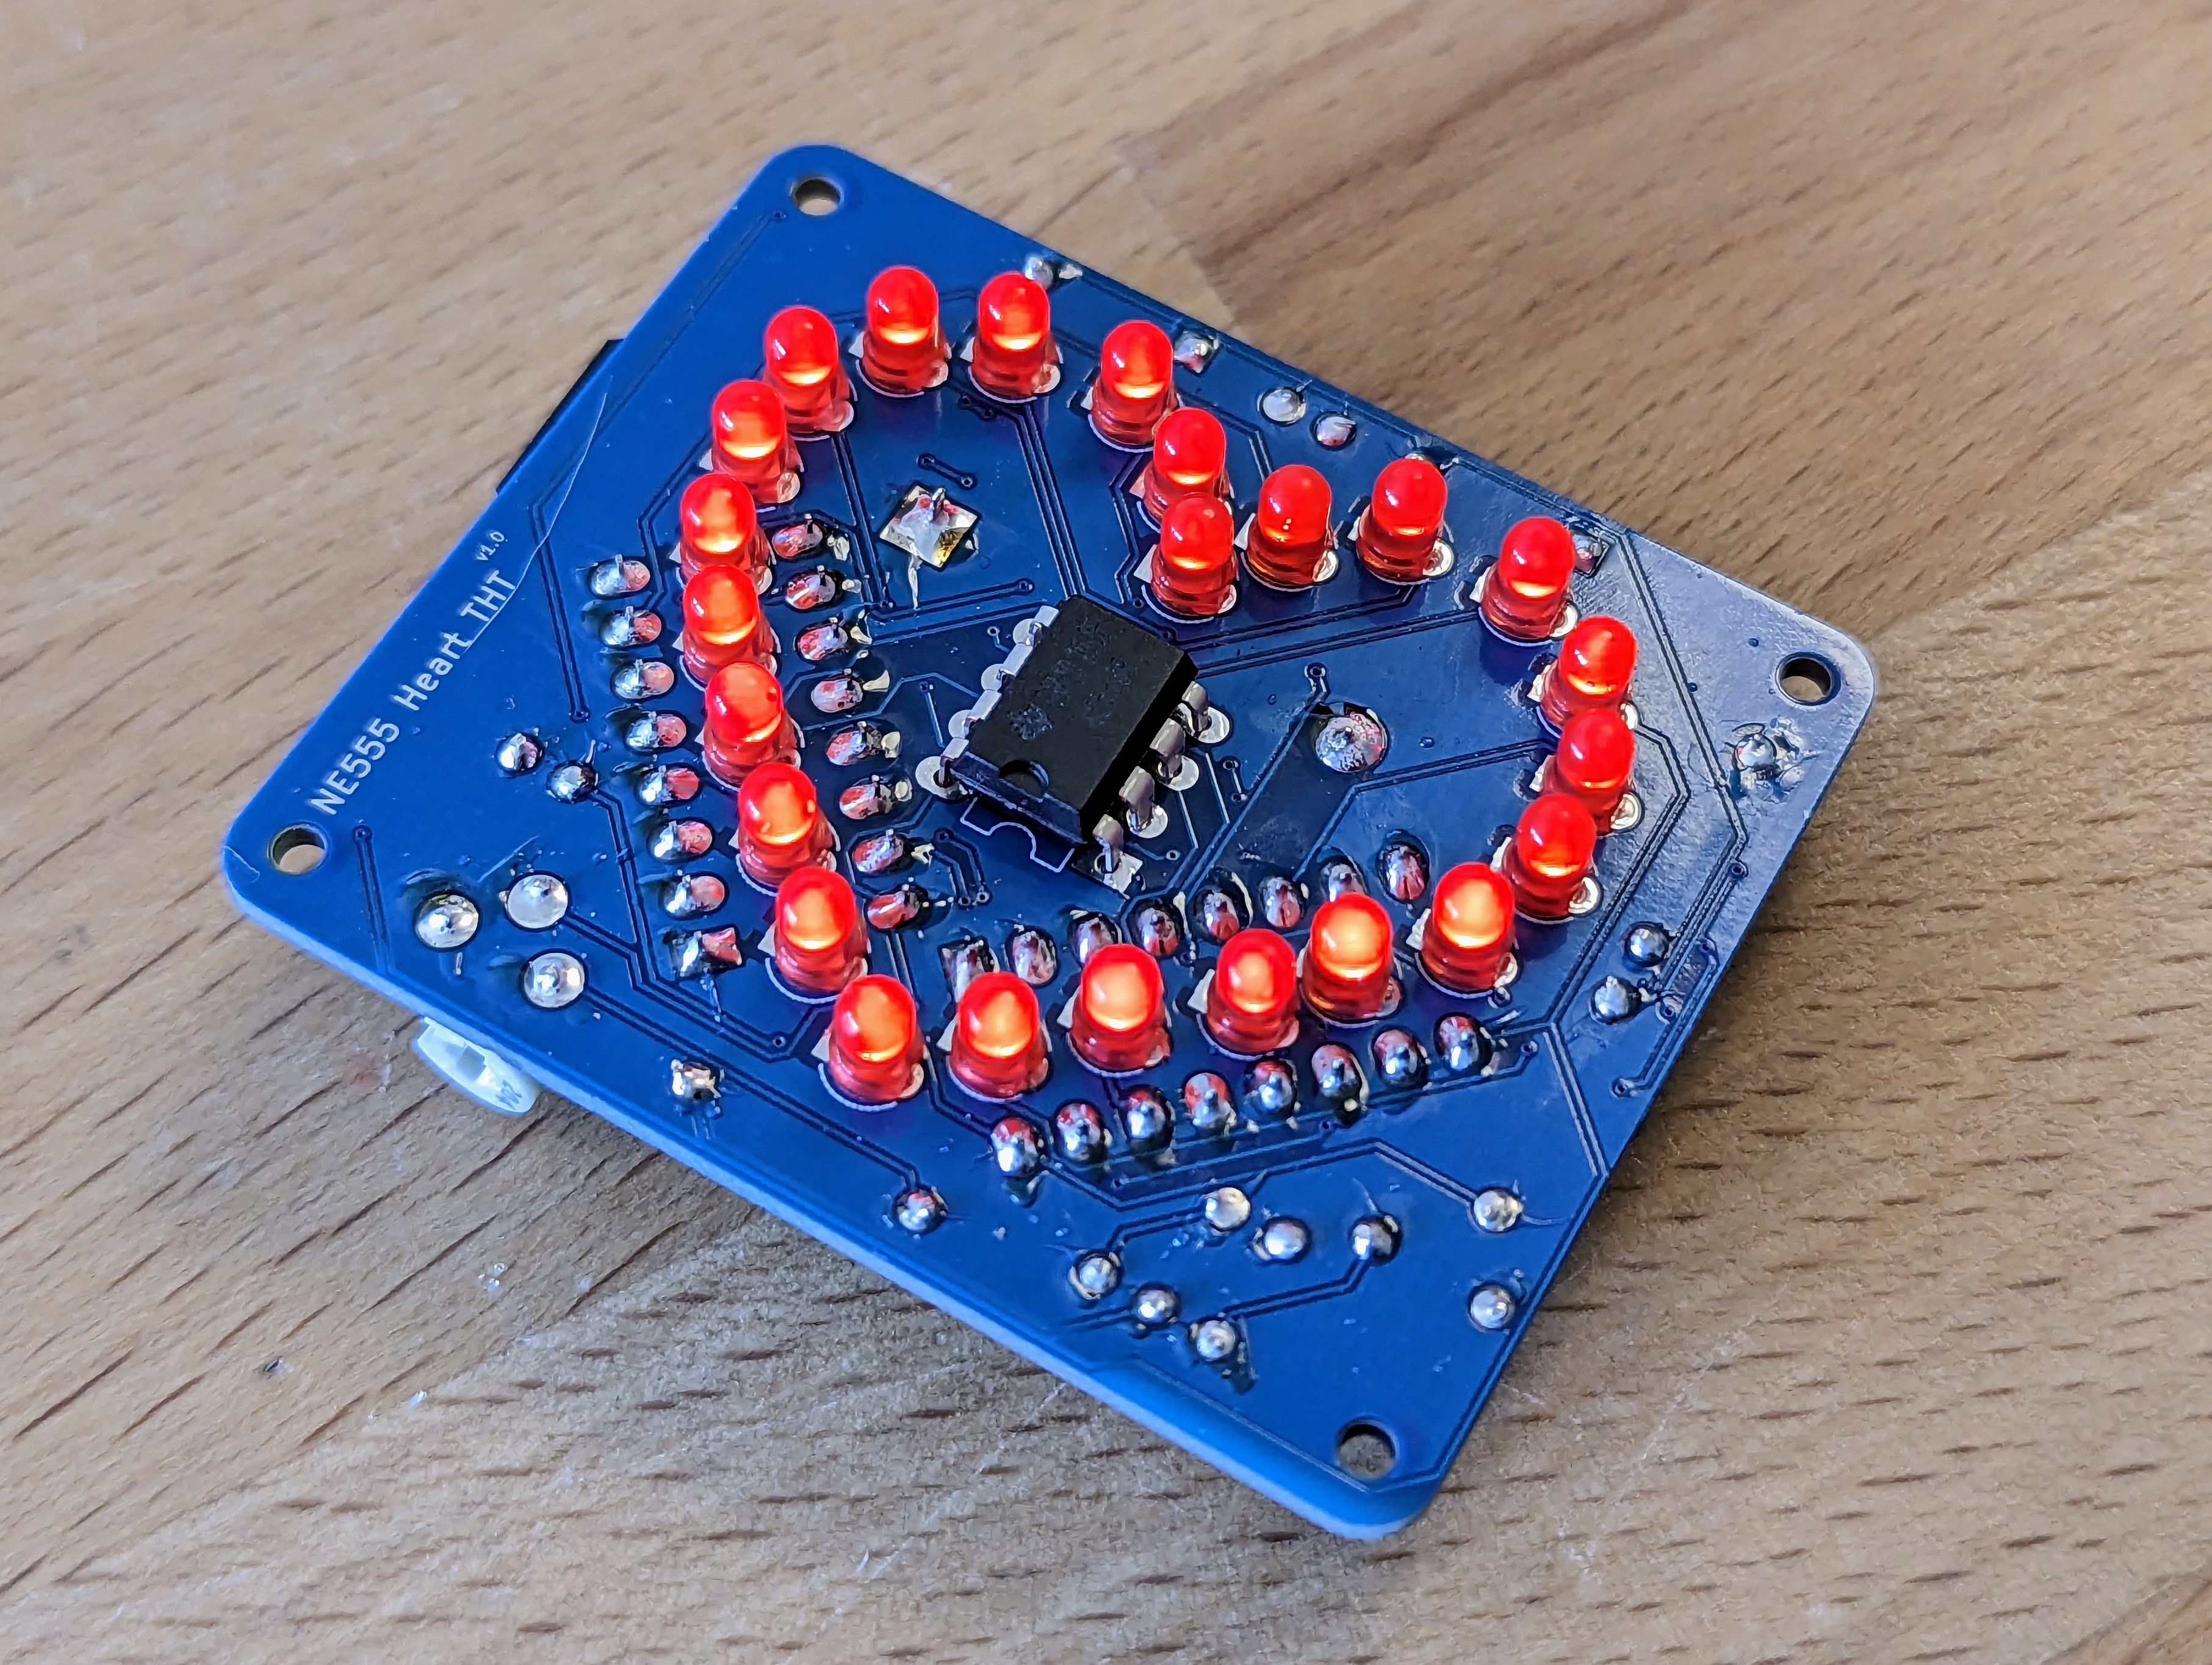
Hearts are always good! And this heart is a homage to a very special chip: the NE555, 50 years old and one of the most widely used chips in the world... Still is!From mobile phones to blinker kits to satellites, this beautiful chip is used everywhere! In this THT heart kit, the chip sits appropriately in the middle on the circuit board and drives the pulse of the heart. The heart itself consists of many red 3mm THT LEDs with a so-called tracking circuit. Two LEDs light up at the same time and follow each other... whether they will ever reach each other? In addition, a switch on the back can be flipped to make the heart glow permanently. Of course, in the chaser version you can set the speed of the chase yourself with a potentiometer. Translated with www.DeepL.com/Translator (free version)The best thing is: With this soldering kit, even beginners can easily solder a heart for themselves or as a gift. There are a few through-hole components to solder, and it looks like a lot of solder joints at first, but the kit is still relatively easy to solder if you follow our good illustrated instructions. You just have to follow a certain order, then soldering is no problem at all!Target groupThe electronic soldering kit is designed for beginners. Adults and children alike can have fun with the THT Heart soldering kit, although you should not let children solder alone. Relatively large components are used, which make it easy to learn how to solder. This is also possible for absolute beginners in a reasonable amount of time. And the shape? Of course, you must have soldered a heart for yourself or your loved ones at some point in your life. It's best to order one or two at the same time, because as you can imagine, the heart is a popular gift for friends, partners or children.The components in the NE555 heart soldering kitOur kits always contain all the components you need for soldering. Unfortunately we cannot send you the batteries. However, you can get them from DIY stores and larger supermarkets (more on this below under "Tools and accessories"). The soldering kit includesThe circuit boardsThe circuit boards are the heart of the kit. They form the outline and the space to solder all the components. The circuit board is made of fibreglass material which is coated with a gold alloy. A multi-coloured lacquer layer is applied on top.The NE555On the board there is one smaller and two larger chips. The smaller chip is an NE555 that acts as a bistable flip-flop to provide the necessary clock. The two CD4017s (the larger chips) then dutifully count through all the LEDs and ensure that they light up.The LEDs and the other chicken foodOn the front side, many red 3mm THT LEDs are put through the board and soldered on. Even when switched off, this gives you a wonderful heart. But as soon as the circuit is powered up and switched on, everyone's eyes get big! Apart from that, there are some switches, slide switches and some chicken feed, i.e. other components.The battery holderWhat would a circuit be without power. Power is provided by a CR2032 battery that is securely fastened in a battery holder. The circuit itself and also the LEDs need relatively little power, so you can run the heart for a very long time with one CR2032.One push switch and several slide switchesOf course, there are also a couple of switches included! The push switch is easy to operate and therefore ideal for children (and adult hands). The switch locks in place and stays in the position (on or off) you want the switch to be in. A great perceptible "click" provides haptic and acoustic comfort. A slide switch sort for continuous lighting or chase LED.Tools neededHow the minimal soldering workstation looks like is described here: Der LötarbeitsplatzTo light up the NE555 heart, you will need to get some batteries from a DIY store or a large supermarket/shop.Also, an electric side cutter is very helpful for this kit :) Instructions and helpTo make it easy for you to solder the kit, we have put together detailed instructions with lots of pictures and individual steps for each of our kits. There you will be guided step by step through the assembly and there are many tips and tricks on how to solder correctly. For the majority of our soldering kits there are also interactive circuits with the names of the components and the tracks. All instructions are available in German and English.For environmental reasons we do not print our instructions. In fact, it is better to view them on screen, as you can then zoom into the high-resolution photos to see details. On each kit you will find a QR code or link to the instructions.You can find all the instructions as PDF files at the following link: https://binary-kitchen.github.io/SolderingTutorialJust click on "DE" or "EN" for the right kit and you can download a PDF.Lovingly packed for you by handAll soldering kits are lovingly packed for you by hand in Germany. Unfortunately, it happens from time to time that a component is packed too much or too little. If something is too much: No problem! Keep the components and use them for your creations! If something is missing: No problem! Just send us an email and we will send you the missing parts.Show us your heart!We at blinkyparts are super excited to find out what your heart soldering kit has become. A pin? A hair clip? Did you give your heart as a present? Share your photo with us atTwitter/Mastodon: #SolderConnectsInstagram: #SolderConnects or follow us on @blinkyparts_comHelp others with your feedbackIt is often difficult to judge whether a soldering kit is something for you. Help others by giving us a rating, a feedback. How did it work? What equipment did you have? What did you like most about it? How is your heart now? Just leave a review here on the product page under "Reviews".

€9.99*
PINECIL Portable Mini Stand
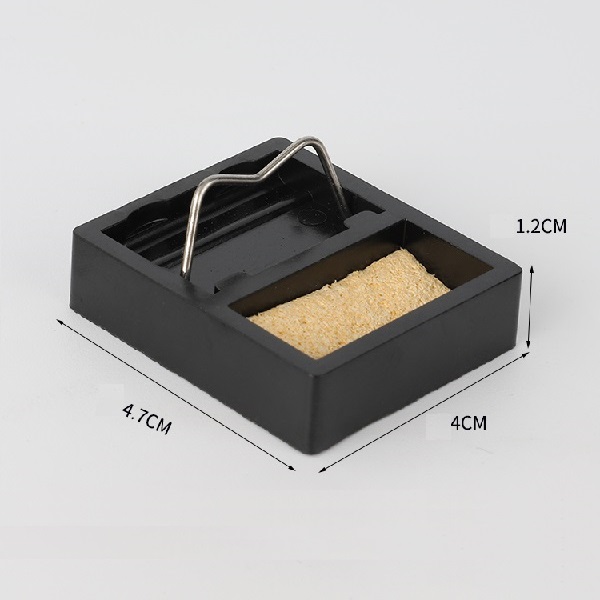
This portalbe mini soldering iron holder is the perfect companion for your Pinecil. It is the original accessory and offers exactly what you want and nothing more. No wasted space or heavy components. Just lightly moisten the sponge. Portable and of high quality Sponge included Material resists high temperatures Dimensions: 47mm x 40mm x 12mm (WxDxH)Weight: 18g

€3.99*
Pinepower - Desktop USB-Power-Station with 120W PD and QC3.0
The Pinecil is a smart, portable mini soldering iron with a 32-bit RISC-V SoC, featuring a slim design, automatic standby mode and heating up to operating temperature in just 6 seconds! The v2 is the improved and further enhanced version and successor to version 1. Dual power inputs: The USB-C port supports both PD (Power Delivery) and QC 3.0 (Quick Charge) and a DC5525 barrel DC jack. Fast warm-up: The soldering iron reaches operating temperature in 6 seconds. Support for on-demand rapid boost function. Adjustable soldering tip temperature from 100° C to 400° C, which can be set via the adjustment buttons and an easy-to-read OLED display. Portable: slim design consisting of a SAE 304 stainless steel core in a polycarbonate housing. Automatic standby mode turns on when not in use to ensure user safety. Technical data Power 88W Temperature range 100-400 °C Heating time ~12 s Tip system activ ESD safe yes Automatic standby yes, time and temperature adjustable Display 0,69'' white OLED monochrome display (96x16p) Processor 32-Bit RV32IMAC RISC-V "SiFive E24 Core" @ 144 MHz Memory 192 KB Flash, 132 KB SRAM Power supply USB-C, DC5525 Dimension 155mm with soldering tip / 103mm without x 12.8mm x 16.2mm Weight 28g with soldering tip and 18g without soldering tip Target Group The soldering iron is the perfect tool ranging between consumer and professional use. The manufacturing is of very high quality. The easily exchangeable tips also make the mini soldering iron flexible to use. However, the price clearly makes it the first soldering iron for a beginner. The Pinecil will definitely be a long-lasting companion for life. The scope of delivery The scope of delivery of the Pinecil v2 is limited to the most important things you need. Of course, the soldering iron itself is included. The latest firmware is already flashed on the Pinecil. There is also a short, pointed soldering tip. The short tip gets hot particularly quickly! A power supply unit or USB cable is not included. Take a look at the accessories in our shop. You need at least a power supply and a cable. Compatible power supplies The hollow plug socket is not protected against polarity reversal! You must make sure that you use a compatible power supply unit. You can find a list from the manufacturer here: https://wiki.pine64.org/wiki/Pinecil_Power_Supplies We recommend only USB-C power supplies with 65W and 20V. (Attention: Many power supplies do not have a real 65W on one port and distribute the power e.g. to two sockets). The original power supply from Pinecil is excellent. Also the power station. Recommended cables It should definitely be a USB-C to USB-C cable. Since it is a soldering iron, a silicone cable is also extremely practical. Silicone cables are heat-resistant and will not break if accidentally touched. Check out our accessories, we have suitable USB cables in stock! Other accessouries There are several other accessories for the Pinecil v2: Mini stand Although you can simply place the Pinecil on its soldering pad, because the tip does not overlap at the front, a small stand with a sponge or metal wool is practical for cleaning the tip. Other tips There are many other tip sizes. From tiny pencil tips to wide wedge tips, all tips can be used. By the way: The Pinecil v1 soldering tips are compatible with the Pinecil v2. Open Source and Community The Pinecil is a community project. This means that many developers have worked together to perfect the piece of hardware and the software. The community has made sure that the components are open source. This means that there is no trade secret about how the soldering irons are constructed. You can simply download the instructions and circuit diagrams from the internet. This has the advantage that a possible repair is also made much easier, since it is clear which components have been used. The community also ensures that the soldering iron corresponds exactly to the wishes and needs of the solderers. A really great piece of hardware. The PINECIL's software is also open source, so it is easy to make adjustments. It is quite easy to create your own temperature curves or programme a specific response. Built-in motion sensors allow the soldering iron to quickly switch between stand-by mode and operating temperature. Differences between v1 and v2 The new version v2 brings a number of new features. Among the most important are: Bluetooth: It is now possible, for example, for a fan control to switch on automatically when the iron is in use. A shorter tip: This makes the soldering iron even easier to hold and it gets hot even faster. Improved power supply: The power supply has been improved and stabilised. Show us your soldering setup We at blinkyparts are super curious to know what your soldering setup looks like? Do you have any other 3D printed parts for the Pinecil? Share your photo with us on Twitter/Mastodon: #SolderingConnects Instagram: #LötenVerbindet or follow us under @blinkyparts_com Help others with your feedback It's often hard to know which soldering iron is for you. Help others by giving us a rating, a feedback. How did it work? What other equipment did you have? What did you like most about it? What makes the Pinecil special? Just leave a review here on the product page under "Reviews".

€73.99*
Daisy RGB - Show everyone your favourite flower in rainbow colours
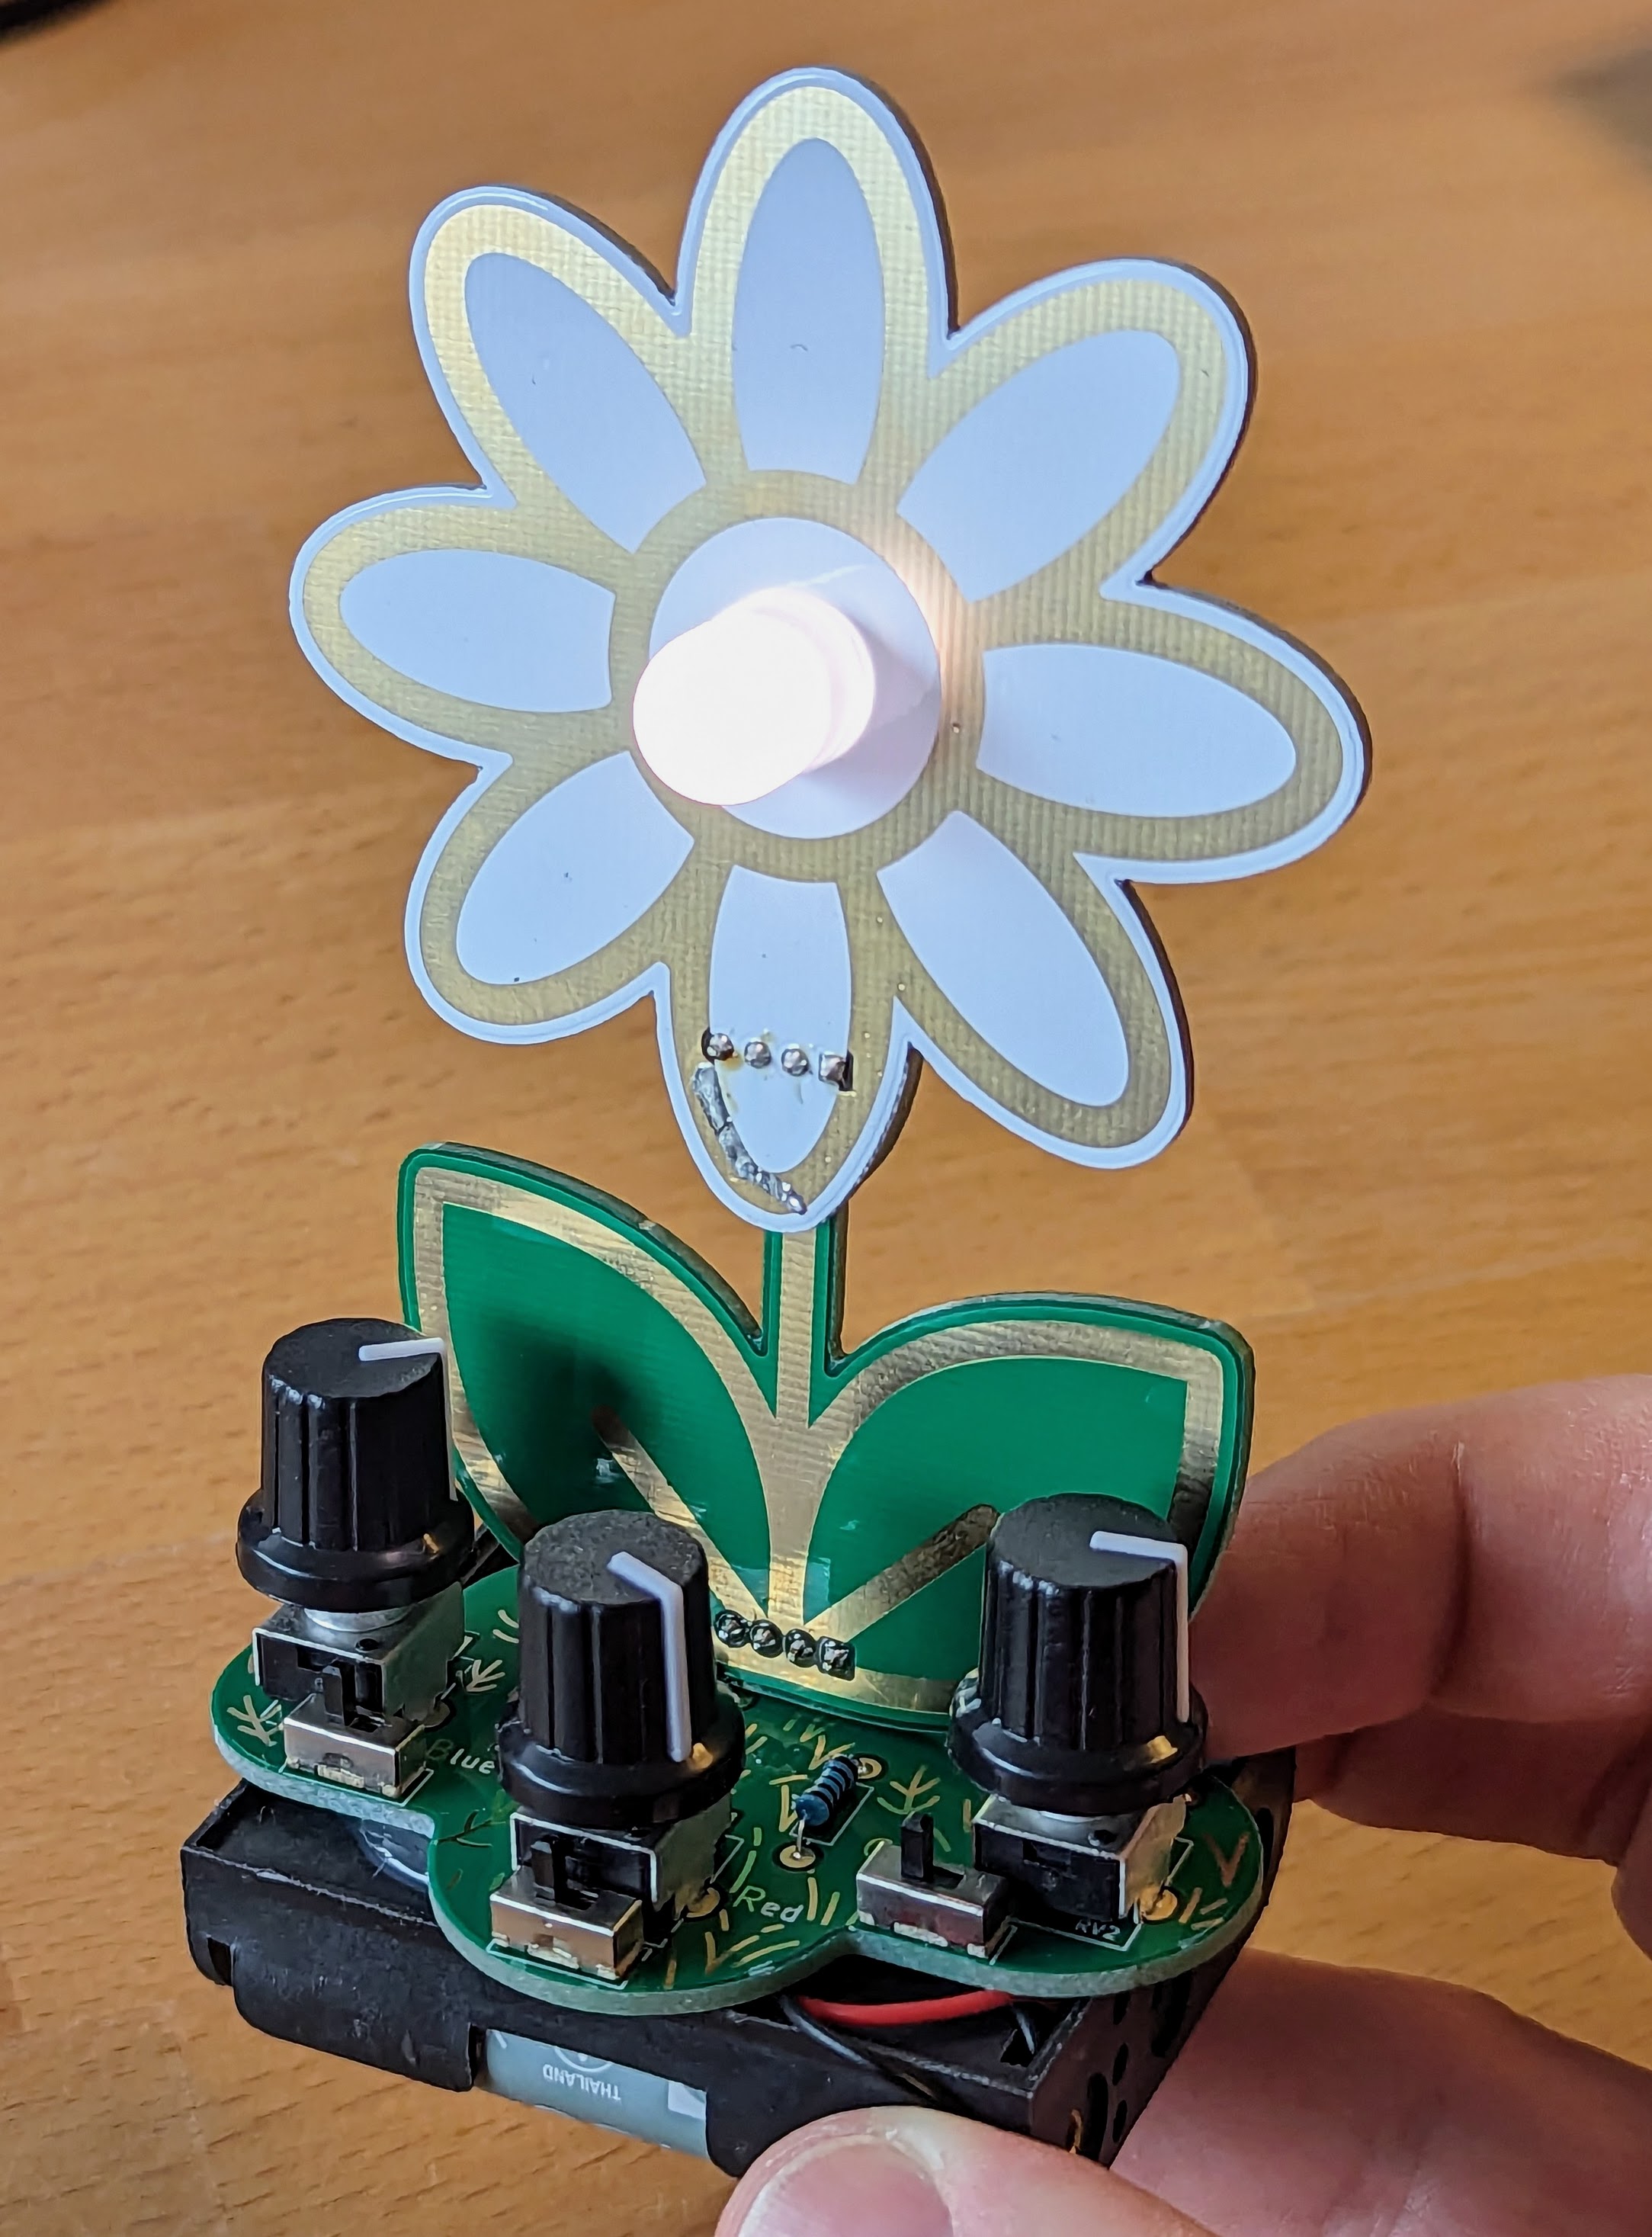
With this great 3D kit you can solder your very own daisy. The best thing about it: There is a super large RGB LED in the middle of the flower. Unlike our unicorns and rockets, you can set the colour yourself. The intensity of the colours red, blue and green can be adjusted with three large variable resistors, so-called potentiometers. Depending on the mixture, you can create your own personal favourite colour.Another potentiometer on the back can be used to adjust the overall brightness. In addition, you can switch off the individual colours to 100% via slide switches and, for example, mix only two colours.Another potentiometer on the back can be used to adjust the overall brightness. In addition, you can switch off the individual colours to 100% via slide switches and, for example, mix only two colours.For all those who are not yet that advanced: never mind! Detailed and well-tested instructions will guide you through this little soldering adventure.Target GroupThe electronic soldering kit is designed for beginners. Adults and children alike can have fun with the Daisy soldering kit, although of course you should not let children solder alone. Relatively large components are used which make it easy to learn how to solder. This is also possible for absolute beginners in a reasonable amount of time. And the shape? Who is not a fan of flowers? :) It's best to order one or two of these at the same time, because as you can imagine, the flower soldering kit is a popular gift for friends, partners or children.The Components in the Daisy Soldering kitIn our kits you will always find all the components you need for soldering. Unfortunately we cannot send you the batteries. However, you can get them from DIY stores and larger supermarkets (more on this below under "Tools and accessories"). The soldering kit includes:The Circuit BoardsThe circuit boards are the heart of the kit. They form the outline and the space to solder all the components. The circuit board is made of fibreglass material which is coated with a gold alloy. A multi-coloured lacquer layer is applied on top. The special thing about the daisy: The circuit boards are arranged in such a way that a 3D flower is created.RGB LEDThis is where the magic happens! RGB stands for red-green-blue and describes the different colours of the LED. It looks like an LED, but there are 3 tiny little LEDs that can change colour through the circuitry on the main board. This gives you all the colours of the rainbow.The Battery HolderThe battery holder for 3xAA or Mignon batteries is included in the kit. It is soldered to the main board like the other components. How to do this is described in the soldering instructions. The battery itself is then simply plugged in. The batteries last a relatively long time. Use rechargeable batteries and you can recharge them at any time. The batteries are located under the main board, so your daisy soldering kit has a great solid base.A Push Switch and Several Slide SwitchesOf course there are also a few switches included! The push switch is easy to operate and therefore ideal for children (and adult hands). The switch locks in place and stays in the position (on or off) you want the switch to be in. A great perceptible "click" provides haptic and acoustic comfort. The three slide switches at the potentiometers activate or deactivate the respective colour.PotentiometerThere are also various adjustable resistors on the circuit board. These change the circuit and provide different bright colours. This way, all the rainbow colours come together. There are also three fixed resistors as series resistors to prevent your circuit from breaking.Tools neededWhat the minimum soldering workstation looks like is described here: Der LötarbeitsplatzTo make the flower light up, you need to get some batteries from a DIY store or a large supermarket/shop. Also, an electric side cutter is very helpful for this kit :) Instructions and HelpTo make it easy for you to solder the kit, we have put together detailed instructions with lots of pictures and individual steps for each of our kits. There you will be guided step by step through the assembly and there are many tips and tricks on how to solder correctly. For the majority of our soldering kits there are also interactive circuits with the names of the components and the tracks. All instructions are available in German and English.For environmental reasons we do not print our instructions. In fact, it is better to view them on screen, as you can then zoom into the high-resolution photos to see details. On each kit you will find a QR code or link to the instructions.You can find all the instructions as PDF files at the following link: https://binary-kitchen.github.io/SolderingTutorialJust click on "DE" or "EN" for the right kit and you can download a PDF.Lovingly Packed for You by HandAll soldering kits are lovingly packed for you by hand in Germany. Unfortunately, it happens from time to time that a component is packed too much or too little. If something is too much: No problem! Keep the components and use them for your creations! If something is missing: No problem! Just send us an email and we will send you the missing parts.Show us your FlowerWe at blinkyparts are super excited to hear what your daisy soldering kit turned out to be. A pin? A hair clip? Did you paint your flower? Share your photo with us onTwitter/Mastodon: #LötenVerbindetInstagram: #SolderingConnects oder follow us at @blinkyparts_comHelp Others with your FeedbackIt is often difficult to judge whether a soldering kit is something for you. Help others by giving us a rating, a feedback. How did it work? What equipment did you have? What did you like most about it? How is your flower doing now? Just leave a review here on the product page under "Reviews".

€9.99*
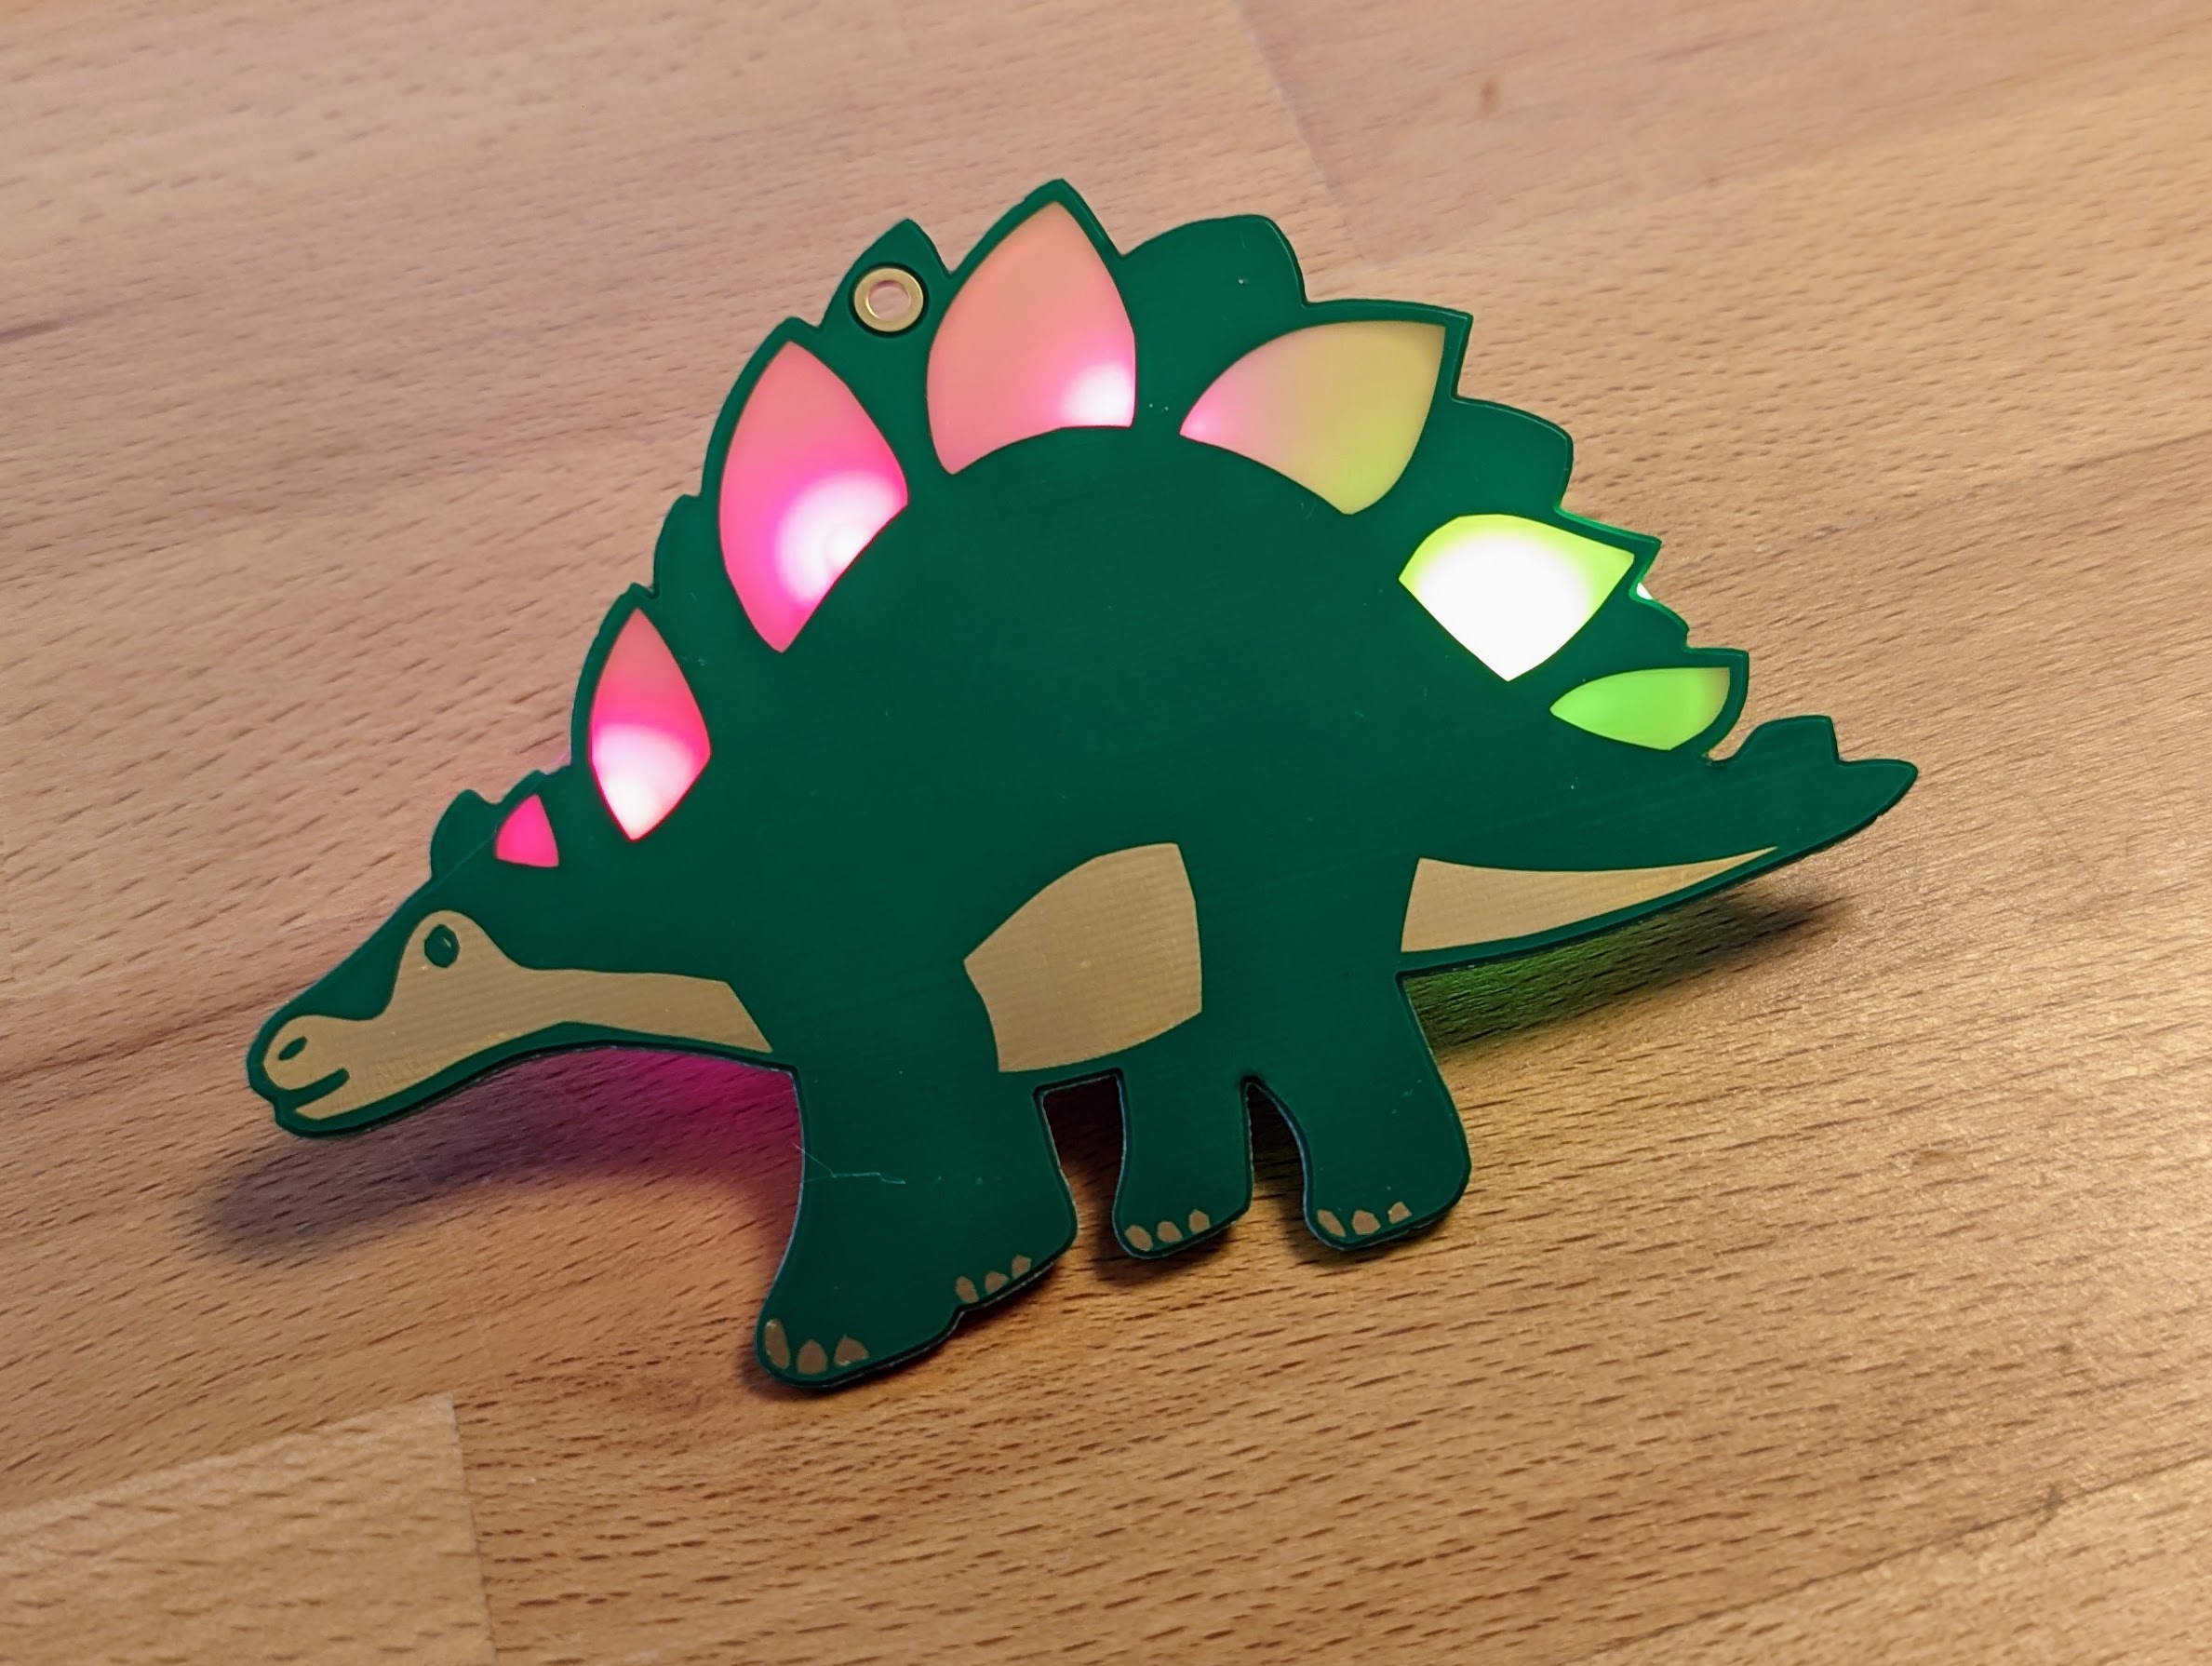
Dino - From a time long gone, this soldering kit glows in all the colours of the rainbow
From a time long gone, this friendly dino greets us with his rainbow scales on his back. kunkelkunst, Taxxizz and x70b1 (yes, those are all their nicknames) have designed and created this great soldering kit. There are four LEDs on the back that make the scales glow in all the colours of the rainbow. The best thing is: with this soldering kit you can easily make a great pin, pendant or necklace even as a beginner. You only have to solder 6 components on the back. For those who already know a bit about soldering: The LEDs are THT, i.e. through-hole components. They are soldered to the surface on the back. We used this trick to avoid having holes on the front. Well, we left one hole to hang the dinosaur on a keychain or somewhere else. This way, the RGB dino can shine in all its glory and shine without any flaws.For all those who are not yet that far: don't worry! Detailed and well-tested instructions will guide you through this little soldering adventure.A video of the rainbow colours can be found here: https://www.youtube.com/watch?v=b8JFJ-eYq9o Of course, it looks much better in real life :). The animation here in the pictures is a time-lapse recording. In the video you'll see another soldering kit, but the dino is at least so colourfull as the other soldering kit!Target groupThe electronic soldering kit is designed for beginners. Adults and children alike can have fun with the dinosaur soldering kit, although of course you should not let children solder alone. Relatively large components are used, which make it easy to learn how to solder. Only 6 components need to be soldered. This is also possible for absolute beginners in a reasonable amount of time. And the shape? Who does not like dinosaurs? It's best to order a kit or two at the same time, because as you can imagine, the dino, rocket or unicorn soldering kit is a popular gift for friends, partners or children.The components in the dino soldering kitOur kits always contain all the components you need for soldering. Unfortunately, we cannot send you the batteries. However, you can get them from hardware stores and larger supermarkets (more on this below under "Tools and accessories"). The soldering kit includes:The circuit boardThe circuit board is the heart or the body of the dinosaur. It forms the outline and the place to solder all the components. The board is made of fiberglass material which is coated with a gold alloy. A white coating of varnish is applied on top of it. Some parts of the board are slightly transparent. This creates the great effects on the back scales of the dino.RGB LEDsThis is where the magic happens! RGB stands for red-green-blue and describes the different colours of the LED. It looks like one LED, but there are 3 tiny little LEDs that slowly change through an integrated circuit. This gives you all the colours of the rainbow. Look closely, the black dot you find in the LED is the entire circuit! Yes really, so tiny! Just connect 3V and the LED lights up in all colours. There are four RGB LEDs in the Rocket soldering kit.The SMD battery holderThe battery holder for CR2032 batteries is included in the kit in an SMD version. It is soldered onto the surface like the other components. How to do this is described in the soldering instructions. We made sure that the SMD battery holder is very easy to solder on. The battery itself is then simply plugged in. The battery lasts for 4-8 hours of continuous operation. So you should switch off your dino to save some power. You can get more in any well-stocked supermarket, in hardware stores and Swedish furniture stores.A switchOf course, a switch is also included! The switch is easy to operate and therefore ideal for children (and adult hands). The switch locks and stays in the position (on or off) you want the switch to be in. A great perceptible "click" provides haptic and acoustic comfort.Needed toolsHow the minimal soldering workplace looks like is described here: The soldering workplace To make the dinosaur soldering kit glow, you need to get one CR2032 battery per rocket at the hardware store or a big supermarket/shop. Also, a pair of tweezers is very helpful for this kit :) Instructions and helpTo make it easy for you to solder the kit, we have put together detailed instructions with lots of pictures and individual steps for each of our kits. There you will be guided step by step through the assembly and there are many tips and tricks on how to solder correctly. For the majority of our soldering kits there are also interactive circuits with the names of the components and the tracks. All instructions are available in German and English. For environmental reasons we do not print our instructions. In fact, it is better to view them on screen, as you can then zoom into the high-resolution photos to see details. On each kit you will find a QR code or link to the instructions.You can find all the instructions as PDF files at the following link: https://binary-kitchen.github.io/SolderingTutorialJust click on "DE" or "EN" for the relevant kit and you can download a PDF.Lovingly packed for you by handAll soldering kits are lovingly packed for you by hand in Germany. Unfortunately, it happens from time to time that a component is packed too much or too little. If something is too much: No problem! Keep the components and use them for your creations! If something is missing: No problem! Just send us an email and we will send you the missing parts.Show us your dinoWe at blinkyparts are super excited to hear what your dino soldering kit turned out to be. A pin? A hairclip? A pendant? A pin for your backpack or something completely different? Share your photo with us atTwitter/Mastodon: #SolderingConnectsInstagram: #LötenVerbindet or follow us under @blinkyparts_comHelp others with your feedbackIt is often difficult to judge whether a soldering kit is something for you. Help others by giving us a rating, a feedback. How did it work? What equipment did you have? What did you like most about it? What makes your dinosaur special? Just leave a review here on the product page under "Reviews".

€6.99*
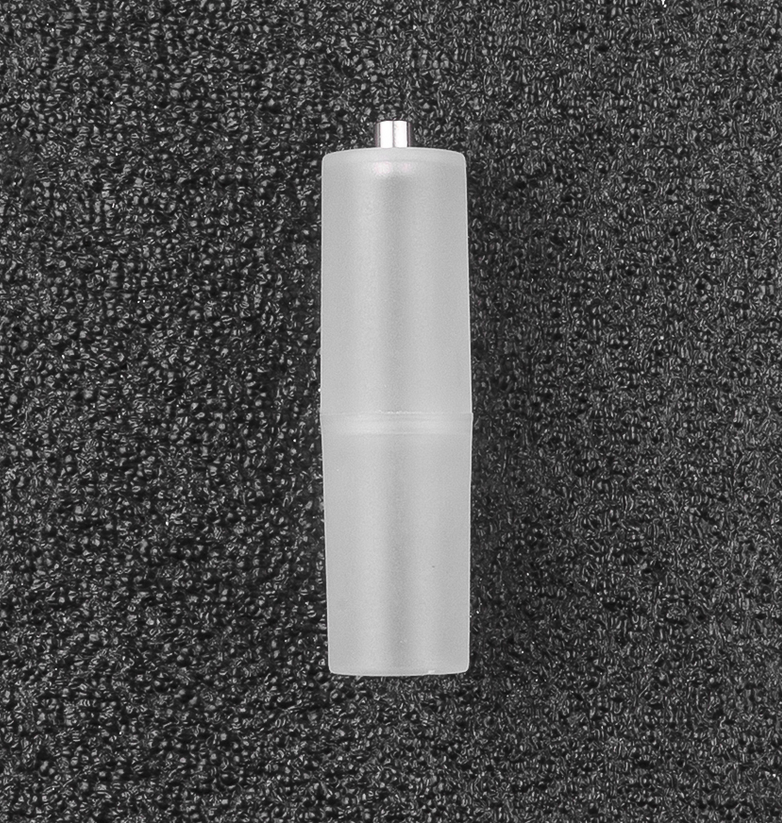
3x battery adapter from AAA (micro battery) to AA (mignon battery)
Many have asked for this and finally it is available from us: A simple plastic adapter from AAA (micro battery) to AA (mignon battery). Simply take a small AAA battery and put the plastic part over it. That's it: you have a battery in AA format. This is especially useful for our OwlThief, so that you can also suck out empty AAA batteries! Of course, rechargeable batteries also fit: Micro LR03 MN2400 Mignon R6 MN1500 LR6 rechargeable battery. 3 pieces are included in the delivery. The delivery does not include batteries. You will receive 3 adapters. We have different colours, but you will probably get transparent ones.

€1.99*
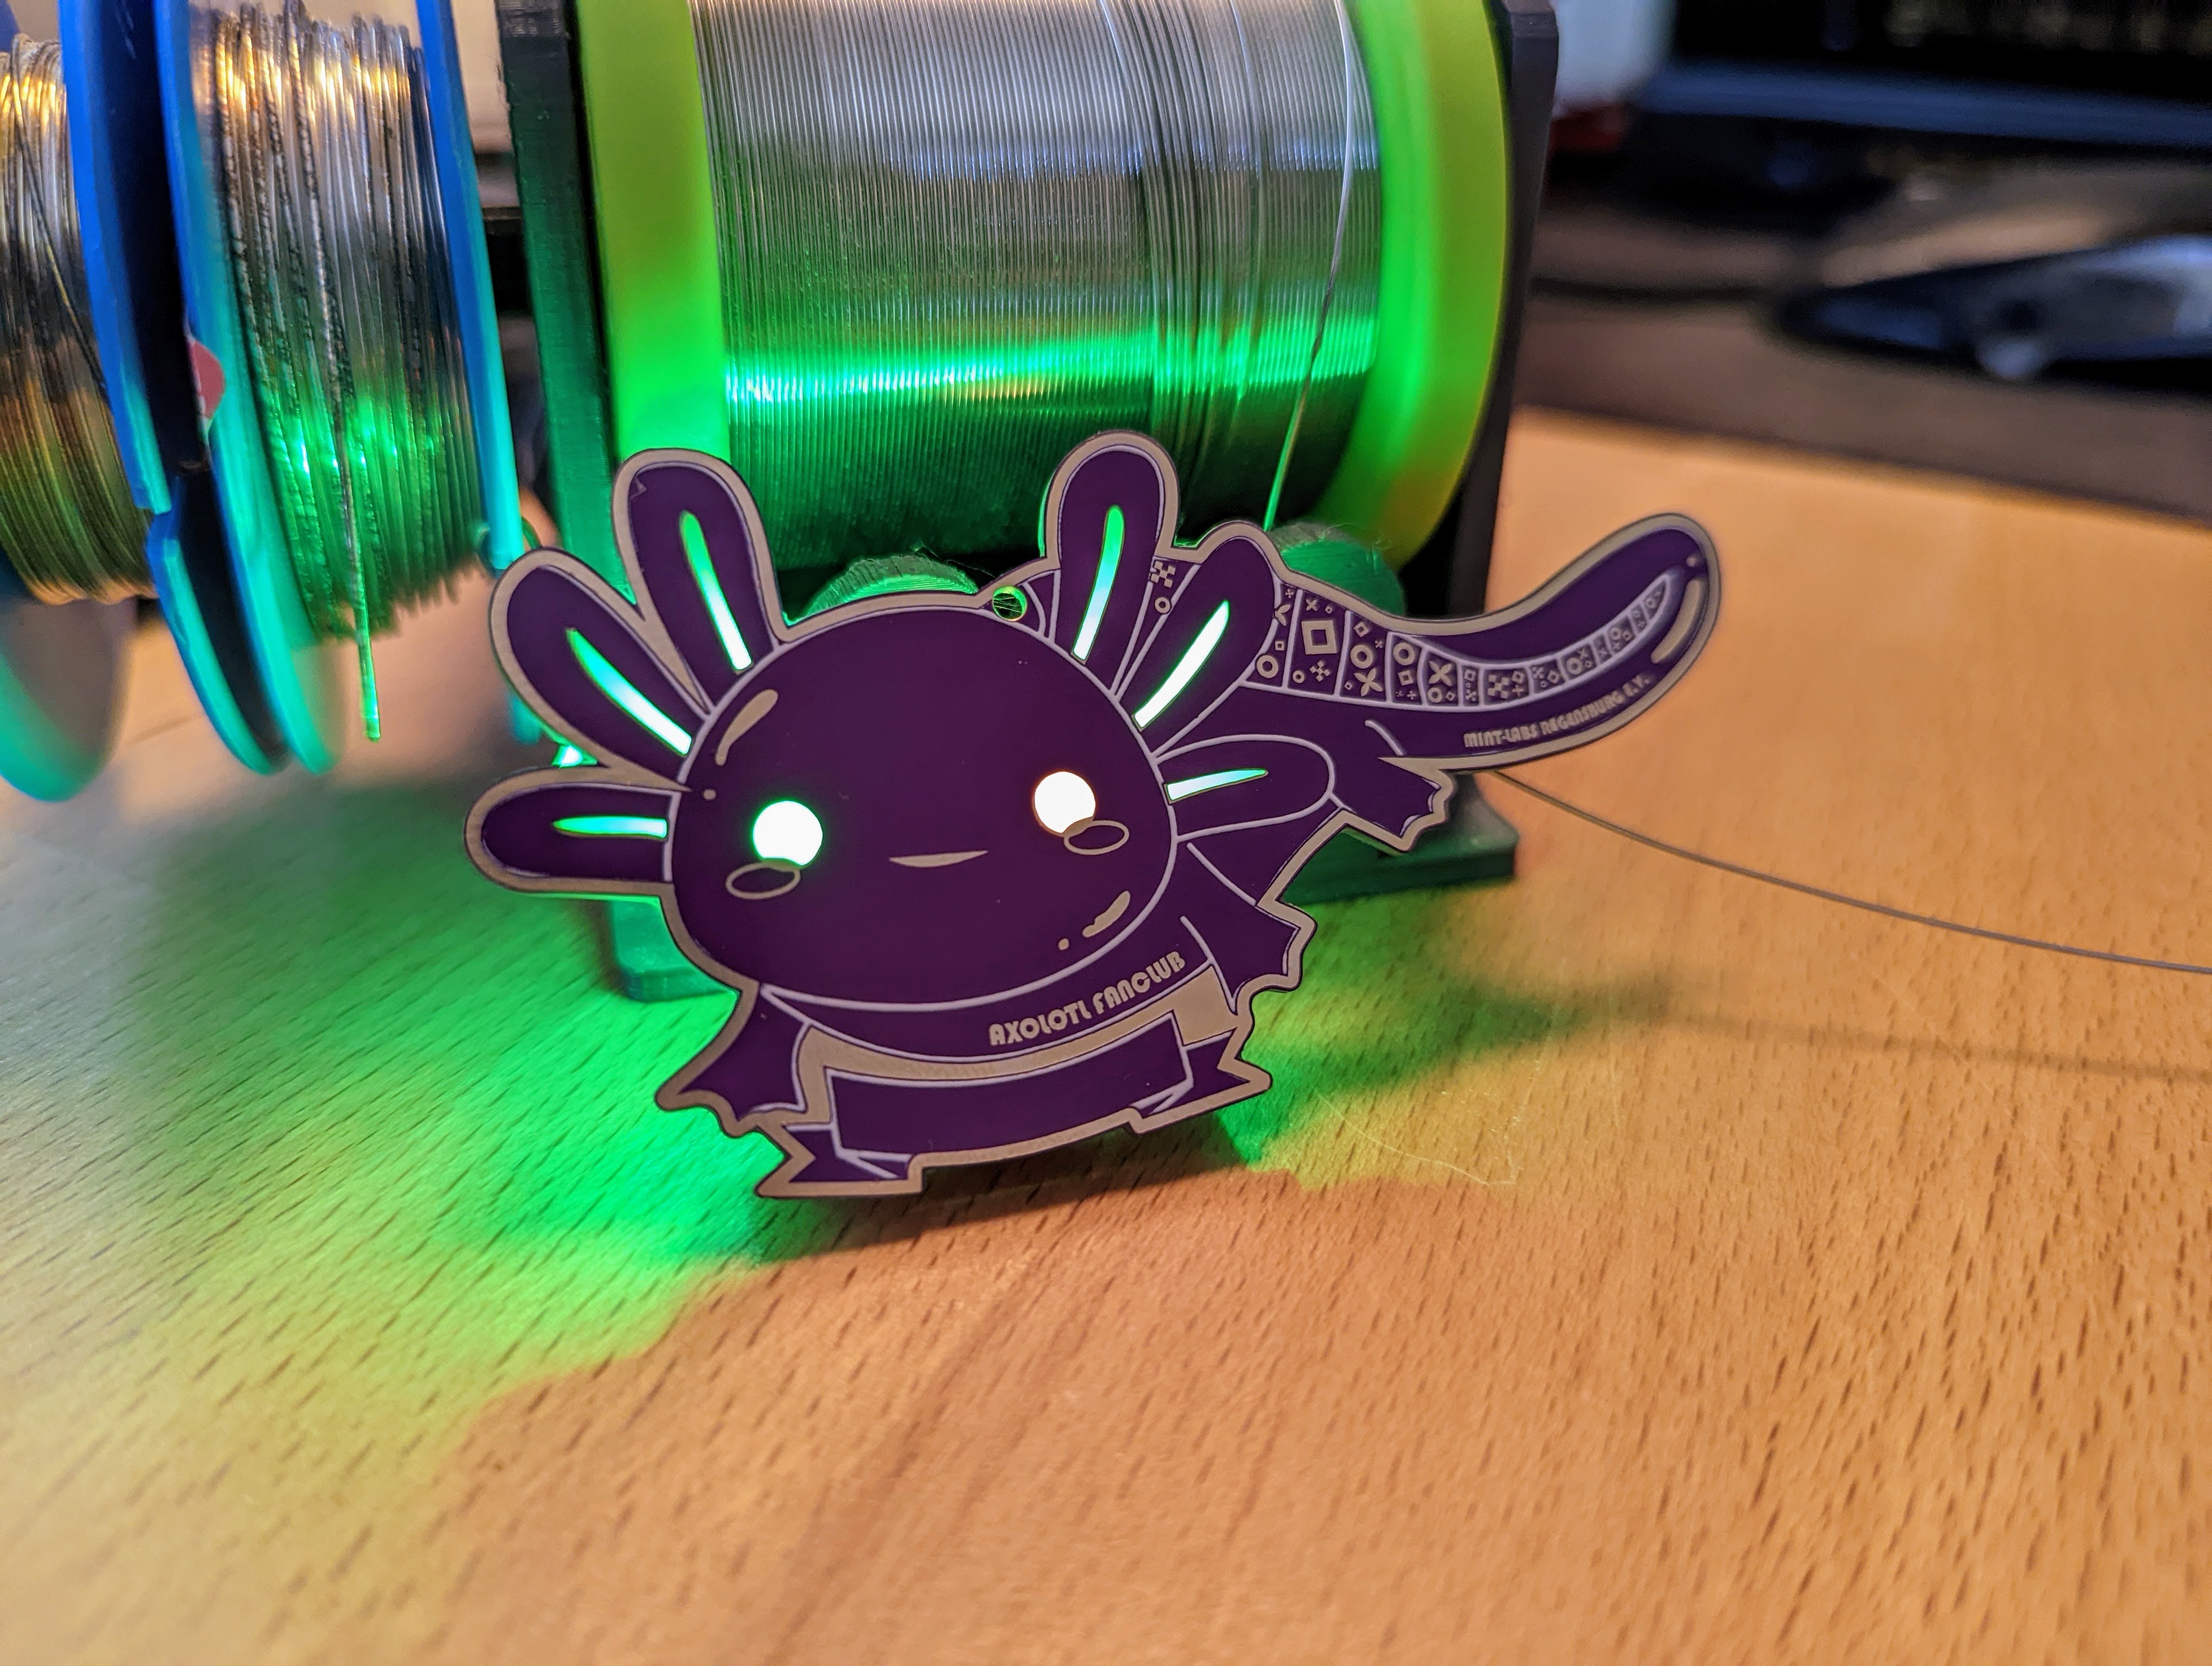
Axolotl Fan Club Badge - A badge for absolute Axolotl fans!
How cool are axolotls? If you're as big a fan as we are, or want to become one, then this badge is just the thing for you. When you have finished soldering the Axolotl soldering kit, the eyes and gills of your Axolotl will glow in all the colors of the rainbow. The best thing is: with this soldering kit you can easily make a great pin, pendant or necklace even as a beginner. You only have to solder 6 components on the back. For those who already know a bit about soldering: The LEDs are THT, i.e. through-hole components. They are soldered to the surface on the back. We used this trick to avoid having holes on the front. Well, we left one hole to hang the axolotl on a keychain or somewhere else. This way, the axo can shine in all its glory and shine without any flaws.For all those who are not yet that far: don't worry! Detailed and well-tested instructions will guide you through this little soldering adventure.You can find a video of the rainbow colours here: https://youtu.be/xomhgZGvNyQ In the video we show you the front and back of the Axolotl soldering kit. You also get an impression of the animation of the LEDs. In the picture gallery you will also find an animated picture. The animation is normally much slower. The gif is a time-lapse recording.Target groupThe electronic soldering kit is designed for beginners. Adults and children alike can have fun with the unicorn soldering kit, although of course you should not let children solder alone. Relatively large components are used, which make it easy to learn how to solder. Only 6 components need to be soldered. This is also possible for absolute beginners in a reasonable amount of time. And the shape? Axolotl fan club is the best! It's best to order a kit or two at the same time, because as you can imagine, the rocket or unicorn soldering kit is a popular gift for friends, partners or children.The components in the axolotl soldering kitOur kits always contain all the components you need for soldering. Unfortunately, we cannot send you the batteries. However, you can get them from hardware stores and larger supermarkets (more on this below under "Tools and accessories"). The soldering kit includes:The circuit boardThe circuit board is the heart of our axolotl. It forms the outline and the place to solder all the components. The board is made of fiberglass material which is coated with a gold alloy. A white coating of varnish is applied on top of it. Some parts of the board are slightly transparent. This creates the great effects on the exhaust jet and the porthole.RGB LEDsThis is where the magic happens! RGB stands for red-green-blue and describes the different colours of the LED. It looks like one LED, but there are 3 tiny little LEDs that slowly change through an integrated circuit. This gives you all the colours of the rainbow. Look closely, the black dot you find in the LED is the entire circuit! Yes really, so tiny! Just connect 3V and the LED lights up in all colours. There are four RGB LEDs in the Rocket soldering kit.The SMD battery holderThe battery holder for CR2032 batteries is included in the kit in an SMD version. It is soldered onto the surface like the other components. How to do this is described in the soldering instructions. We made sure that the SMD battery holder is very easy to solder on. The battery itself is then simply plugged in. The battery lasts for 4-8 hours of continuous operation. So you should switch off your rocket to save some power. You can get more in any well-stocked supermarket, in hardware stores and Swedish furniture stores.A switchOf course, a switch is also included! The switch is easy to operate and therefore ideal for children (and adult hands). The switch locks and stays in the position (on or off) you want the switch to be in. A great perceptible "click" provides haptic and acoustic comfort.Needed toolsHow the minimal soldering workplace looks like is described here: The soldering workplace To make the MINT-Labs rocket glow, you need to get one CR2032 battery per rocket at the hardware store or a big supermarket/shop. Also, a pair of tweezers is very helpful for this kit :) Instructions and helpTo make it easy for you to solder the kit, we have put together detailed instructions with lots of pictures and individual steps for each of our kits. There you will be guided step by step through the assembly and there are many tips and tricks on how to solder correctly. For the majority of our soldering kits there are also interactive circuits with the names of the components and the tracks. All instructions are available in German and English. For environmental reasons we do not print our instructions. In fact, it is better to view them on screen, as you can then zoom into the high-resolution photos to see details. On each kit you will find a QR code or link to the instructions.You can find all the instructions as PDF files at the following link: https://binary-kitchen.github.io/SolderingTutorialJust click on "DE" or "EN" for the relevant kit and you can download a PDF.Who are the MINT-Labs?The MINT-Labs Regensburg e.V. is an association for the promotion of STEM education among children and adults. The axolotl is a speical badge for the axo fanclub. The axolotl was developed together with them and therefore proudly bears the name of the MINT-Labs. If you're ever in Regensburg, stop by! If you are a hackspace or a MINT organisation: network :)Lovingly packed for you by handAll soldering kits are lovingly packed for you by hand in Germany. Unfortunately, it happens from time to time that a component is packed too much or too little. If something is too much: No problem! Keep the components and use them for your creations! If something is missing: No problem! Just send us an email and we will send you the missing parts.Show us your axolotlWe at blinkyparts are super excited to hear what your axolotl soldering kit turned out to be. A pin? A hairclip? A pendant? Did you paint the MINT-Labs axolotl? A pin for your backpack or something completely different? Share your photo with us atTwitter/Mastodon: #SolderingConnectsInstagram: #LötenVerbindet or follow us under @blinkyparts_comHelp others with your feedbackIt is often difficult to judge whether a soldering kit is something for you. Help others by giving us a rating, a feedback. How did it work? What equipment did you have? What did you like most about it? What makes you the best axolotl fan? Just leave a review here on the product page under "Reviews".

€6.99*
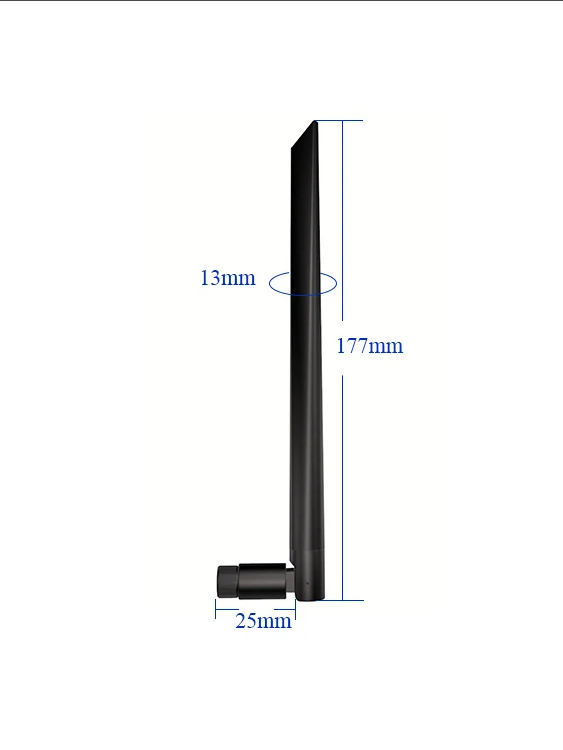
2.4 GHz antenna - Ebyte TX2400-JKD-20 with SMA connector
TX2400-JKD-20 is a bendable 2.4 GHz rubber antenna. The height of the antenna is 200 mm. With an SMA-J connector (SMA female thread and internal needle), it can be used for broadband communication systems, WLAN, mobile devices with a frequency of 2.4 GHz such as routers, AP, radio, smart TV, etc.The antenna is compatible with the Ebyte radio module NRF24L01 E01-ML01DP5, however the antenna is not suitable for the OpenDTU housing.Technical Data Frequency: 2.4 GHz Bandwidth: 2.4 - 2.5 GHz Gain: 5.0 dBi SWR (standing wave ratio): ≤ 1,5 Polarisation: vertical Direction of radiation: omnidirectional Input impedance: 50 Ohm Power capacity: 20 W Material: TPE-E Operating temperature: -40 °C ~ +85 °C Plug connection: SMA-J (SMA internal thread with internal needle) Dimensions: Length 200 mm; diameter 13 mm Colour: black Weight: 17.3 g

€4.99*
Wooden parts for crafting and for your creativity
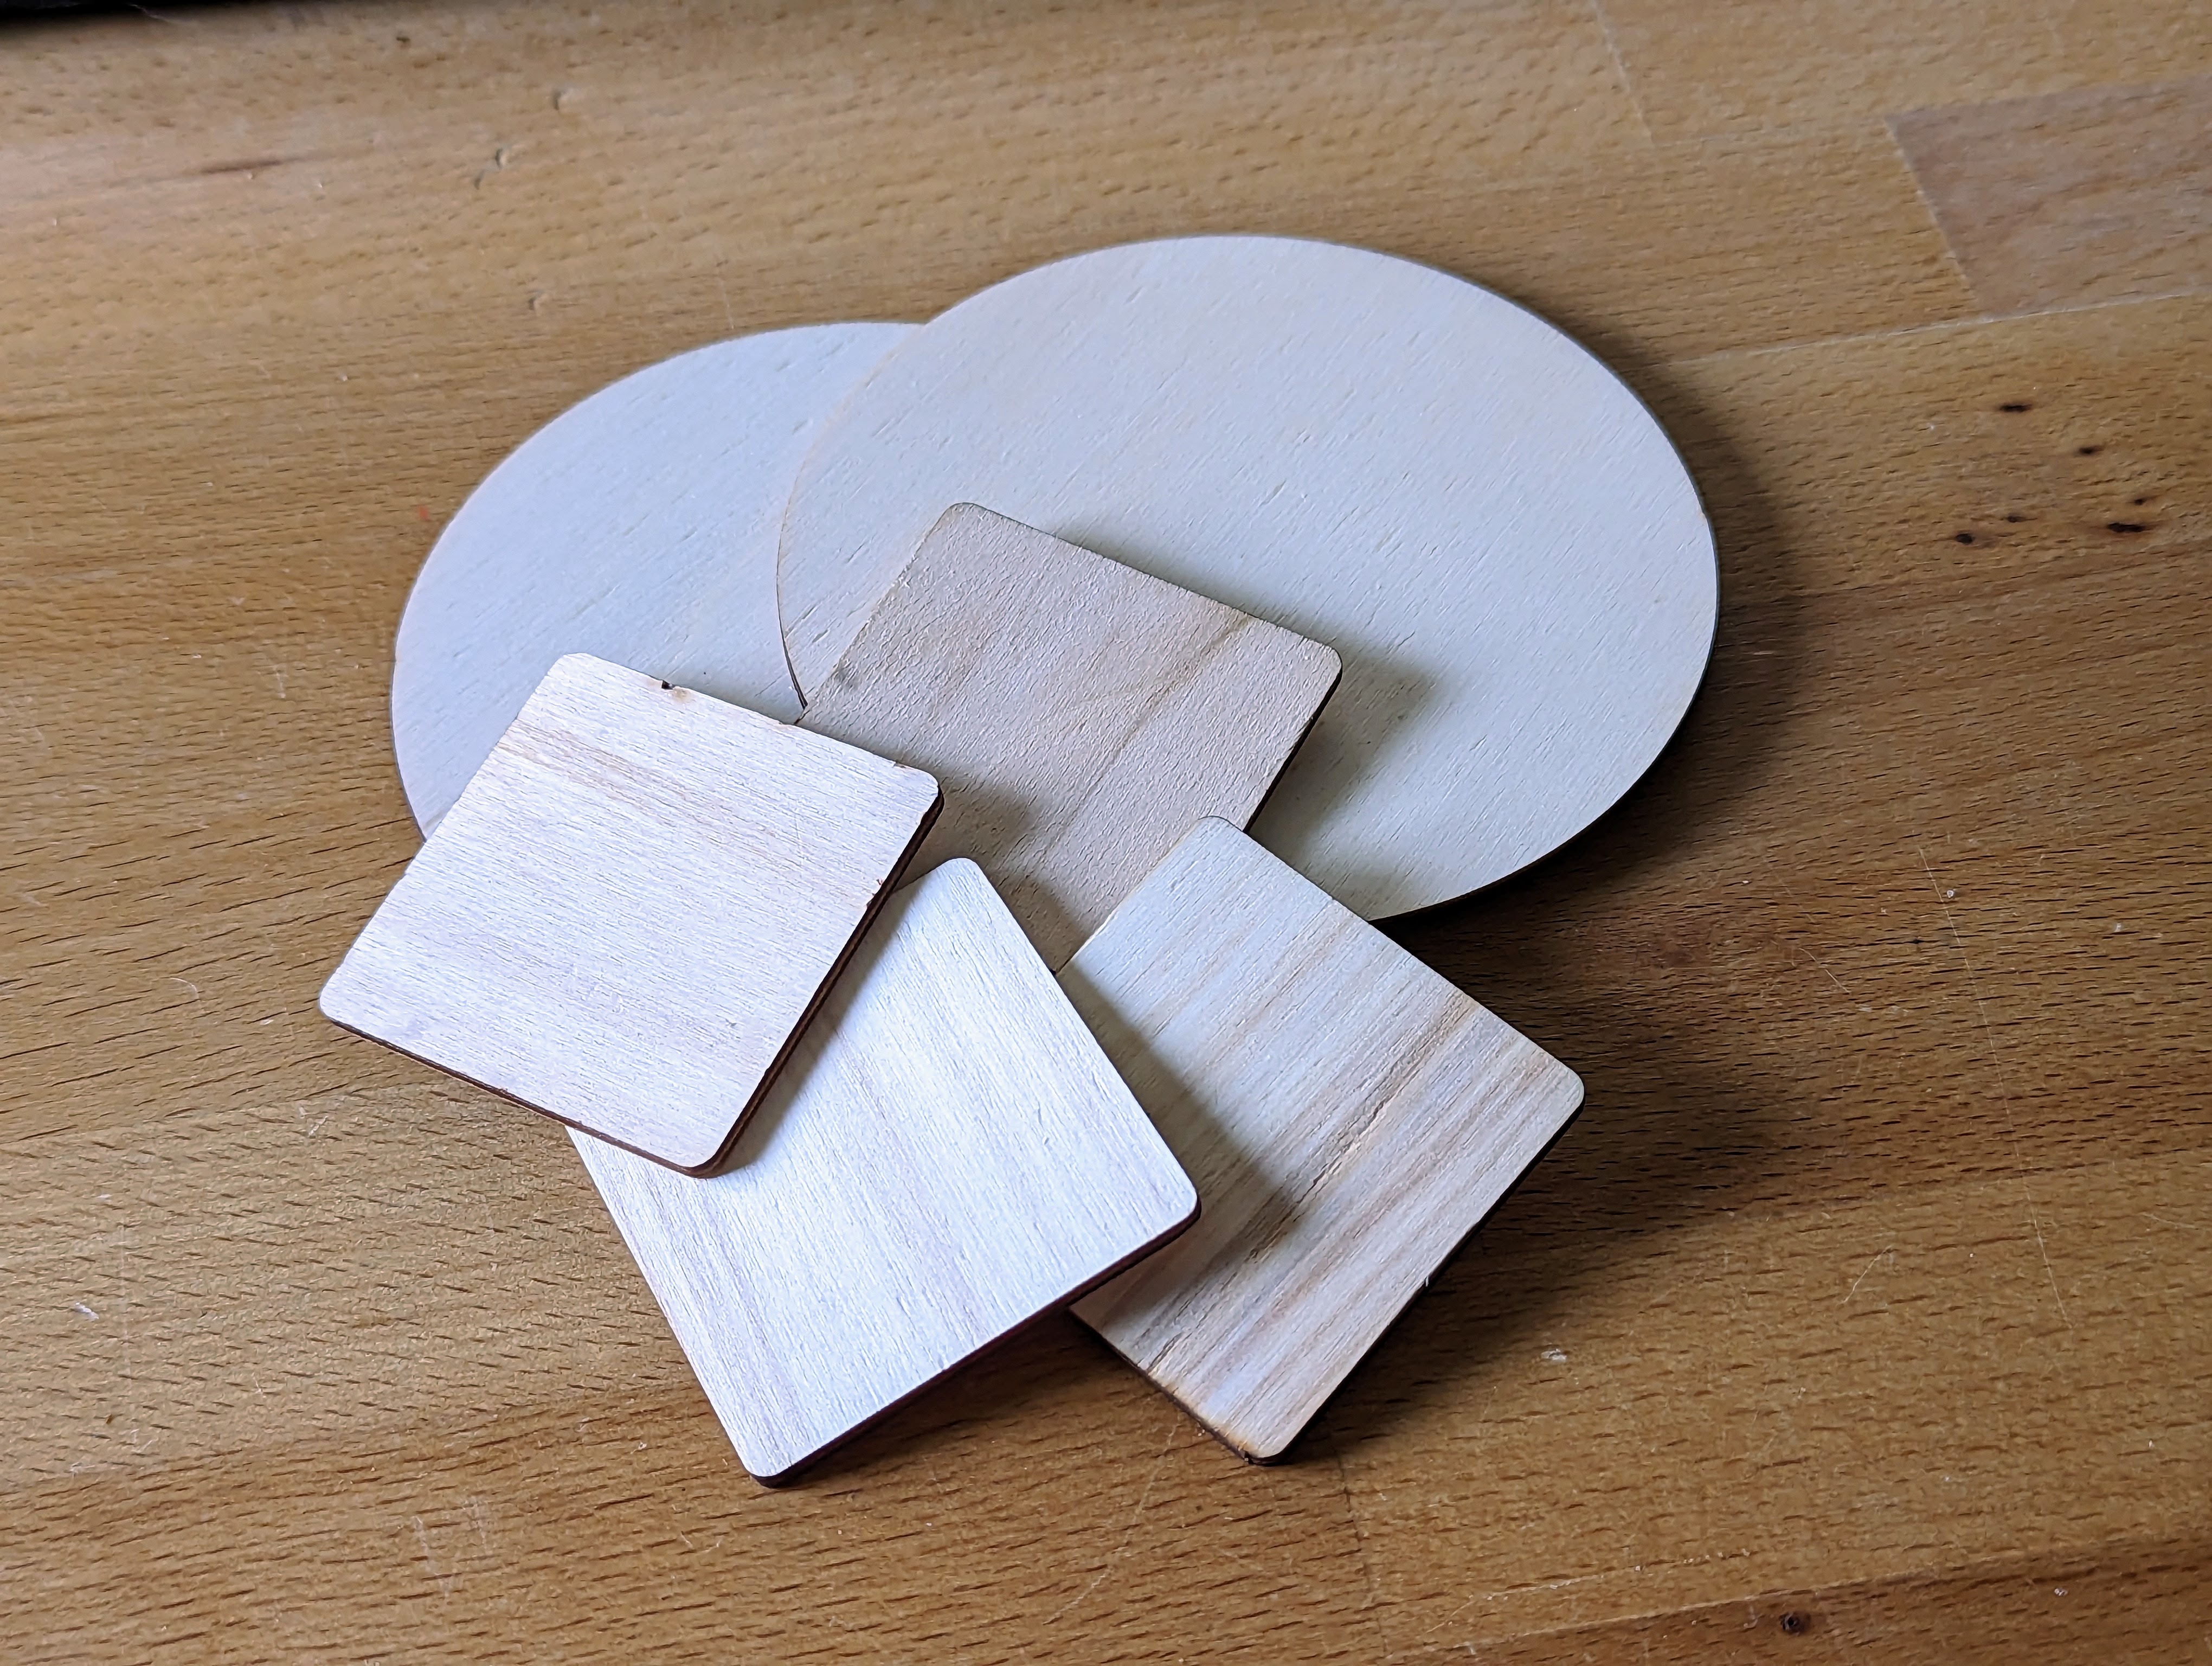
When we laser our Humos, there are always a few pieces of wood left over. We don't know what to do with them, but I'm sure you have an idea! Use the boards for handicrafts, as signs or burn a nice picture into them. Maybe just paint them? Get creative and show us what you have done :). The wooden parts are made of 3mm poplar plywood. The square parts are about 51x51mm. The round elements have a diameter of 110mm. The usual delivery is 1x round, 4x square. If you need more, please write us an email. The wooden parts are free of charge. We reserve the right to omit the wooden elements if they no longer fit in the package or if the next higher weight class is due to the weight. Also only while stocks last.

€0.00*
Heat-resistant silicone soldering pad
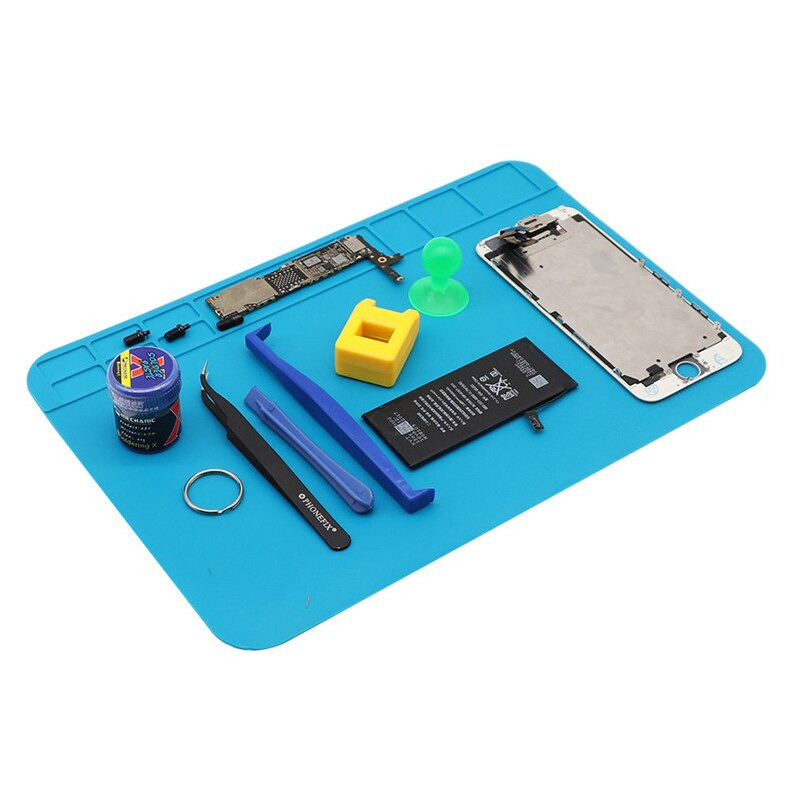
With this heat-resistant silicone soldering pad, you always have a tidy little workspace. Take out the soldering mat and get started with the soldering kits. The soldering pad is blue, 300x200mm in size (about a DIN A4 paper) and has some compartments so that the components don't roll away. After soldering, you simply roll up the mat and stow it away for the next soldering fun! The mat is washable with water and keeps your table clean from solder splashes.As a note: The photo shows a few tools on the silicone mat. These are not included in the delivery.

€9.49*
Robo Robin soldering kit - The very simple and funny red robot kit
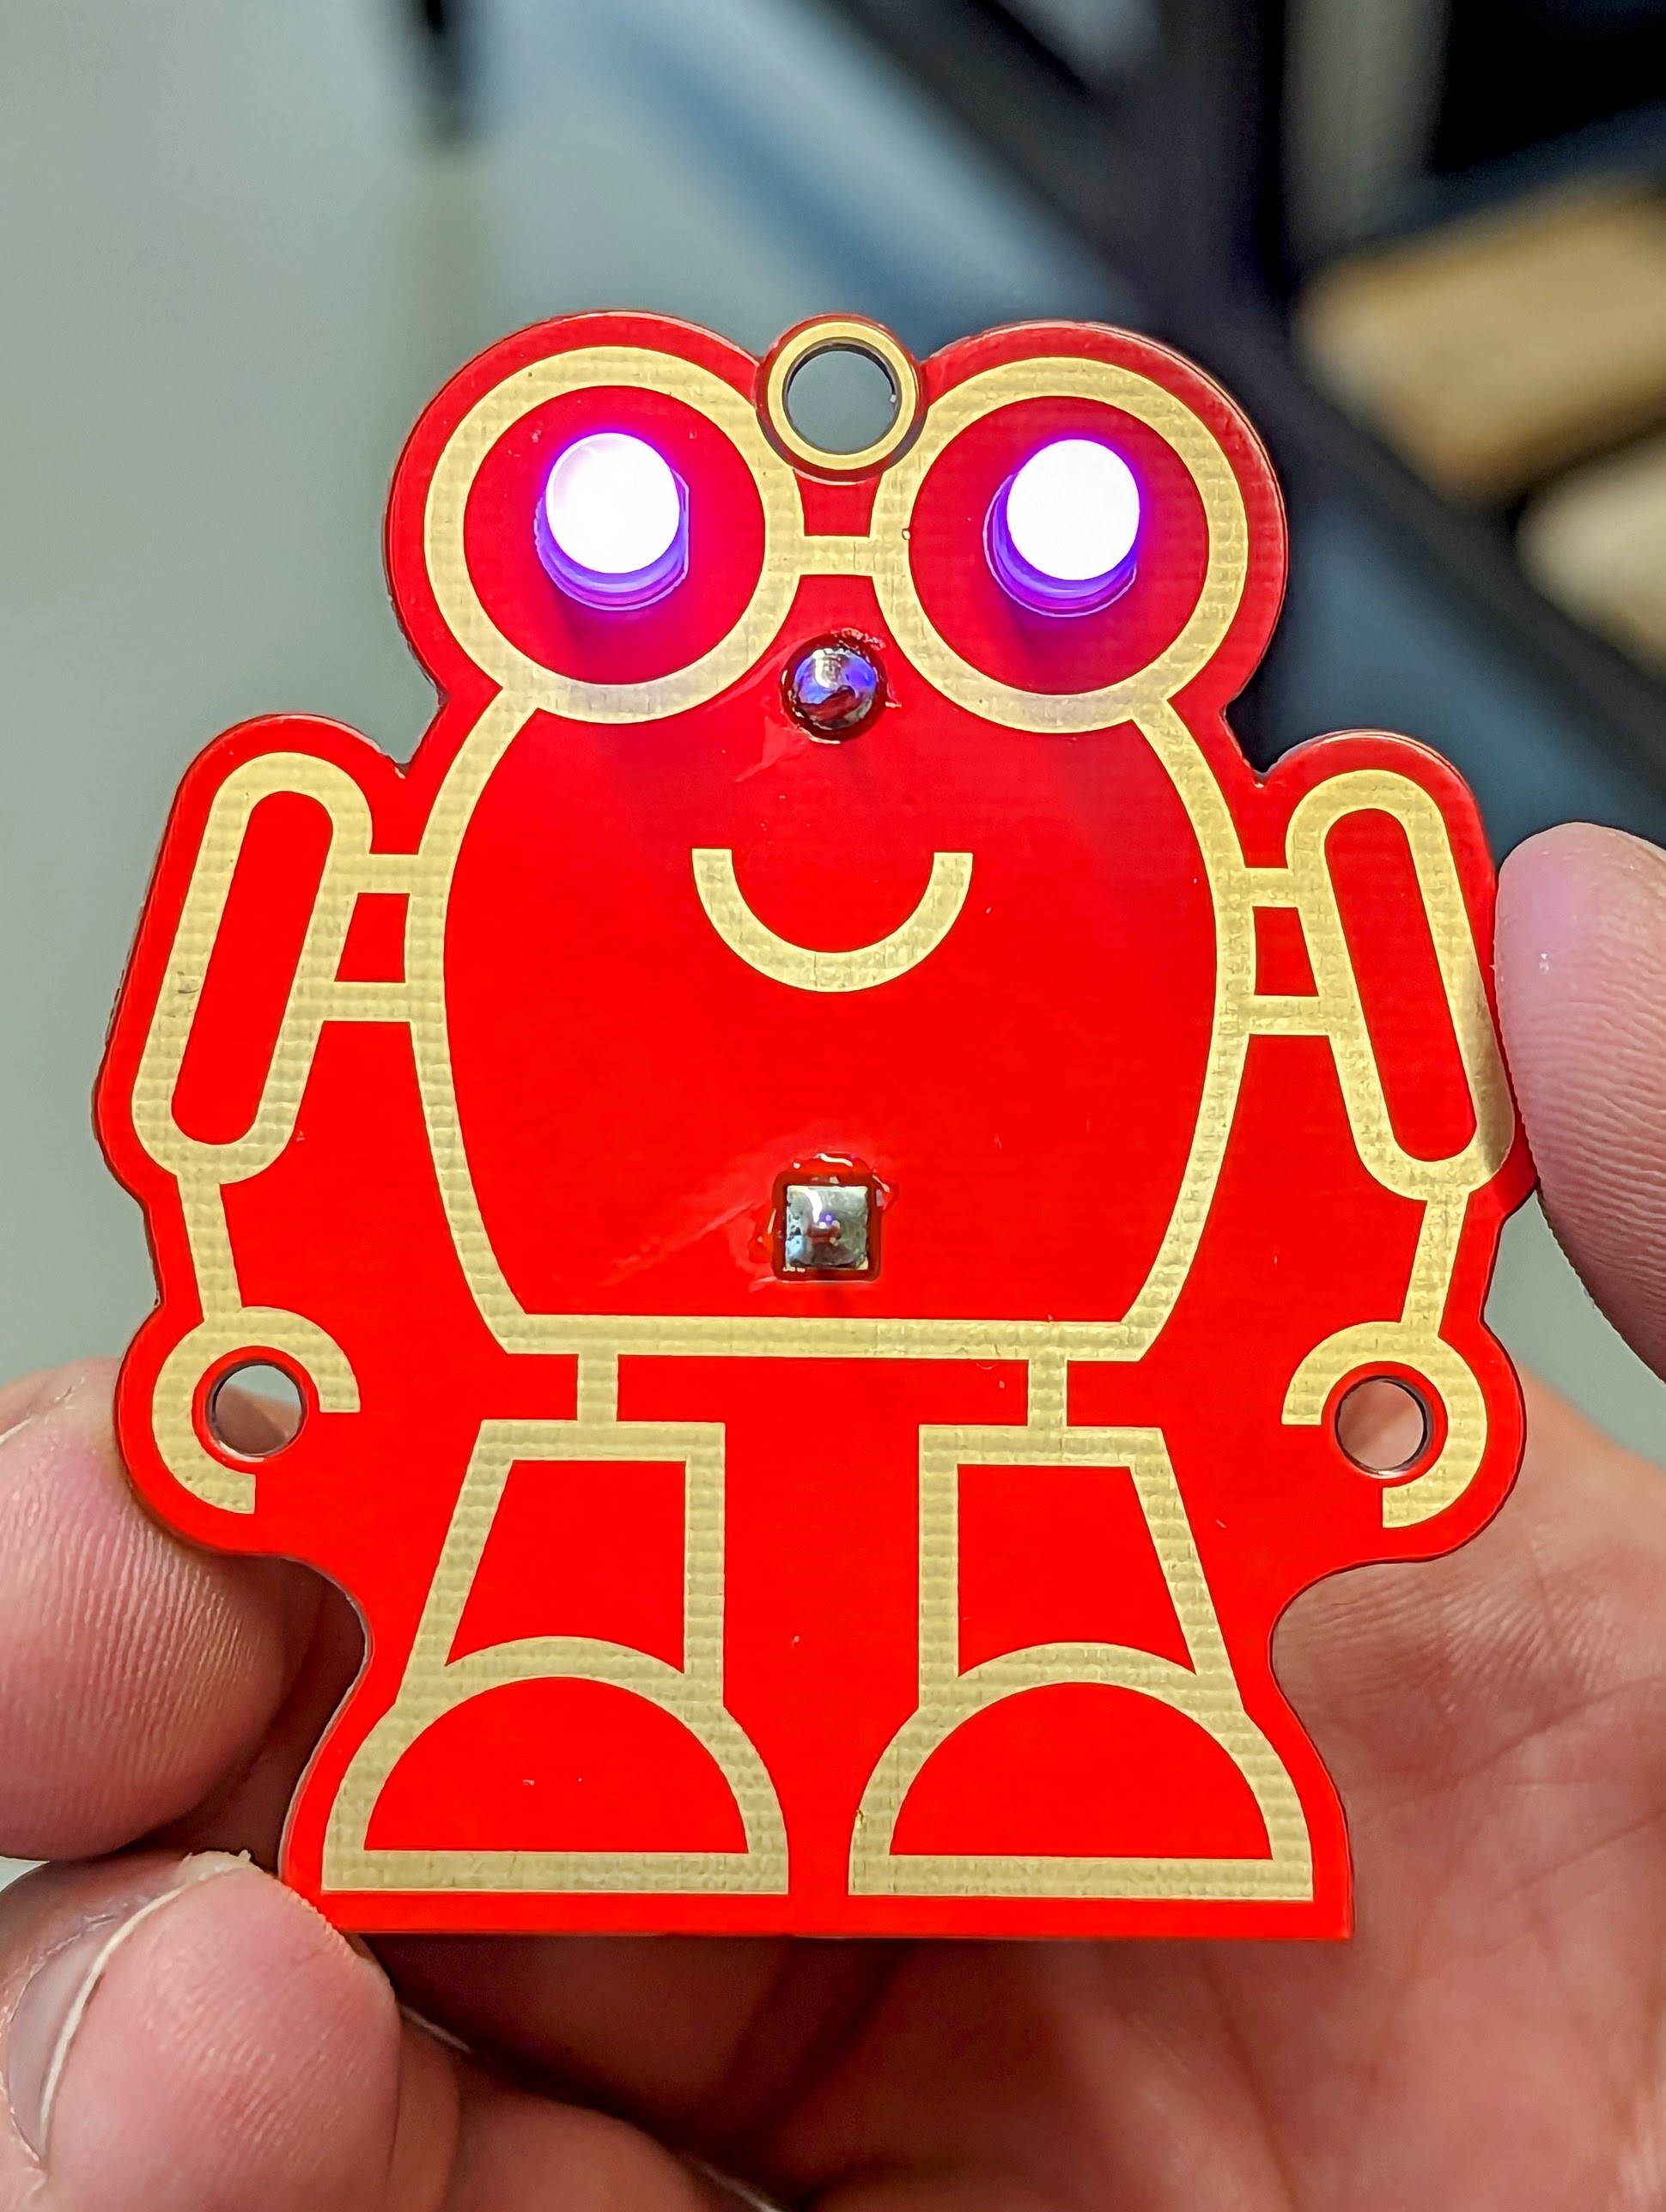
The best thing is: With this soldering kit, even beginners can easily make a great pin, pendant or necklace. Only 4 components need to be soldered on the back. For those who already know their way around: The LEDs are THT, i.e. through-hole components. The Robo Robin has particularly striking eyes that light up in all colours and cast a spell over everyone. For all those who are not yet ready: don't worry! Detailed and tried and tested instructions will guide you through this little soldering adventure. The kit comes with all the necessary components and PCB : Board 2 rainbow RGB LEDs THT CR2032 battery holder SwitchTools required We describe what the minimum soldering workstation looks like here: The soldering workstation To light up the Robo Robin, you will need to buy one CR2032 battery per Robo Robin from a DIY store or a large supermarket/Swedish furniture store.Instructions and help To make it easy for you to solder the kit, we have put together detailed instructions with lots of pictures and individual steps for each of our kits. There you will be guided step by step through the assembly and there are many tips and tricks on how to solder correctly. For the majority of our soldering kits there are also interactive circuits with the names of the components and the conductor paths. All instructions are available in German and English.For environmental reasons, we do not print our instructions. It is even better to view them on screen, as you can then zoom into the high-resolution photos to see the details. On each kit you will find a QR code or link to the instructions. You can find all instructions as PDF files under the following link: https://binary-kitchen.github.io/SolderingTutorial Simply click on "DE" or "EN" for the correct kit and you can download a PDF.Show us your Robo Robin We at blinkyparts are super excited to find out what has become of your Robo Robin soldering kit. A pin? A hair clip? Have you added something to your robot, embellished it further? A badge for your rucksack or something completely different? Share your photo with us at Twitter/Mastodon: #LötenVerbindet Instagram: #LötenVerbindet or follow us on @blinkyparts_comHelp others with your feedback It is often difficult to judge whether the soldering kit is something for you. Help others by giving us a rating, a feedback. How did it work out? What equipment did you have? What did you particularly like? What is your Robo Robin doing now? Simply leave a review here on the product page under "Reviews".

€6.99*
868 MHz antenna - Ebyte TX868-JZLW-15 with IPEX-1 connector
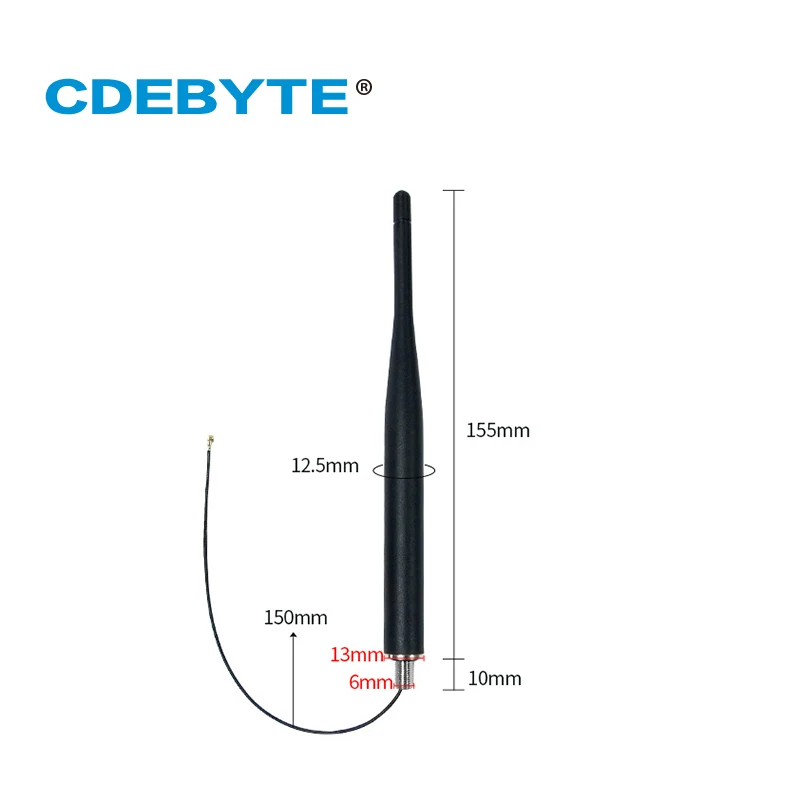
TX868-JZLW-15 is a rubber antenna with 868 MHz frequency band, antenna size approx. 165 mm, interface an IPEX-1 connector, suitable for 868 MHz frequency band equipment cabinets, control cabinets, logistics fleets, property security, hotels and restaurants, construction sites , outdoor radio enthusiasts, taxi teams and similar applications.The antenna is compatible with the Ebyte radio module CMT2300A 868/915MHz breakout board, however the antenna is not suitable for the OpenDTU housing. Technical Data Frequency: 868 MHz Bandwidth: 832~920 MHz Gain: 3 dBi SWR (standing wave ratio): ≤ 1,5 Polarisation: vertical Radiation direction: omnidirectional Input impedance: 50 Ohm Power capacity: 20 W Material: TPE-E Operating temperature: -40 °C ~ +85 °C Plug connection: IPEX-1 Dimensions: Length 165 mm; diameter 12.5 mm; thread 6 mm Length of the antenna cable: 150 mm Colour: black Weight: 18.2 g

€5.99*
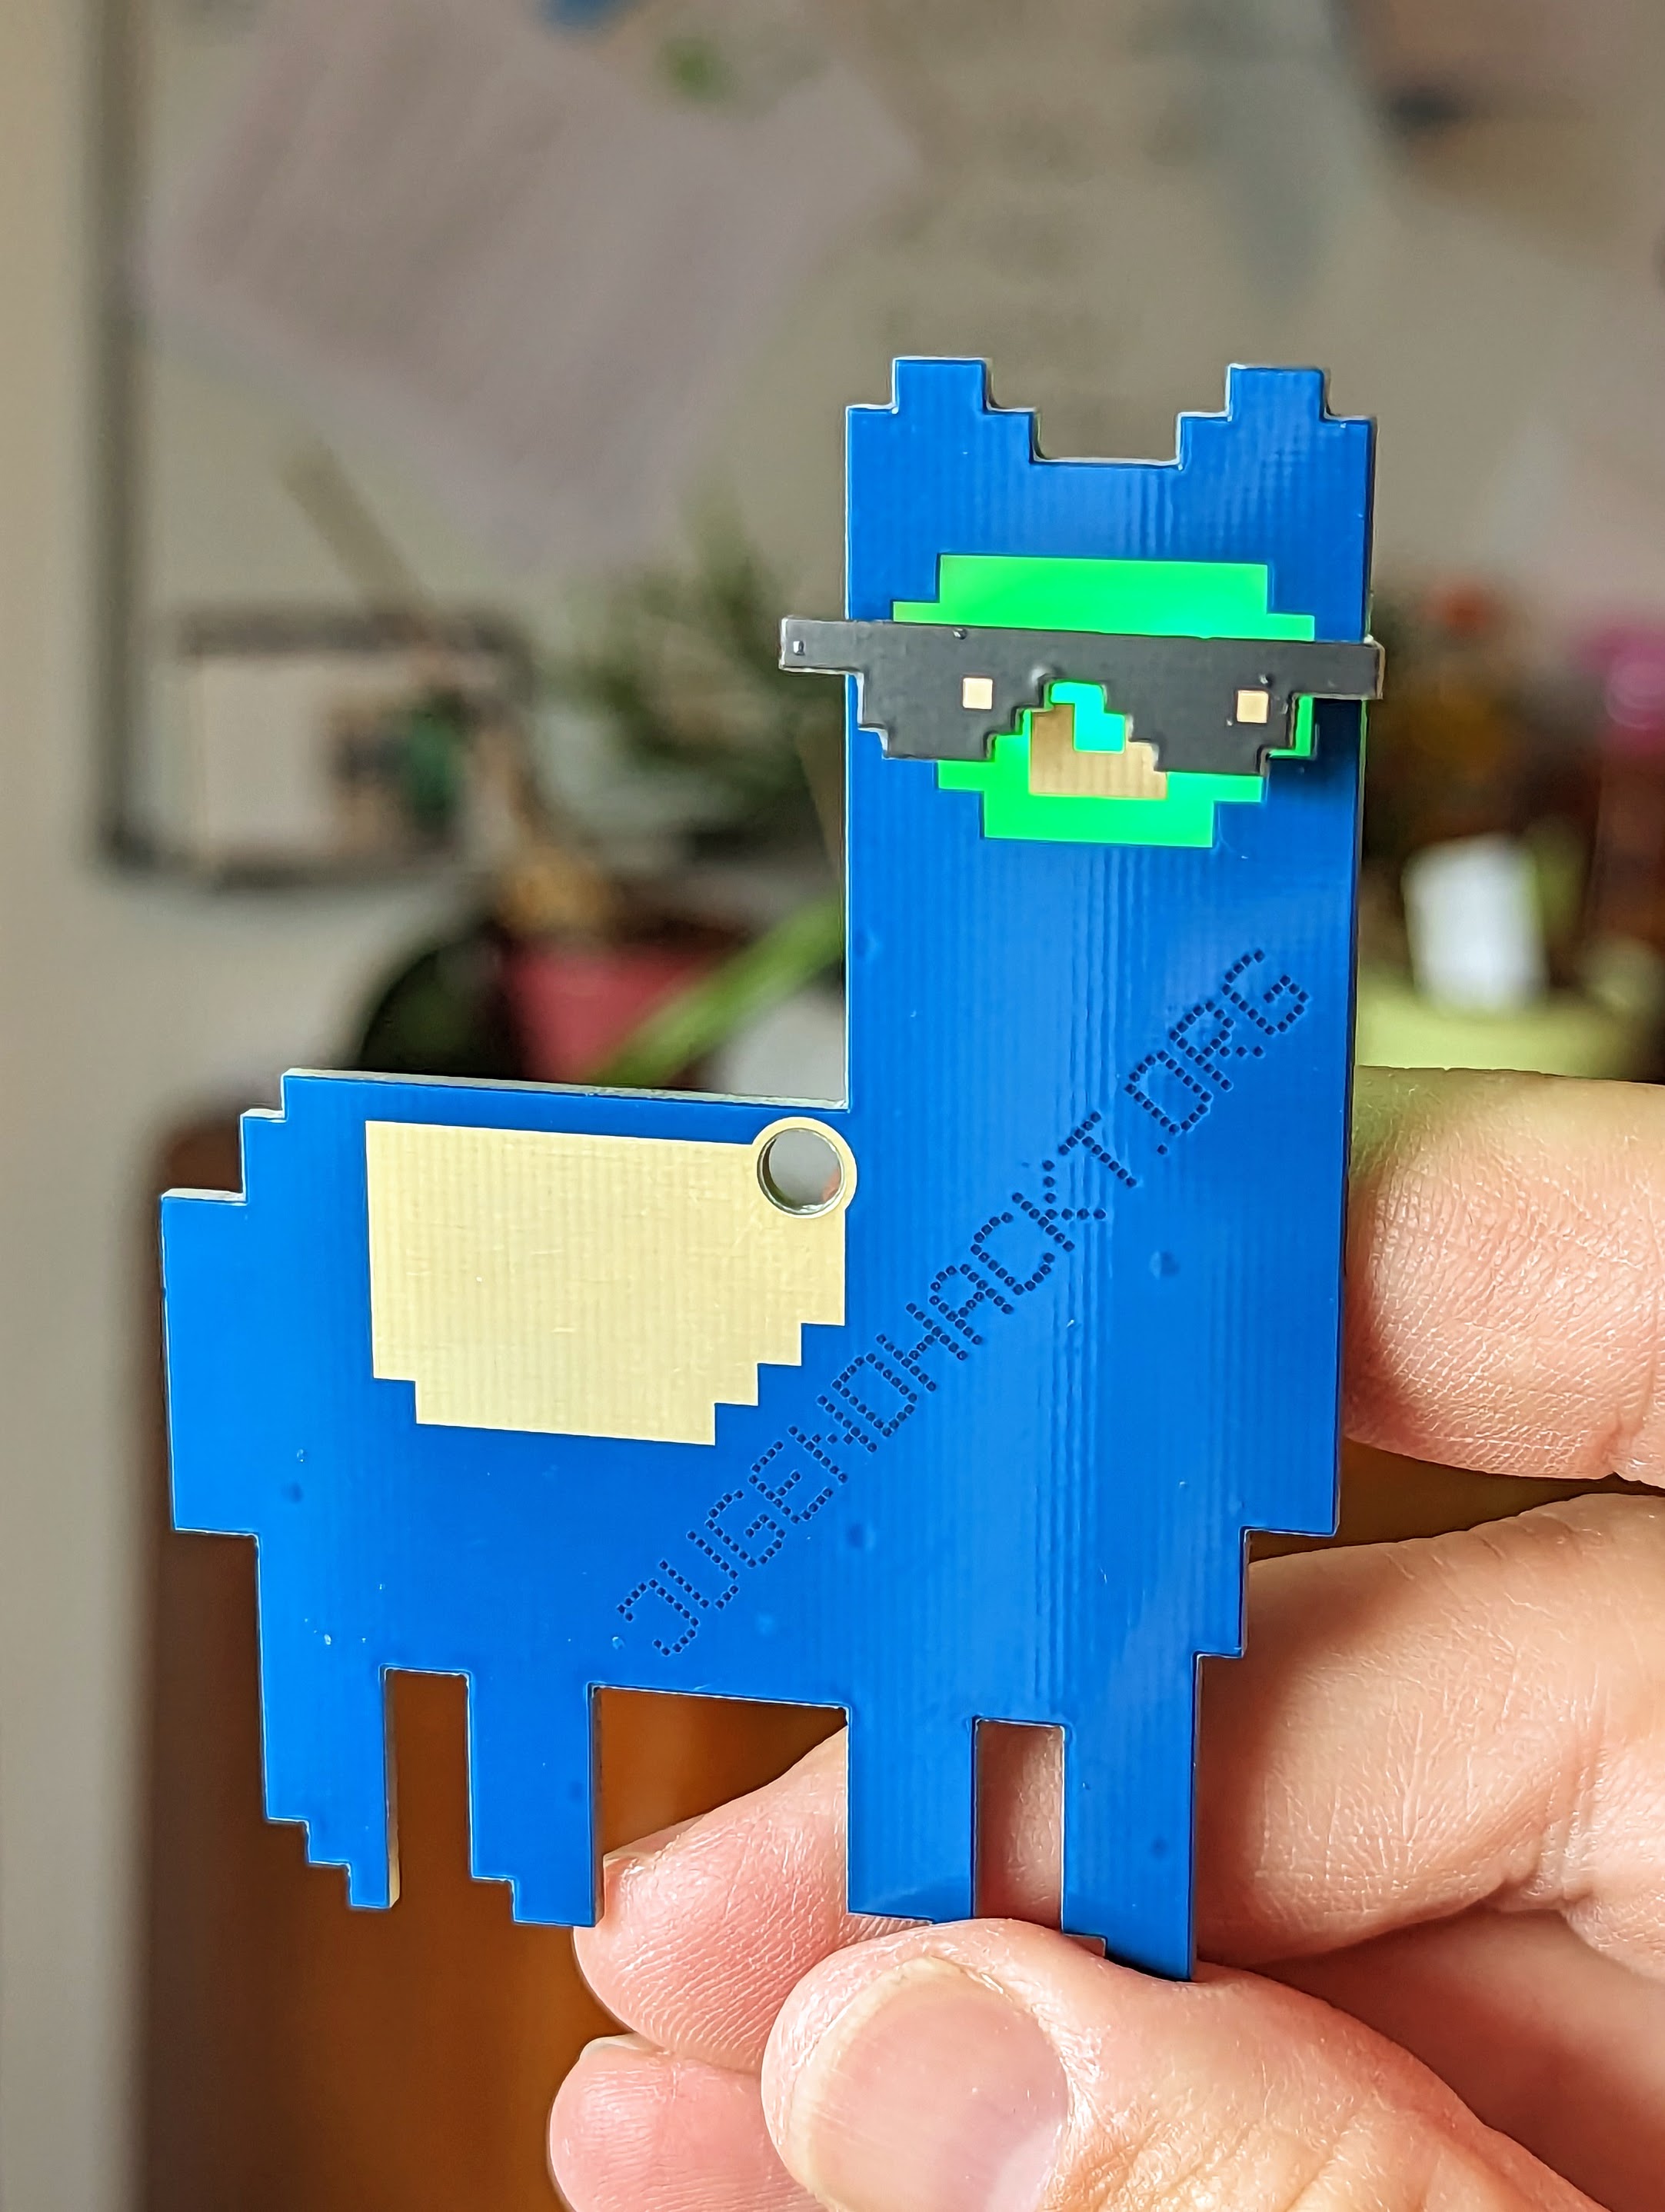
The youth hack Al Hacka Alpaka - Cooler than reality allows!
The youth hack alpaca Al Hacka is cooler than reality allows! From behind, the eyes are illuminated in all the colours of the rainbow. To make it even cooler, it comes with a pair of sleek black sunglasses.The best thing is: With this soldering kit you can easily make a great pin, pendant or necklace even as a beginner. You only have to solder 4 components on the back. For those who already know a bit about soldering: The LEDs are THT, i.e. through-hole components. They are soldered to the surface on the back. We used this trick to avoid having holes on the front. This way the alpaca can shine in all its glory and without any blemishes.For all those who are not yet ready: never mind! Detailed and well-tested instructions will guide you through this little soldering adventure.You can find a video of the rainbow colours here: https://www.youtube.com/watch?v=b8JFJ-eYq9o(The video is of our unicorn, but it will give you an idea of how great the Al Hacka alpaca glows).Target groupThe electronic soldering kit is designed for beginners. Adults and children alike can have fun with the Alpaka soldering kit, although of course you should not let children solder alone. Relatively large components are used, which make it easy to learn how to solder. Only 4 components need to be soldered on. This is also possible for absolute beginners in a reasonable amount of time. And the shape? Who can resist the coolness of Al Hacka the Soldering Paka? :) It's best to order one or two of the other items as well, because as you can imagine, the alpaca soldering kit is a popular gift for friends, partners or children.The components in the Jugendhackt soldering kitOur kits always contain all the components you need for soldering. Unfortunately, we cannot send you the batteries. However, you can get them from DIY stores and larger supermarkets (more on this below under "Tools and accessories"). The soldering kit includes:The circuit boardThe circuit board is the heart of the alpaca. It forms the outline and the space to solder all the components. The board is made of fibreglass material which is coated with a gold alloy. A layer of white lacquer is applied on top. Some parts of the board are slightly transparent. This creates the great effects of the eyes! The icing on the cake: The sunglasses made of black PCB. The perfect addition for Al Hacka.RGB LEDsThis is where the magic happens! RGB stands for red-green-blue and describes the different colours of the LED. It looks like an LED, but it is 3 tiny little LEDs that slowly alternate through an integrated circuit. This gives you all the colours of the rainbow. Look closely, the black dot you find in the LED is the entire circuit! Yes really, so tiny! Just connect 3V and the LED lights up in all colours. There are two RGB LEDs in the Alpaka soldering kit.The SMD battery holderThe battery holder for CR2032 batteries is included in the kit in an SMD construction. It is soldered onto the surface like the other components. How to do this is described in the soldering instructions. The battery itself is then simply plugged in. The battery lasts for 4-8 hours of continuous operation. So you should switch off your alpaca to save some power. You can get a new one in any well-stocked supermarket, in do-it-yourself stores and Swedish furniture stores.A switchOf course, a switch is also included! The switch is easy to operate and therefore ideal for children (and adult hands). The switch locks and stays in the position (on or off) you want the switch to be in. A great perceptible "click" provides haptic and acoustic comfort.Required toolsHere we describe what the minimum soldering workstation looks like: Der LötarbeitsplatzIn order to light up the Alpaka soldering kit, you need to buy one CR2032 battery per Alpaka at a DIY store or a large supermarket/Swedish furniture store.Also, tweezers are especially helpful for this kit :) Instructions and helpTo make it easy for you to solder the kit, we have put together detailed instructions with lots of pictures and individual steps for each of our kits. There you will be guided step by step through the assembly and there are many tips and tricks on how to solder correctly. For the majority of our soldering kits there are also interactive circuits with the names of the components and the tracks. All instructions are available in German and English.For environmental reasons we do not print our instructions. In fact, it is better to view them on screen, as you can then zoom into the high-resolution photos to see details. On each kit you will find a QR code or link to the instructions.You can find all the instructions as PDF files at the following link: https://binary-kitchen.github.io/SolderingTutorialJust click on "DE" or "EN" for the right kit and you can download a PDF.3D printed case Axel from Hacklabor Schwerin has built a wonderful case for the Al Hacka Alpaka. You can find all the necessary data here: https://gitlab.com/hacklabor/jugendhackt-al-hacka-alpaka-caseLovingly packed for you by handAll soldering kits are lovingly packed for you by hand in Germany. Unfortunately, it happens from time to time that a component is packed too much or too little. If something is too much: No problem! Keep the components and use them for your creations! If something is missing: No problem! Just send us an email and we will send you the missing parts.Show us your alpacaWe at blinkyparts are super excited to hear what your Al Hacka soldering kit turned out to be. A pin? A hairclip? Did you paint or tattoo the alpaca? A pin for your backpack or something completely different? Share your photo with us atTwitter/Mastodon: #SolderingConnectsInstagram: #SolderingConnects or follow us on @blinkyparts_comHelp others with your feedbackIt is often difficult to judge whether a soldering kit is something for you. Help others by giving us a rating, a feedback. How did it work? What equipment did you have? What did you like most about it? What is your alpaca doing now? Just leave a review here on the product page under "Reviews".

€6.99*
Robust case kit for the Pinecil - Everything neatly and perfectly packaged
Looking for the perfect case for your Pinecil? Then you've come to the right place. With this chic 3D-printed case you can store your Pinecil and lots of accessories. The box offers space for the soldering iron, the cable, two soldering tips (even the long ones), brass sponge and even a soldering iron holder. That's right: in the picture the part with the ball bearing can simply be used as a soldering iron holder. Just make sure you put the soldering iron in completely. From the outside, the part is absolutely robust and can be closed quickly and securely with two buckles. Translated with www.DeepL.com/Translator (free version)The case comes as a kit. However, you don't need many tools or skills and can assemble it yourself very easily. Note: The case is sold without contents. So without cables, Pinecil and co. (the scope of delivery is described below).Scope of deliveryNote: The case is sold without contents. So without cables, Pinecil and co. The following scope of delivery is included in the kit:Six 3D-printed parts made of PLA (two inner shells, two outer shells and the buckles).One 3D printed part made of ABS for the soldering iron holderOne metal spongeA ball bearingAll the necessary nuts and bolts to assemble the case3D printYou can find the template for the case here: https://www.printables.com/de/model/345083-rugged-multipart-pinecil-caseThe template for the 3D print is from PjotrStrog and originates from Termiman. The wonderful Rugged Boxes von Whity were used. The three of them have given me permission to offer the great case here in the shop for you. Be sure to check out the makers or print out the case or a box yourself. It's worth it!We only use high-quality materials for our 3D printing. The outer case is printed with colourFabb Vertigo Star Night (PLA). The inner parts and closures with colorFabb Dutch Orange (PLA). The soldering iron holder is made of robust and heat-resistant ABS.Tools neededYou don't need much for the assembly. Only a hexagonal spanner. Only 7 screws need to be tightened and the case is ready for your Pinecil.LicenceA word about the licence: The Pinecil Case is published under CC BY-NC-SA 4.0. This actually means that the case cannot be sold here in the shop. However, I have received permission and a special licence from the makers. Please honour the licence if you adapt or improve the case.

€27.99*
ESP32-WROOM NodeMCU Development Board WiFi+Bluetooth Ultra-Low Power Dual Core 38 Pin Breakout Board
Discover the powerful ESP32-WROOM NodeMCU development board! With integrated WiFi and Bluetooth, it allows easy integration into Arduino projects. The ultra-low power design and dual-core processor offer high performance. With soldered headers for easy connection and wide connectivity thanks to WLAN and BLE (Bluetooth Low Energy), there are no limits to your projects. Order the ESP32 Dev Kit now and start your creative ideas! Included is the ESP32 Dev Board with two pin headers (38 pins in total).Technical DataChipset: ESP32 flexible through pin headers Processor: Tensilica LX6 Dual-Core Clock frequency: 240MHz Operating voltage: 3.3V / 5V WIFI: 802.11. b/g/n Bluetooth: Classic and BLE

€9.90*
Ebyte Funkmodul CMT2300A 868/915MHz Breakoutboard
E49-900M20S is a low-cost wireless data transmission module introduced to the market by Chengdu Ebyte. It is a hardware-only module based on the CMT2300A. The E49-900M20S supports a maximum transmit power of 20dBm, but the user can also set a lower output power to save power. The module operates in the 850MHz ~ 930MHz frequency band, including the widely used 868MHz and 915MHz frequencies.This module comes with a breakout board and is pin compatible with OpenDTU's NRF modules. Es ist natürlich auch die passende Antenne dabei. Achtung: Dies ist nur das Funkmodul und für die Bastler gedacht. The radio module breakout board is not enough to build an OpenDTU! You need the complete kit or additional components.Pre-soldered CMT module (optional)We have heard your feedback and understood that SMD soldering is probably not for everyone. Therefore, we have decided to offer the module pre-soldered. Only the CMT module (the silver chip) is soldered on. The pin header and antenna module are much easier to solder and still need to be soldered by you. We actually solder them by hand, so unfortunately we have to charge a little more to justify the extra effort. We hope for your understanding here.Compatibility This radio module is fully compatible with openDTU and ahoyDTU. Unfortunately, we cannot provide support for ahoyDTU. You can find help here at ahoydtu.de . The CMT module is needed for communication with the following inverters: Hoymiles HMS-300-1T Hoymiles HMS-350-1T Hoymiles HMS-400-1T Hoymiles HMS-450-1T Hoymiles HMS-500-1T Hoymiles HMS-600-1T Hoymiles HMS-700-2T Hoymiles HMS-800-2T Hoymiles HMS-900-2T Hoymiles HMS-1000-2T Hoymiles HMS-1600-4T Hoymiles HMS-1800-4T Hoymiles HMS-2000-4THoymiles HMT-1600-4THoymiles HMT-1800-4THoymiles HMT-2000-4THoymiles HMT-1800-6THoymiles HMT-2250-6TTechnical dataThe measured range can reach 2.5 km Maximum transmission power of 20dBm, adjustable in several steps via software Supports ISM 868MHz/915MHz band Supports 0.5Kbps~300Kbps transmission rate Supports low power mode, suitable for battery operation Supports GFSK modulation mode, OOK & (G)MSK Supports 2.6V~3.6V power supply Industrial standard design, up to -40 ~ 85 °C operating temperature IPEX and punch hole optional, good for secondary development and integrationsScope of deliveryCMT2300A SMD moduleAntenna socketAntennaBreakout board2x4 pin header ** When selecting the tax rate for products for photovoltaic systems, §8 of our Terms & Conditions must be taken into account.

From €14.27*
OpenDTU NRF - Your evaluation for your balcony solar system compatible with Hoymiles HM series (NRF module)
The energy turnaround is in full swing and great balcony power plants are sprouting up on every balcony. It's beautiful!With this OpenDTU Board kit you can read out your balcony solar power plant, display the data and even control it. The prerequisite is an inverter from Hoymiles. A small display always shows the current power production.The project was started by Thomas and Jan and can of course be found under open source licence here:https://github.com/tbnobody/OpenDTU (there you will also find a list of compatible inverters).This breakout board is 100% compatible and was created together with the developers of the software. On the board there is a special radio module that speaks the radio standard of the inverters. This is read out by an ESP32 module, processed and can be further processed via WLAN, e.g. with MQTT.The board also has connections for a display and an RGB LED strip, which may be supported in a future version.Scope of Delivery In the scope of delivery, you will receive all the necessary components: a display, an ESP32, and an antenna module. You just need to solder them together and enter your Hoymiles serial number, and you're ready to go! The ESP32 is already pre-flashed.CompatibilityThis kit uses the NRF24L01+ module and is compatible with the following Hoymiles models: Hoymiles HM-300 Hoymiles HM-350 Hoymiles HM-400 Hoymiles HM-600 Hoymiles HM-700 Hoymiles HM-800 Hoymiles HM-1000 Hoymiles HM-1200 Hoymiles HM-1500 Solenso SOL-H350 Solenso SOL-H400 Solenso SOL-H800 TSUN TSOL-M350 TSUN TSOL-M800 TSUN TSOL-M1600If you are looking for a module with CMT2300A for the HMS and HMT series from Hoymiles you need this: https://shop.blinkyparts.com/en/OpenDTU-CMT-Your-evaluation-for-your-balcony-solar-system-compatible-to-Hoymiles-HMS-and-HMT-series-CMT-module/blink238342FeaturesRead out live data from the inverter Display the inverter's internal event log Display inverter information such as firmware version, firmware build date, hardware revision and hardware version View and set the current inverter threshold Power off/on function of the inverter Uses ESP32 microcontroller and NRF24L01+ multi-inverter support MQTT support (with TLS) Home Assistant MQTT Auto Discovery support Beautiful and fancy WebApp with visualisation of current data Firmware upgrade via the Web UI Standard source supports up to 10 inverters Time zone support Prometheus API endpoint (/api/prometheus/metrics) English, German and French web interface Direct connection of displays (SSD1306, SH1106, PCD8544) Dark theme in the web interfaceThe HousingThe kit comes with a high-quality 3D printed housing. You can also print it yourself. We have published the files here:https://www.printables.com/de/model/441037-opendtu-breakoutboard-caseTarget GroupThis kit is designed for all those who have a solar power plant at home and a suitable Hoymiles inverter. Without the inverter and the solar panels the kit is just a nice paperweight with display ;). The electronics kit for soldering is designed for beginners. Relatively large components are used, which make it easy to learn how to solder. This is also possible for absolute beginners in a reasonable time.Required toolsWhat the minimum soldering workstation looks like is described here: Der LötarbeitsplatzYou will also need a micro USB cable and a suitable USB power supply. Two toothpicks are very practical. An electric side cutter is also very useful for this kit :) Instructions and helpTo make it easy for you to solder the kit, we have put together detailed instructions with lots of pictures and individual steps for each of our kits. There you will be guided step by step through the assembly and there are many tips and tricks on how to solder correctly. For the majority of our soldering kits there are also interactive circuits with the names of the components and the tracks. All instructions are available in German and English.The instructions also describe the software part as far as the software is installed, connected to your WLAN and you have set up your inverter. Everything else is self-explanatory in the web interface. For environmental reasons, we do not print our instructions. It is even better to view them on screen, as you can then zoom into the high-resolution photos to see the details. On each kit you will find a QR code or link to the instructions. You can find all the instructions as PDF files at the following link: https://binary-kitchen.github.io/SolderingTutorialJust click on "DE" or "EN" for the right kit and you can download a PDF.Lovingly packed for you by handAll soldering kits are lovingly packed for you by hand in Germany. Unfortunately, it happens from time to time that a component is packed too much or too little. If something is too much: No problem! Keep the components and use them for your creations! If something is missing: No problem! Just send us an email and we will send you the missing parts.Show us your solar system and your OpenDTU evaluationWe at blinkyparts are super excited to hear what your solar system looks like and how/what you did with your OpenDTU kit. Share your photo with us atTwitter/Mastodon: #SolderingConnectsInstagram: #SolderingConnects or follow us on @blinkyparts_comHelp others with your feedbackIt is often difficult to judge whether a soldering kit is something for you. Help others by giving us a rating, a feedback. How did it work? What equipment did you have? What did you like most about it? What does your solar system do? Just leave a review here on the product page under "Reviews".

€6.70*
Pinecil v2 - Opensource Portable Soldering Iron with 65W and USB-C
The Pinecil is a smart, portable mini soldering iron with a 32-bit RISC-V SoC, featuring a slim design, automatic standby mode and heating up to operating temperature in just 6 seconds! The v2 is the improved and further enhanced version and successor to version 1. Dual power inputs: The USB-C port supports both PD (Power Delivery) and QC 3.0 (Quick Charge) and a DC5525 barrel DC jack. Fast warm-up: The soldering iron reaches operating temperature in 6 seconds. Support for on-demand rapid boost function. Adjustable soldering tip temperature from 100° C to 400° C, which can be set via the adjustment buttons and an easy-to-read OLED display. Portable: slim design consisting of a SAE 304 stainless steel core in a polycarbonate housing. Automatic standby mode turns on when not in use to ensure user safety. Technical data Power 88W Temperature range 100-400 °C Heating time ~12 s Tip system activ ESD safe yes Automatic standby yes, time and temperature adjustable Display 0,69'' white OLED monochrome display (96x16p) Processor 32-Bit RV32IMAC RISC-V "SiFive E24 Core" @ 144 MHz Memory 192 KB Flash, 132 KB SRAM Power supply USB-C, DC5525 Dimension 155mm with soldering tip / 103mm without x 12.8mm x 16.2mm Weight 28g with soldering tip and 18g without soldering tip Target Group The soldering iron is the perfect tool ranging between consumer and professional use. The manufacturing is of very high quality. The easily exchangeable tips also make the mini soldering iron flexible to use. However, the price clearly makes it the first soldering iron for a beginner. The Pinecil will definitely be a long-lasting companion for life. The scope of delivery The scope of delivery of the Pinecil v2 is limited to the most important things you need. Of course, the soldering iron itself is included. The latest firmware is already flashed on the Pinecil. There is also a short, pointed soldering tip. The short tip gets hot particularly quickly! A power supply unit or USB cable is not included. Take a look at the accessories in our shop. You need at least a power supply and a cable. Compatible power supplies The hollow plug socket is not protected against polarity reversal! You must make sure that you use a compatible power supply unit. You can find a list from the manufacturer here: https://wiki.pine64.org/wiki/Pinecil_Power_Supplies We recommend only USB-C power supplies with 65W and 20V. (Attention: Many power supplies do not have a real 65W on one port and distribute the power e.g. to two sockets). The original power supply from Pinecil is excellent. Also the power station. Recommended cables It should definitely be a USB-C to USB-C cable. Since it is a soldering iron, a silicone cable is also extremely practical. Silicone cables are heat-resistant and will not break if accidentally touched. Check out our accessories, we have suitable USB cables in stock! Other accessouries There are several other accessories for the Pinecil v2: Mini stand Although you can simply place the Pinecil on its soldering pad, because the tip does not overlap at the front, a small stand with a sponge or metal wool is practical for cleaning the tip. Other tips There are many other tip sizes. From tiny pencil tips to wide wedge tips, all tips can be used. By the way: The Pinecil v1 soldering tips are compatible with the Pinecil v2. Open Source and Community The Pinecil is a community project. This means that many developers have worked together to perfect the piece of hardware and the software. The community has made sure that the components are open source. This means that there is no trade secret about how the soldering irons are constructed. You can simply download the instructions and circuit diagrams from the internet. This has the advantage that a possible repair is also made much easier, since it is clear which components have been used. The community also ensures that the soldering iron corresponds exactly to the wishes and needs of the solderers. A really great piece of hardware. The PINECIL's software is also open source, so it is easy to make adjustments. It is quite easy to create your own temperature curves or programme a specific response. Built-in motion sensors allow the soldering iron to quickly switch between stand-by mode and operating temperature. Differences between v1 and v2 The new version v2 brings a number of new features. Among the most important are: Bluetooth: It is now possible, for example, for a fan control to switch on automatically when the iron is in use. A shorter tip: This makes the soldering iron even easier to hold and it gets hot even faster. Improved power supply: The power supply has been improved and stabilised. Show us your soldering setup We at blinkyparts are super curious to know what your soldering setup looks like? Do you have any other 3D printed parts for the Pinecil? Share your photo with us on Twitter/Mastodon: #SolderingConnects Instagram: #LötenVerbindet or follow us under @blinkyparts_com Help others with your feedback It's often hard to know which soldering iron is for you. Help others by giving us a rating, a feedback. How did it work? What other equipment did you have? What did you like most about it? What makes the Pinecil special? Just leave a review here on the product page under "Reviews".

€58.99*
Pinepower - 65W GaN USB Charger with PD and QC3.0
Finally it's here. The perfect power supply for your Pincil, designed and built by the original manufacturer. Until now you couldn't get it and Pine64 has really built a great piece of hardware: This ingenious USB power supply offers everything a hobbyist's heart desires. Both Quick Charge (QC3.0) and twice Power Delivery (PD with 65W).USB-C1 Power Delivery (PD) Port 65W Max PD 5V3A, 9V3A, 12V3A, 15V3A, 20V3.25APPS 3.3-11V 5AUSB-C2 Power Delivery (PD) Port 65W Max PD 5V3A, 9V3A, 12V3A, 15V3A, 20V3.25A PPS 3.3-11V 5AUSB-A Quick Charge QC3.0 Port 18W OutputQC3.0 4.5V5A, 5V4.5A, 9V3A, 12V3A, 20V3AWhen USB-C1 and C2 are connected simultaneously, USB-C1 provides 45W Max (5V3A, 9V3A, 12V3A, 15V3A) and USB-C2: 18W Max (5V3A, 9V2A, 12V1.5A). If the USB-A cable is also connected, USB-C2 and USB-A together provide 18W. If USB-C1 and USB-A are connected at the same time, USB-C1 supplies 45W max (5V3A, 9V3A, 12V3A, 15V3A) and USB-A 18W max (5V3A, 9V2A, 12V1.5A).Open Source and Community The PinePower GaN USB power supply is a community project. This means that many developers have worked together to perfect the piece of hardware and the software. The community has made sure that the components are open source. This means that there is no trade secret about how everything is built. You can simply download the instructions and circuit diagrams from the internet. This has the advantage that a possible repair is also made much easier, as it is clear which components have been used. A really great piece of hardware. Show us your soldering setup We at blinkyparts are super curious to know what your soldering setup looks like? Have you printed any other 3D printed parts for the Pinecil? Share your photo with us at Twitter/Mastodon: #SolderingConnects Instagram: #SolderingConnects or follow us on @blinkyparts_com Help others with your feedbackIt's often hard to know which soldering iron is for you. Help others by giving us a rating, a feedback. How did it work? What other equipment did you have? What did you like most about it? What makes your Pine Powerstation special? Just leave a review here on the product page under "Reviews".

€54.99*
Jumper set for breadboards - 140 wires with 14 lengths
If you want to build, test or develop your own circuits, there is no way around a breadboards. What would the breadboards be without the right cables? This set contains a total of 140 wire bridges in 14 lengths, i.e. 10 pieces per length. This is enough for many circuits and if you are in doubt you can simply get more wire jumpers. The advantage of the pre-bent and prepared lengths is the overview on the breadboards . Especially for beginners, it is difficult to follow a circuit correctly if you first have to fight your way through a tangle of wires. This is difficult even for professionals.The cable set for breadboards contains (in brackets are the lengths of the holes/steps on a standard breadboard that can connect these cables): 10x 2mm (2 steps) 10x 5mm (3 steps) 10x 7mm (4 steps) 10x 10mm (5 steps) 10x 12mm (6 steps) 10x 15mm (7 steps) 10x 17mm (8 steps) 10x 20mm (9 steps) 10x 22mm (10 steps) 10x 25mm (11 steps) 10x 50mm (21 steps) 10x 75mm (30 steps) 10x 100mm (41 steps) 10x 125mm (50 Steps) The 140 wires come in a handy little box.Show us your circuitWe at blinkyparts are super excited to hear what circuits you tinker with. Something to program? A running light? Something completely different? Share your photo with us atTwitter/Mastodon: #SolderConnectsInstagram: #SolderConnects or follow us on @blinkyparts_comHelp others with your feedbackIt's often hard to see how good a product is and how good its quality is. Help others and share your honest feedback: Simply leave a review here on the product page under "Reviews".

€4.49*
Breadboard with 400 connections - Your experimental board for your own circuits
A breadboard is the essential tool for any circuit development. Components can simply be plugged together and connected. It's easy to create your first own circuits! The basis for your own kit.The special thing about this plug-in board: it is transparent. This is especially good for beginners, because you can immediately see how the connectors are connected to each other.For larger projects or circuits, the plug-in boards can simply be plugged together and expanded almost infinitely! It is therefore worth buying a few more.There is tape on the back as part of the standard package: You are happy with your circuit and want to install it somewhere: No problem, just stick it in a box and you're done! The scope of delivery includes a plug-in board with 400 connections with 8.5x5.5 cm.Show us your circuitWe at blinkyparts are super excited to hear what circuits you tinker with. Something to program? A running light? Something completely different? Share your photo with us atTwitter/Mastodon: #SolderConnectsInstagram: #SolderConnects or follow us on @blinkyparts_comHelp others with your feedbackIt's often hard to see how good a product is and how good its quality is. Help others and share your honest feedback: Simply leave a review here on the product page under "Reviews".

€3.79*
PINECIL soldering tip set - Fine, short tip
The perfect addition to your Pinecil: The four-piece soldering tip set from the original manufacturer. 100% compatible. The short tips heat up a little faster and make your Pinecil extra compact! This set includes 4 different tips: ST-BC2: A fine wedge tip with 45°. Length: 87,2mm Weight: 8,6g ST-C1: A very fine wedge tip with 60°. Length: 88,0mm Weight: 8,4g ST-ILS: A very fine bullet tip with a tip radius of 0.15mm. Length: 88,3mm Weight: 8,6g ST-KU:  A large wedge tip with 45°. Length: 87,8mm Weight: 8,6g

€54.99*
Rainbow Unicorn - Simple kit for a fantastic badge
The great rainbow unicorn is something very special. Once soldered, the tail, horn and mane shine almost magically in all the colours of the rainbow. The best thing is: with this soldering kit you can easily make a great pin, pendant or necklace even as a beginner. You only have to solder 6 components on the back. For those who already know a bit about soldering: The LEDs are THT, i.e. through-hole components. They are soldered to the surface on the back. We used this trick to avoid having holes on the front. This way, the unicorn can shine in all its glory and shine without any flaws.For all those who are not yet that far: don't worry! Detailed and well-tested instructions will guide you through this little soldering adventure.A video of the rainbow colours can be found here: https://www.youtube.com/watch?v=b8JFJ-eYq9oTarget groupThe electronic soldering kit is designed for beginners. Adults and children alike can have fun with the unicorn soldering kit, although of course you should not let children solder alone. Relatively large components are used, which make it easy to learn how to solder. Only 6 components need to be soldered. This is also possible for absolute beginners in a reasonable amount of time. And the shape? Who isn't a unicorn fan, please? :) It's best to order one or two of these soldering kits, because as you can imagine, the unicorn soldering kit is a popular gift for friends, partners or children.The components in the unicorn soldering kitOur kits always contain all the components you need for soldering. Unfortunately, we cannot send you the batteries. However, you can get them from hardware stores and larger supermarkets (more on this below under "Tools and accessories"). The soldering kit includes:The circuit boardThe circuit board is the heart of the unicorn. It forms the outline and the place to solder all the components. The board is made of fiberglass material which is coated with a gold alloy. A white coating of varnish is applied on top of it. Some parts of the board are slightly transparent. This creates the great effects on the tail and horn! RGB LEDsThis is where the magic happens! RGB stands for red-green-blue and describes the different colours of the LED. It looks like one LED, but there are 3 tiny little LEDs that slowly change through an integrated circuit. This gives you all the colours of the rainbow. Look closely, the black dot you find in the LED is the entire circuit! Yes really, so tiny! Just connect 3V and the LED lights up in all colours. There are four RGB LEDs in the Unicorn soldering kit.The SMD battery holderThe battery holder for CR2032 batteries is included in the kit in an SMD version. It is soldered onto the surface like the other components. How to do this is described in the soldering instructions. The battery itself is then simply plugged in. The battery lasts for 4-8 hours of continuous operation. So you should switch off your unicorn to save some power. You can get more in any well-stocked supermarket, in hardware stores and Swedish furniture stores.A switchOf course, a switch is also included! The switch is easy to operate and therefore ideal for children (and adult hands). The switch locks and stays in the position (on or off) you want the switch to be in. A great perceptible "click" provides haptic and acoustic comfort.Needed toolsHow the minimal soldering workplace looks like is described here: The soldering workplace To make the unicorn glow, you need to get one CR2032 battery per unicorn at the hardware store or a big supermarket/shop. Also, a pair of tweezers is very helpful for this kit :) Instructions and helpTo make it easy for you to solder the kit, we have put together detailed instructions with lots of pictures and individual steps for each of our kits. There you will be guided step by step through the assembly and there are many tips and tricks on how to solder correctly. For the majority of our soldering kits there are also interactive circuits with the names of the components and the tracks. All instructions are available in German and English. For environmental reasons we do not print our instructions. In fact, it is better to view them on screen, as you can then zoom into the high-resolution photos to see details. On each kit you will find a QR code or link to the instructions.You can find all the instructions as PDF files at the following link: https://binary-kitchen.github.io/SolderingTutorialJust click on "DE" or "EN" for the relevant kit and you can download a PDF.CaseGot a 3D printer at home? Print your own unicorn enclosure! The wonderful Christian Erhardt has designed and published an enclosure. You can find the print data here: https://github.com/Binary-Kitchen/rainbow_unicorn/tree/master/caseLovingly packed for you by handAll soldering kits are lovingly packed for you by hand in Germany. Unfortunately, it happens from time to time that a component is packed too much or too little. If something is too much: No problem! Keep the components and use them for your creations! If something is missing: No problem! Just send us an email and we will send you the missing parts.Show us your unicornWe at blinkyparts are super excited to hear what your unicorn soldering kit turned out to be. A pin? A hair clip? Did you tattoo or paint the unicorn? A pin for your backpack or something completely different? Share your photo with us atTwitter/Mastodon: #SolderingConnectsInstagram: #LötenVerbindet or follow us under @blinkyparts_comHelp others with your feedbackIt is often difficult to judge whether a soldering kit is something for oneself. Help others by giving us a rating, a feedback. How did it work? What equipment did you have? What did you like most about it? What is your unicorn doing now? Just leave a review here on the product page under "Reviews".

€6.99*
OpenDTU CMT - Your evaluation for your balcony solar system compatible to Hoymiles HMS and HMT series (CMT module)
The energy turnaround is in full swing and great balcony power plants are sprouting up on every balcony. It's beautiful!With this OpenDTU Board kit you can read out your balcony solar power plant, display the data and even control it. The prerequisite is an inverter from Hoymiles. A small display always shows the current power production.The project was started by Thomas and Jan and can of course be found under open source licence here:https://github.com/tbnobody/OpenDTU (there you will also find a list of compatible inverters).This breakout board is 100% compatible and was created together with the developers of the software. On the board there is a special radio module that speaks the radio standard of the inverters. This is read out by an ESP32 module, processed and can be further processed via WLAN, e.g. with MQTT.The board also has connections for a display and an RGB LED strip, which may be supported in a future version. Pre-soldered CMT module (optional) We have heard your feedback and have realised that SMD soldering is probably not for everyone. We have therefore decided to offer the module pre-soldered. Only the CMT module (the silver chip) is soldered on. The pin header and antenna module are much easier to solder and still need to be soldered by you. We actually solder this by hand, so unfortunately we have to charge a little more to justify the extra work. We hope for your understanding here. NEW - Fully assembled OpenDTU (optional) Due to the frequent requests, we have now also decided to offer you a fully pre-soldered and assembled DTU. It will be ready to go when it arrives. All you have to do is log in to your OpenDTU, connect it to the Wi-Fi and then add your inverter. Please follow the instructions from step 20 onwards. Scope of Delivery In the scope of delivery, you will receive all the necessary components: a display, an ESP32, and an antenna module. You just need to solder them together and enter your Hoymiles serial number, and you're ready to go! The ESP32 is already pre-flashed. ** When selecting the tax rate for products for photovoltaic systems, §8 of our Terms & Conditions must be taken into account. KompatiblitätThis kit uses the CMT2300A module which is compatible with the following Hoymiles:Hoymiles HMS-300-1T Hoymiles HMS-350-1THoymiles HMS-400-1THoymiles HMS-450-1T Hoymiles HMS-500-1T Hoymiles HMS-600-2T Hoymiles HMS-700-2T Hoymiles HMS-800-2T Hoymiles HMS-900-2T Hoymiles HMS-1000-2T Hoymiles HMS-1600-4T Hoymiles HMS-1800-4T Hoymiles HMS-2000-4T Hoymiles HMT-1600-4THoymiles HMT-1800-4THoymiles HMT-2000-4THoymiles HMT-1800-6T Hoymiles HMT-2250-6TWenn du ein Modul mit NRF24L01+ für die HM Serie von Hyomiles suchst brauchst du diesen Bausatz: https://shop.blinkyparts.com/de/OpenDTU-Deine-Auswertung-fuer-deine-Balkonsolaranlage-kompatibel-zu-Hoymiles-HM-Serie-NRF-Modul/blink237542FeaturesRead out live data from the inverter Display the inverter's internal event log Display inverter information such as firmware version, firmware build date, hardware revision and hardware version View and set the current inverter threshold Power off/on function of the inverter Uses ESP32 microcontroller and NRF24L01+ multi-inverter support MQTT support (with TLS) Home Assistant MQTT Auto Discovery support Beautiful and fancy WebApp with visualisation of current data Firmware upgrade via the Web UI Standard source supports up to 10 inverters Time zone support Prometheus API endpoint (/api/prometheus/metrics) English, German and French web interface Direct connection of displays (SSD1306, SH1106, PCD8544) Dark theme in the web interfaceThe HousingThe kit comes with a high-quality 3D printed housing. You can also print it yourself. We have published the files here:https://www.printables.com/de/model/441037-opendtu-breakoutboard-caseTarget GroupThis kit is designed for all those who have a solar power plant at home and a suitable Hoymiles inverter. Without the inverter and the solar panels the kit is just a nice paperweight with display ;). The electronics kit for soldering is designed for beginners. Relatively large components are used, which make it easy to learn how to solder. This is also possible for absolute beginners in a reasonable time.Required toolsWhat the minimum soldering workstation looks like is described here: Der LötarbeitsplatzYou will also need a micro USB cable or a USB-C cable and a suitable USB power supply. Two toothpicks are very practical. An electric side cutter is also very useful for this kit :) Instructions and helpTo make it easy for you to solder the kit, we have put together detailed instructions with lots of pictures and individual steps for each of our kits. There you will be guided step by step through the assembly and there are many tips and tricks on how to solder correctly. For the majority of our soldering kits there are also interactive circuits with the names of the components and the tracks. All instructions are available in German and English.The instructions also describe the software part as far as the software is installed, connected to your WLAN and you have set up your inverter. Everything else is self-explanatory in the web interface. For environmental reasons, we do not print our instructions. It is even better to view them on screen, as you can then zoom into the high-resolution photos to see the details. On each kit you will find a QR code or link to the instructions. You can find all the instructions as PDF files at the following link: https://binary-kitchen.github.io/SolderingTutorialJust click on "DE" or "EN" for the right kit and you can download a PDF.Lovingly packed for you by handAll soldering kits are lovingly packed for you by hand in Germany. Unfortunately, it happens from time to time that a component is packed too much or too little. If something is too much: No problem! Keep the components and use them for your creations! If something is missing: No problem! Just send us an email and we will send you the missing parts.Show us your solar system and your OpenDTU evaluationWe at blinkyparts are super excited to hear what your solar system looks like and how/what you did with your OpenDTU kit. Share your photo with us atTwitter/Mastodon: #SolderingConnectsInstagram: #SolderingConnects or follow us on @blinkyparts_comHelp others with your feedbackIt is often difficult to judge whether a soldering kit is something for you. Help others by giving us a rating, a feedback. How did it work? What equipment did you have? What did you like most about it? What does your solar system do? Just leave a review here on the product page under "Reviews".

From €36.99*
PINECIL soldering tip set - Big, short tip
The perfect addition to your Pinecil: The four-piece soldering tip set from the original manufacturer. 100% compatible. The short tips warm up a little faster and make your Pinecil extra compact.This set contains 4 different tips: ST-I: A round tip with 0.2mm tip radius.Length: 86,1mm Weight: 8,4g ST-C4: A large wedge tip with 45°.Length: 88,2mm Weight: 9,2g ST-D24: A straight wedge tip with no angle.Length: 86,0mm Weight: 8,5g ST-K:  A very large wedge tip with 45°.Length: 91,1mm Weight: 9,2g

€54.99*
Relife - High quality electronic wire cutter RL-0001
We looked around for a good and affordable electronic side cutter and found what we were looking for: Relife Electronic Side Cutter RL-0001. The renowned brand RELIFE is known for the quality of this tool. Indispensable in any workshop, the side cutter is perfect for cutting cables, insulation, cable braids or as an aid for soldering wired components. Features: Dimensions: 135 x 53 x 14mm Model: rl-0001Weight: 80gColour: blueTilt angle: 20°Made of durable stainless steelComfortable, non-slip handle

€8.99*
10x Electrolytic Capacitor 50V 10UF 5*7mm
Electrolytic capacitor 50V with 10UF and a size of 5*7mm. You will get 10 capacitors.

€2.40*
USBC to USBC silicone charging cable for Pinecil v2 and v1 - 1.5m length
This USB-C to USB-C silicone cable was specially developed for the Pinecil soldering iron. It is flexible, tangle-free, high temperature resistant and has low resistance. This cable mainly for power supply and can be used for PinePhone and Pinebook Pro application. Specifications: Material: silicone shell and copper wire. Colour: Red (indicates that it is a power supply cable). Heat resistance: up to 350°C Length: 1.5 metres

€9.99*
868 MHz antenna - Ebyte TX868-JKD-20 with SMA connector
TX868-JKD-20 is a slighly bendable 868 MHz rubber antenna. The height of the antenna is 200 mm. With an SMA-J connector (SMA female thread and internal needle), it can be used for broadband communication systems, WLAN, mobile devices with a frequency of 868 MHz such as routers, AP, radio, smart TV, etc.The antenna is compatible with the Ebyte CMT2300A 868/915MHz Breakoutboard, however the antenna is not suitable for the OpenDTU housing.Technical Data Frequency: 868 MHz GHz Bandwidth: 848 - 888 MHz Gain: 3.0 dBi SWR (standing wave ratio): ≤ 1,5 Polarisation: vertical Direction of radiation: omnidirectional Input impedance: 50 Ohm Power capacity: 20 W Material: TPEE Operating temperature: -40 °C ~ +85 °C Plug connection: SMA-J (SMA internal thread with internal needle) Dimensions: Length 200 mm; diameter 13 mm Colour: black Weight: 21 g

€3.99*
Felder ISO-Core Ultra-Clear Solder - Sn100Ni+ 100g Coil
We've been looking around the incredibly large solder market and have decided on a good solder for lots of soldering fun: Felder ISO-Core Solder. All lead-free and everything, of course! We have limited ourselves to a small selection, but all the solders here have been tested and found to be good. The diameters are 0.75mm and 1.0mm. In our experience, you don't have to add too much and still don't apply too much solder to your spots. Perfect for fine and coarse solder joints. Properties 2.2% flux Sn100Ni (Sn99,3CUNiGe)0.75mm and 1mm diameter100g spool Made in Germany Felder and Eco Tin Felder is a solder manufacturer from Germany and pays special attention to fair resources with Eco Tin. EcoTin pays attention to environmental protection, prevents child labour and increases work safety. You can read more about the company and EcoTin here: https://www.felder.de/unternehmen/ecotin.html

€14.99*